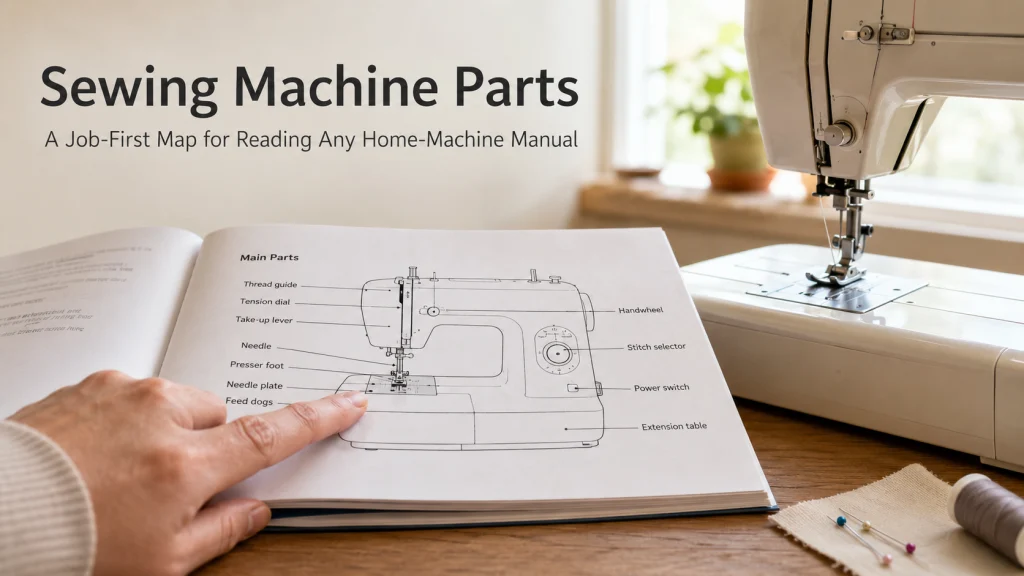
Learning sewing machine parts is easier when each label is tied to a job instead of memorized from one generic diagram. The useful questions are what system the part belongs to, whether it moves or controls something else, and whether the exact model manual treats it as owner-visible, owner-removable or service-only. That approach also prevents common mix-ups such as calling the bobbin, bobbin case and hook the same thing. By the end, you should be able to read a domestic machine diagram or listing without assuming that another model uses the same layout or terminology.
Start with the exact model and manual
A bobbin is not a bobbin case, and neither term tells you how the hook moves. That distinction matters when you are learning sewing machine parts because a listing photo may show all three close together while a manual labels them as separate objects with separate jobs. If you collapse those names into one, later research about threading, cleaning, replacement parts or machine design can go in the wrong direction.
Begin with the make and exact model number, then find the manual or manufacturer support page for that machine. A generic diagram is useful for learning broad systems, but the manual controls location, wording and owner access. If the identification label is not obvious, use the manufacturer’s support instructions for that machine family rather than guessing from the cabinet shape. Brother, for example, documents the serial number on a rear machine label for a range of home-sewing models, and treats that number as a separate identifier from numbers shown in some machine settings screens.
Note: A cross-manual check of domestic machines should record each label by job, system, movement and access. Similar-looking machines can use different terminology or layouts, and those differences should be preserved rather than normalized away.
Classify every label before memorizing its name
A useful way to learn the parts of a sewing machine is to ask what kind of thing each label names. Some labels identify structure, some identify a control the user operates, some identify a mechanism that moves during sewing, and some identify a removable item such as a presser foot or bobbin. Mixing these categories is why flat parts lists become hard to use once you move to another model.
| System | Typical labels | How to classify them | Job-first question |
|---|---|---|---|
| Structure and work support | Frame, bed, free arm, needle plate | Mostly structure | What supports, encloses or positions the sewing area? |
| Motion input and drive | Handwheel, power switch, foot-control connection | Controls and inputs | What starts, stops or manually advances machine motion? |
| Needle system | Needle bar, clamp, needle | Mechanism plus removable item | What carries, holds or forms the needle-side part of the stitch? |
| Upper-thread system | Guides, tension parts, take-up lever | Mostly mechanism | What routes thread and manages resistance or slack? |
| Lower-thread system | Bobbin, case or holder, hook, race | Removable items plus mechanism | What stores lower thread and participates in loop capture? |
| Feed and hold-down system | Feed dogs, presser foot, presser bar | Mechanism plus removable item | What advances or holds the fabric at the stitch point? |
| User controls | Reverse, speed control, needle up/down | Controls | What setting or machine action does the user command? |
This classification does not decide whether something is safe to remove. It only tells you what job the label performs. The exact manual still decides whether a cover, holder, plate or internal component is intended for owner access.
- If a label changes a setting, treat it first as a control.
- If a label transfers or coordinates movement, treat it first as part of a mechanism.
- If it supports the work, identify the support surface before assuming it is a moving part.
- If it detaches, confirm the manual actually describes owner removal before treating it like an accessory.
That simple sort also separates how the sewing machine operating cycle works from this identification task. One article explains the complete cycle; this one gives you the vocabulary needed to follow that explanation on a real model.
Map the frame, bed, free arm and work-support surfaces
The frame is the machine’s supporting structure, while the bed is the work surface around the needle area. Many domestic machines use a removable accessory compartment or extension section so part of that bed can be cleared to expose a free arm. The free arm is therefore a work-support shape, not a separate stitch system.
When a listing says “free arm,” look for how the exact machine exposes it and how much surrounding support remains. Likewise, an extension table is not the same thing as the built-in bed even though both support fabric. Reading each label by job is more useful than assuming that everything grouped together in a seller’s feature list belongs to the same machine system.
Map power input, the handwheel and motion-transfer parts
The power inlet, power switch and foot-control connection belong to the machine’s input and control side, while the handwheel is a manual control connected to the motion system. On many domestic machines, turning the handwheel moves the needle mechanism and related internal parts through part of the stitch cycle. The manual may call it a handwheel, balance wheel or another model-specific term.
Do not treat the handwheel as proof that every connected internal component is owner-serviceable. Internal shafts, gears, belts, linkages and motor components may be part of the motion path without being intended for owner access. Identification stops at what the manual names and exposes; repair or internal adjustment belongs elsewhere.
Safety boundary: Do not open service covers, expose energized or moving mechanisms, test wiring, or remove an internal part merely to identify it. If the manual does not describe owner access, leave the component in place.
Map the needle bar, clamp, needle and position mechanism
The needle is the replaceable item that enters the fabric. The needle clamp holds it, and the needle bar carries the needle vertically through the sewing cycle. A needle-position control may change where the needle sits across the available stitch width, but that control is not the same object as the needle bar mechanism it commands.
This distinction becomes useful when reading a specification sheet. “Needle positions” describes available placement, while the manual diagram may separately label a needle up/down button, needle clamp screw and needle bar thread guide. Keep the control, the holder and the moving member separate even when all three affect the same needle area.

This pack contains 10 SINGER Universal sewing machine needles in size 90/14. SINGER recommends this size for medium-weight fabrics and describes the needle with a rounded tip and tapered end for knit and woven fabrics. It is a practical replacement for the removable needle component held by the machine's needle clamp.
Check On AmazonIf you click this link and buy, we earn a commission at no additional cost to you.
Follow the upper-thread path as a system
The upper thread normally passes through a sequence of guides and tension-related parts before reaching the needle. Exact routing varies by model, but common labels include an upper thread guide, tension discs or a tension unit, a check spring, the take-up lever, a lower guide and a needle-bar guide. A dial or electronic control may change tension, but the control is not itself the complete tension mechanism.
| Upper-thread path | What to verify in the manual |
|---|---|
| 1. Spool and first guide | The approved spool position and first routing point |
| 2. Upper guides | The exact route leading into the tension area |
| 3. Tension area | How the thread enters the discs or tension unit |
| 4. Take-up lever | The direction and machine position required to thread it |
| 5. Lower and needle-bar guides | Which guides are used before the needle |
| 6. Needle | The documented threading direction for the exact model |
Manufacturer instructions commonly tell users to raise the presser foot before threading so the thread can seat correctly through the upper tension path. That is a threading condition, not evidence that every domestic machine uses an identical release mechanism. For the deeper relationship between resistance, slack and the upper-thread system, continue to how sewing machine tension works.
Separate bobbin, case or holder, hook, shuttle and race
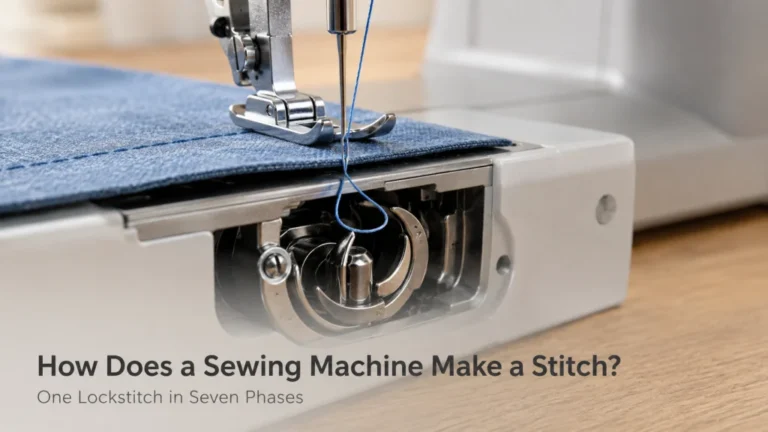
The lower-thread area is where generic diagrams cause some of the most persistent naming errors. The bobbin stores the lower thread. A separate bobbin case may hold that bobbin on some machines, while other layouts use a fixed or removable holder around a drop-in bobbin. The hook is the moving stitch-forming component that interacts with the needle thread, and the race is the path or supporting area associated with hook movement.
| Term | Job | What not to assume |
|---|---|---|
| Bobbin | Holds the lower thread | It does not by itself identify the hook type |
| Bobbin case or holder | Positions and manages the bobbin in the lower-thread assembly | The exact form and removability vary by model |
| Hook | Catches or carries the needle-thread loop during stitch formation | “Hook” should not be replaced with “bobbin case” |
| Shuttle | A term used in some manuals or mechanism descriptions for a moving lower-thread component or assembly | Do not treat it as a universal synonym for every hook |
| Race | Provides the path or support associated with hook or shuttle movement | Its owner-access procedure is model-specific |
The names are useful only when attached to the exact layout. A front-loading machine with a removable bobbin case should not be described as though its lower-thread assembly were identical to a top-loading drop-in arrangement. For the mechanics behind that system, see how the sewing machine bobbin system works.

This pack contains four transparent plastic SINGER Class 15 bobbins. The bobbins hold the machine's lower thread and are separate components from the bobbin case, holder, and hook mechanism. SINGER advises checking the exact machine manual to confirm that Class 15 is the correct bobbin size before use.
Check On AmazonIf you click this link and buy, we earn a commission at no additional cost to you.
Keep hook motion, hook axis and bobbin access separate
Three labels that often travel together are still three independent questions. Hook motion asks whether the hook rotates continuously or oscillates through part of a rotation. Hook axis describes the physical orientation of the hook. Bobbin access describes where and how the owner reaches the bobbin, such as from the top or front.
| Question | Example label | What the label proves |
|---|---|---|
| How does the hook move? | Full rotary or oscillating | The stated motion pattern only |
| How is the hook oriented? | Horizontal or vertical | The stated axis or orientation only |
| How is the bobbin accessed? | Top-loading or front-loading | The stated access layout only |
Record all three fields separately whenever the manufacturer supplies them. Janome currently describes the HD-1000 with front-loading, vertical and oscillating hook wording, while the Sewist 740DC is documented as top-loading and full rotary, with a horizontal rotary hook description elsewhere on the same product page. The point is not to rank those machines, but to keep access, orientation and motion as separate facts. For a focused comparison of motion, use rotary and oscillating hook differences; for access layout, use top-loading and front-loading bobbins.
Separate feed, hold-down and fabric-support parts
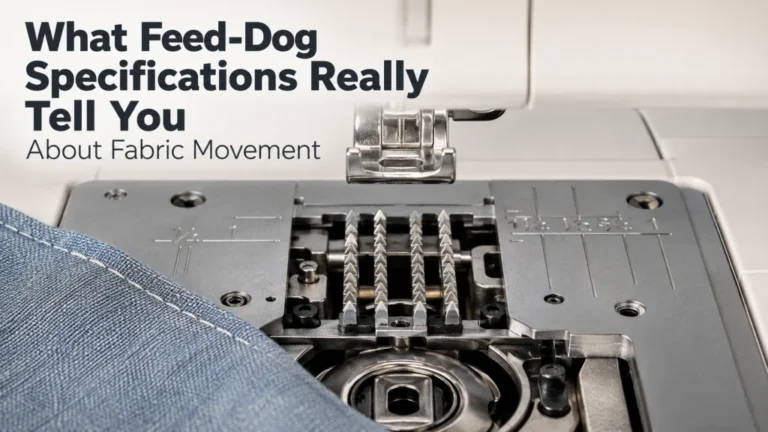
Feed dogs are toothed moving elements below the fabric. The presser foot holds the fabric against the sewing area from above, the presser bar supports the foot assembly, and the needle plate provides a surface with openings for the needle and feed system. These parts work together around the same fabric, but they do different jobs.
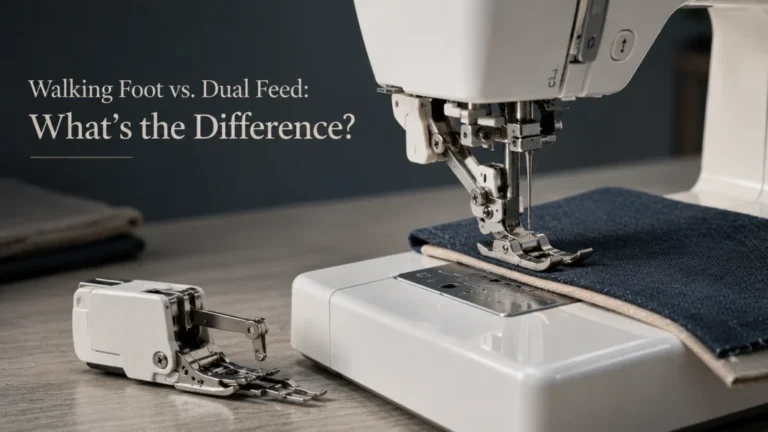
A specification such as “7-piece feed dog” describes the feed-dog arrangement, not the whole feed architecture. Machines may add other feed features or mechanisms that change how layers are controlled. For that broader distinction, use sewing machine feed mechanism types; for the component itself, continue to how sewing machine feed dogs work.

The SINGER All-Purpose Presser Foot is designed for general sewing on many fabric types. Its wide needle opening accommodates straight and zigzag stitches up to 7 mm wide. It represents the removable fabric hold-down component described in this section, but compatibility should still be confirmed for the exact sewing machine before purchase.
Check On AmazonIf you click this link and buy, we earn a commission at no additional cost to you.
Do not confuse the presser foot with the foot controller
The presser foot is the fabric-contact part mounted at the needle area. The foot controller is the floor-operated control connected to the machine for sewing-speed input on models that use one. The shared word “foot” describes how two unrelated items are used, not a shared mechanical system.
This sounds basic until a parts list, marketplace listing or support question uses “foot” without context. Check whether the sentence is about holding fabric, attaching an accessory, starting the machine or controlling speed. If the claim concerns a feature or control rather than a part label, read sewing machine features and controls before assuming the same wording means the same function on another model.
Mark owner-removable, owner-visible and service-only parts
Knowing a part’s name does not grant permission to remove it. The exact manual may show the needle, presser foot, bobbin or a specific cover as owner-removable while merely identifying other parts for orientation. Some internal components may be visible through an opening yet still have no owner procedure attached to them.
- Owner-removable: the manual gives a normal removal or replacement procedure.
- Owner-visible: the part can be seen or named without assuming it should be detached.
- Service-only: the manual reserves the work for qualified service or provides no owner procedure for internal access.
Use the strictest reasonable interpretation when the documentation is unclear. Owner cleaning or replacement instructions on one model are not a license to copy the procedure to another machine. Mechanical controls versus computerized controls also do not establish a broader or narrower owner-access boundary by themselves; the exact manual still decides what the owner may remove, clean or replace. The same caution applies to oiling, hook removal, needle-plate removal and any adjustment that could affect moving parts.
Translate alternate names only when the jobs truly match
Manufacturers do not always choose identical English labels. “Handwheel” and “balance wheel” may refer to the same user control in different documentation, while “bobbin case,” “bobbin holder,” “hook,” “shuttle” and “race” should not be merged just because they occupy the same neighborhood. The safest translation test is functional: does each term name the same job and the same object on the machines being compared?
When the answer is uncertain, preserve the manufacturer’s term and add a plain-English explanation rather than inventing a synonym. That keeps the parts map readable without erasing model-specific differences. It is especially important in used-machine research, where a seller’s casual wording may not match the manual at all.
Read a model diagram and parts list without guessing
A manual diagram becomes much easier to use when you read it in passes instead of trying to memorize every number at once. First identify the machine orientation, then group labels by job, and only after that compare names with another model. This keeps a cosmetic layout difference from turning into a false mechanical conclusion.
- Confirm the make and exact model number on the machine or documentation.
- Open the model’s own manual or current manufacturer support page.
- Find the names-of-parts or machine-overview diagram.
- Mark each label as structure, control, mechanism or removable item.
- Note whether the part moves, controls another part or simply supports the work.
- Check later manual sections before deciding that the part is owner-removable.
- Compare alternate terminology only after the job and layout are confirmed.
This workflow also catches a first-time-owner mistake: a numbered diagram is not an exploded parts catalog. A label can help you identify a lever or cover without supplying a replacement part number, compatibility rule or disassembly procedure.
Use part knowledge to read listings and specification sheets
A used-machine listing may say “drop-in bobbin,” “metal frame,” “free arm” or “automatic tension” without explaining the mechanisms behind those phrases. Part knowledge lets you ask narrower questions: where is the bobbin accessed, what hook description does the manufacturer use, which control is automatic, and what does the manual call the corresponding component?
Also separate the machine itself from loose items that happen to come with it. Current manufacturer accessory lists can include items such as extra bobbins, a seam ripper, presser feet, a foot controller or a hard cover. In a used listing, note which of those items are present, but do not treat an included accessory as a built-in mechanism or assume a missing loose item proves the machine itself is incomplete.
Do not turn those labels into unsupported performance claims. A top-loading bobbin does not by itself prove fewer jams, an oscillating hook does not automatically mean weaker sewing, and a metal internal frame does not establish material capacity. The useful evidence is the exact mechanism or control the manufacturer documents, followed by the fabric, needle, thread, settings and use conditions that affect the real sewing job.
Key point: Product terminology is evidence about configuration only when the manufacturer defines it clearly. It is not a shortcut to claims about stitch quality, durability or heavy-material capability.
Choose the mechanism question that matches the label
Once the part is correctly named, the next article should answer a narrower question. If you are trying to understand the phase order that creates a lockstitch, continue to how a sewing machine makes a stitch. If the uncertainty is below the needle plate, the bobbin, hook-motion and bobbin-access articles separate three different questions instead of treating the lower-thread area as one component.
The same rule applies above the fabric. Feed-dog identification is different from comparing complete feed architectures, and identifying a tension dial is different from understanding how thread resistance and slack are controlled. Correct routing starts with the part’s job, not with whichever term sounds closest in a generic search result.
Continue with the mechanism you need to understand
The articles below take the labels from this page and follow one mechanism question farther. Use the row that matches the part or movement you are trying to interpret in the exact machine manual.
| Topic | What you’ll find |
|---|---|
| How a sewing machine makes a stitch | The phase order connecting needle motion, thread loop formation and lower-thread capture. |
| How the bobbin system works | The lower-thread assembly and the separate jobs of bobbin, holder or case and surrounding mechanism. |
| How feed dogs move fabric | The feed-dog component, its motion and the specification language used around it. |
| How sewing machine tension works | The relationship between upper-thread resistance, slack control and stitch formation. |
| Rotary versus oscillating hook motion | What continuous rotary and oscillating motion describe, without turning the label into a quality ranking. |
| Top-loading versus front-loading bobbins | How bobbin access and layout differ from hook motion and hook orientation. |
If your question is still only “what is this part called?”, return to the manual diagram and identify the job first. A deeper mechanism comparison is most useful after the label, model and architecture axis are already clear.
Final Thoughts: name the system, job, movement and access
A reliable parts map does not require memorizing every label on every domestic machine. Identify the exact model, place the part in a system, state its job, note whether it moves or controls something else, and check what the manual allows the owner to access.
That method keeps similar-looking lower-thread parts separate, prevents controls from being mistaken for mechanisms, and makes unfamiliar manuals easier to read. When the terminology changes between machines, preserve the documented wording until the job truly proves that two names refer to the same thing.
Frequently Asked Questions
🧵 What are the main parts of a sewing machine?
For identification, group the machine into structure, controls, needle and upper-thread parts, lower-thread parts, feed and hold-down parts, and removable items. The exact names and locations still come from the model manual.
🪡 Is the bobbin case the same thing as the bobbin?
No. The bobbin holds lower thread, while a bobbin case or holder positions and manages the bobbin within the lower-thread assembly. Some machines use a separate removable case and others use a different holder layout.
⚙️ Is a top-loading bobbin always a rotary-hook machine?
Do not infer hook motion from access layout alone. Check the manufacturer description for bobbin access, hook orientation and hook motion as separate fields or statements.
🦶 Is the presser foot the same as the foot controller?
No. The presser foot holds fabric at the needle area, while the foot controller is an input device used to control sewing on machines that support one.
📖 Can I use a generic sewing machine diagram for my model?
Use a generic diagram only for broad orientation. Confirm location, terminology, motion and removability in the exact model manual before acting on the label.
🔧 Does a removable cover mean the parts underneath are owner-serviceable?
No. Follow only the cleaning, replacement or access procedures the exact manual assigns to the owner. Visible internal parts should not be treated as service points without documented instructions.
References and Sources
- Janome HD-1000 documentation: Verifies the current front-loading vertical oscillating hook wording, manual tension control and model-specific parts and accessory context.
- Janome Sewist 740DC documentation: Verifies the current top-loading full rotary hook wording, manual tension control and the linked manual’s names-of-parts diagram.
- Brother serial-number guidance: Verifies a documented rear-label location for the serial number across the listed home-sewing models and reinforces that identification details remain model-specific.
- Brother upper-threading instructions: Supports the distinction among upper tension discs, the check spring, take-up lever and needle-bar thread guide in a documented threading path.