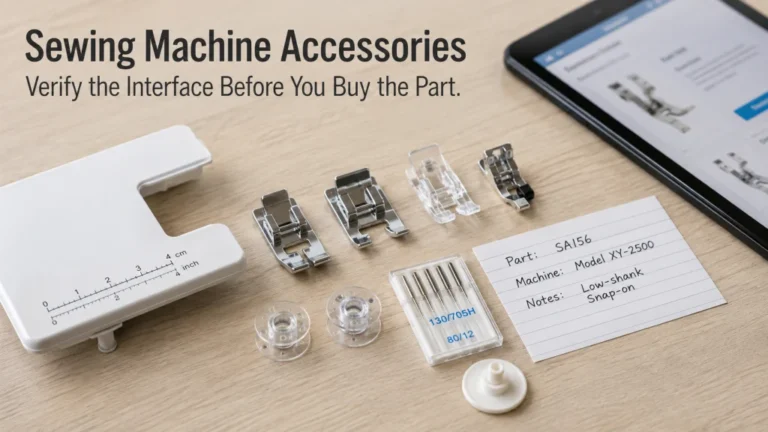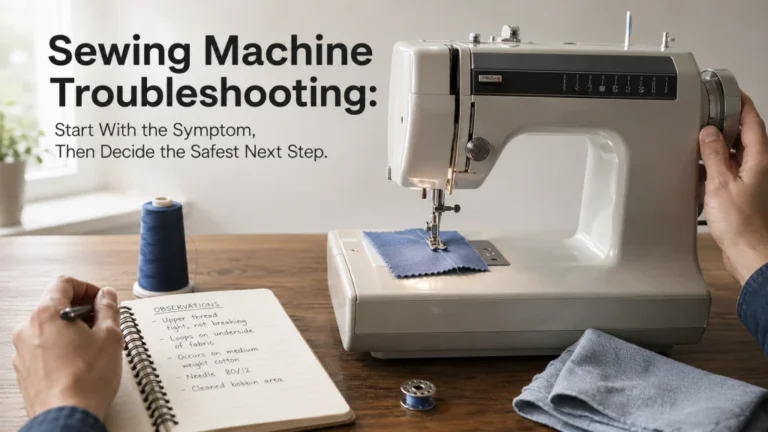
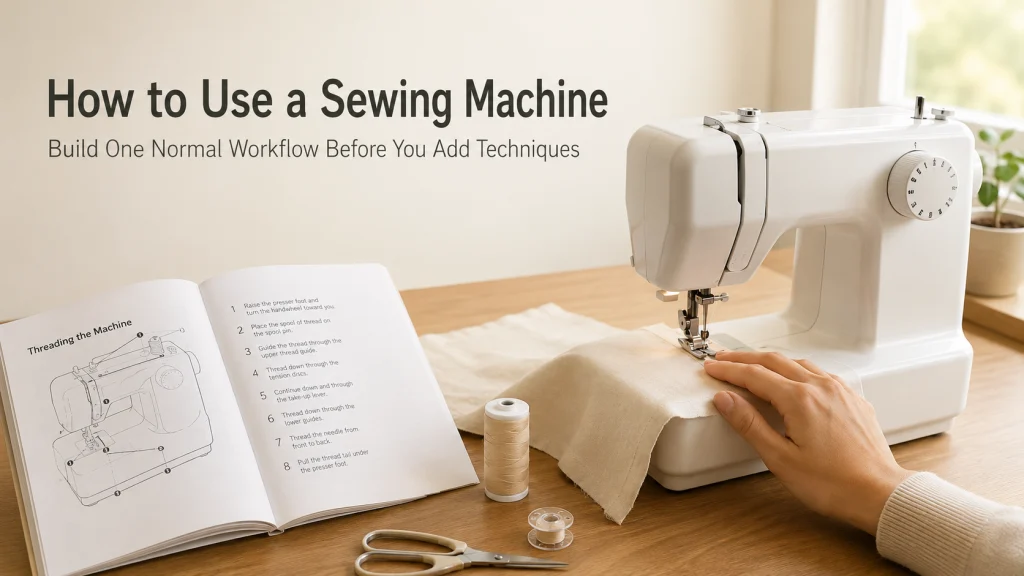
Learning how to use a sewing machine is easier when the first goal is not a finished project, but one repeatable first-use workflow. Identify the machine and matching instructions, prepare the upper and lower thread systems as specified, establish a basic stitch state, then sew a short controlled seam on stable woven scrap. Threading paths, bobbin orientation, control behavior, needle position, and safety steps can differ by model, so general advice should never replace the instructions for the machine in front of you. Once that first seam is predictable, the next step should depend on what you want to sew rather than on changing several settings at once.
Start with one normal workflow before adding techniques
Learning how to use a sewing machine starts with a machine that is already functioning as expected, its model information, the matching instructions, thread and bobbin supplies that belong with that machine, and a piece of stable scrap fabric. The first job is to make one ordinary seam while changing as few variables as possible.
That approach gives each control a context. The spool and bobbin supply thread, the presser foot holds the work in the sewing position, the selected stitch tells the machine what motion to make, the speed control determines how quickly that motion happens, and the feed system advances the fabric. When the seam forms and the fabric advances as expected, you have a useful baseline. When the machine jams, displays an error, moves unpredictably, or produces an unexplained failure, the task has changed from routine operation to troubleshooting.
First-use rule: Change one thing because the next sewing result requires it, not because the machine has another control available.
This keeps sewing machine basics manageable without pretending every model works the same way. Use this sequence as the baseline:
- Identify the model and matching instructions.
- Establish the model-specific safe setup state.
- Prepare the upper thread and bobbin system.
- Confirm the basic foot, needle position, and stitch.
- Practice starting, controlling speed, and stopping.
- Sew and record one short stable-woven seam.
Each step below shows what belongs in the baseline and when to move to a more specific task.
Identify the exact model and manual
Before you operate a sewing machine that is unfamiliar to you, find the model designation on the machine and match it to the correct instruction manual. A brand name or a family resemblance is not enough. Machines from the same manufacturer can use different bobbin arrangements, threading paths, needle-position controls, presser-foot requirements, start and stop controls, or procedures for winding and inserting the bobbin.
The manual is the reference for states that cannot safely be generalized. SINGER’s current threading support explicitly notes that top threading varies from model to model and directs users to the instruction manual for model-specific details. Brother likewise publishes threading instructions for defined machine groups rather than presenting one sequence as universal.
A familiar-looking control can still have a different function on another machine. Model identification keeps the rest of the workflow grounded.
Establish the documented safe setup state
Set the machine on a stable surface with enough room for the fabric to move without pulling. Keep loose objects away from the needle area, position the foot controller where it cannot be pressed accidentally, and check the manual before any needle-area task. The correct power state during threading, needle changes, presser-foot changes, bobbin work, or other setup actions belongs to the exact machine instructions.
Do not use a generic video to override model-specific safety instructions. Current Brother threading support for covered models uses specific power states at different points in the procedure, which is exactly why the documented state should control each action. The useful general rule is not “always on” or “always off.”
Safety boundary: Do not bypass guards, inspect exposed internal mechanisms under power, continue after electrical damage, smoke, overheating, uncontrolled motion, or repeated hard needle strikes. Those conditions are outside a normal first-use workflow.
Once the machine, manual, work surface, and power-state instructions are clear, you can prepare only the items needed for one practice seam.
Inventory only what the first practice seam needs
A first seam should reduce decisions. Use the machine’s basic sewing configuration identified in its instructions, the correct bobbin system for that machine, ordinary sewing thread permitted by the machine instructions, an appropriate installed needle, the presser foot specified for the selected basic stitch, and a stable woven scrap large enough to guide comfortably. The goal is to observe baseline control and fabric movement, not to test the machine’s limits.
- Machine model and matching instructions
- Correct bobbin or bobbin system for the machine
- Upper thread and lower thread prepared according to those instructions
- Installed needle and presser foot appropriate for the selected basic stitch
- Stable woven scrap with enough area to guide without placing fingers near the needle
- A simple way to record the stitch, settings, and result
Accessories stored with the machine are not automatically candidates for the first test. An unfamiliar foot, specialty needle, unusual thread, stretchy knit, bulky seam, or decorative stitch adds another variable before you know what expected operation feels like.

This set includes 20 spools of Sew-All polyester thread, with 100 meters on each spool. It is designed for both machine and hand sewing and works for seams, quilting, and decorative stitching. The assortment provides multiple basic colors for routine sewing practice and future projects.
Check On AmazonIf you click this link and buy, we earn a commission at no additional cost to you.
Treat upper threading and bobbin preparation as their own setup job
Upper threading and lower-thread preparation are necessary before the first seam, but they deserve more attention than a broad first-use article can give them. The thread must follow the path intended by the machine, while the bobbin must be prepared and inserted for its own system. That is where a generic sequence becomes risky.
Current manufacturer documentation illustrates the problem. SINGER tells users to raise the presser foot before threading and also states that the threading path varies by model. Brother instructions for covered machine groups specify particular needle positions, spool placement, thread guides, and power states. These are evidence that “thread the machine” is not one universal set of movements.
For the full normal setup, use the separate explanation of threading a sewing machine correctly. Return here after the upper thread and lower-thread system are prepared exactly as the machine documentation requires.
Keep tension, pressure, feed engagement, and speed controls at the model’s starting state
A broad first-use workflow should not turn four separate controls into four experiments. If the manual gives a starting state for upper-thread tension, presser-foot pressure, feed engagement, or speed control, use that state for the practice seam. If a control is automatic or absent on your machine, do not invent an equivalent adjustment.
Tension is the easiest place to over-adjust. A visible tension dial can tempt a new user to start turning it before the machine has even sewn a baseline seam. At this stage, the better question is whether the machine is correctly threaded and set to the manufacturer-specified starting condition. Adjustment belongs later, when a specific sewing goal requires it.
The separate section on understanding sewing machine settings covers tension, pressure, feed engagement, speed controls, and related non-stitch settings without turning every failed result into an adjustment problem.
Set the presser foot and needle position from the exact manual
The presser foot and needle position must agree with the stitch you intend to make. Do not assume that a foot attached to the machine is suitable for every stitch, and do not move the needle sideways simply because the control allows it. The foot opening, needle plate, stitch pattern, and needle position have to remain compatible with one another.
The selected stitch, foot opening, needle position, and needle plate must agree according to the machine documentation. That is why this article does not prescribe one foot name or needle position for every machine. Use the foot and needle position identified by the machine instructions for the basic stitch you are about to practice.
Model check: If you cannot identify the installed foot, selected stitch, or required needle position with confidence, stop the setup and resolve that identification question before running the machine.
Once those relationships are verified, leave them alone for the first seam. The point is to establish a baseline, not explore every stitch option.
Use one basic stitch before exploring stitch length, width, needle position, or buttonholes
Select the basic straight-seam state documented for the machine and avoid changing length, width, or needle position unless the manual requires a specific starting value. Mechanical machines may use dials and levers, while computerized machines may use buttons, menus, or automatically linked settings. The command method changes, but the first-use objective does not.
A straight practice seam gives you one uncomplicated reference for speed, guiding, fabric feed, starting, stopping, and handling the work. Decorative patterns, zigzag width, buttonholes, specialty stitch families, and programmable combinations all introduce new motion or control choices that are easier to learn after normal straight sewing is familiar.
When you are ready to understand those choices, move to sewing machine stitch operation. That is where stitch selection, length, width, needle position, reverse functions, and buttonholes can be treated as stitch decisions rather than compressed into a first-use checklist.
Practice speed control before asking for precision
Speed control is one of the first physical skills worth isolating. On a foot-controller machine, learn how little pressure is needed to start and how quickly the machine responds as pressure increases. On a machine with electronic speed limiting or a start and stop button, identify those controls in the manual before sewing and choose a conservative first-use state.
Do this without also trying to hit a narrow seam allowance or turn a corner. A few controlled starts and stops on stable scrap are more useful while the machine still feels unfamiliar. Keep hands on the fabric for guidance, not for pulling it through the feed system.
Brother’s current start-sewing support for covered models describes gradual foot-controller pressure as the way to begin sewing and notes that releasing the controller stops the machine. That is a useful manufacturer example, but the control method on your machine still comes from its own manual.
Sew one short seam on stable woven scrap
With threading complete, the basic stitch selected, the required foot and needle position confirmed, and the machine ready to sew, place a stable woven scrap under the presser foot. Position the fabric so you can guide it without putting fingers close to the needle. Lower the presser foot or place it in the machine’s specified sewing position, then begin at a slow, controllable speed.
Guide the fabric rather than dragging it from the front or pulling it from behind. Let the feed system do the advancing while your hands keep the scrap aligned. Sew only far enough to feel the start, steady travel, and stop. The first seam is a control check, not a precision test.
| Record | What to write down |
|---|---|
| Machine | Exact model and the manual or support document used |
| Thread and bobbin | What was installed and whether both were prepared from the specified path |
| Needle and foot | Installed needle information and the foot identified for the selected basic stitch |
| Stitch state | Selected stitch plus any displayed or dialed length, width, and needle position |
| Fabric | Stable woven scrap and approximate number of layers |
| Result | Whether the machine started, fed, stitched, and stopped as expected |
Before moving on, check that the baseline is repeatable:
- You can start and stop the machine predictably.
- The fabric advances without being pulled through by hand.
- The basic stitch forms consistently on the stable scrap under the setup you recorded.
- You can identify the stitch, foot, needle position, and control state without guessing.
If those points repeat, change one variable for the next task. If a jam, error, repeated strike, or unexplained failure appears instead, stop here and treat it as a symptom rather than something to practice through.
This record is deliberately plain. Its value is that you know what the baseline looked like on this machine before you change fabric, stitch type, speed, or construction technique.

This PEASUG muslin is made from 100% cotton and comes in a 63-inch by 2-yard piece. The unbleached fabric is described as medium weight and suitable for sewing, embroidery, garments, and crafts. Its generous size provides plenty of material for cutting practice pieces and sewing repeatable test seams.
Check On AmazonIf you click this link and buy, we earn a commission at no additional cost to you.
Learn reverse or reinforcement as a stitch operation, not a reflex
Many basic seams use reverse stitching or another reinforcement function near the beginning or end, but the control is not identical across machines. A mechanical machine may use a reverse lever, while a computerized model may provide a reverse or reinforcement button whose behavior depends on the selected stitch. Some stitch programs handle reinforcement differently from an ordinary straight stitch.
For the first practice seam, it is reasonable to identify the control and understand what the manual says it does. Do not assume that holding, tapping, or pressing the control produces the same action on every model. If the function is not clear, leave the detailed operation for the stitch-specific instructions rather than experimenting beside the needle.
The sewing machine stitch reference is the next place to handle reverse, reinforcement, buttonholes, and other stitch behaviors in context.
Stop when first-use turns into a symptom-led problem
This workflow assumes a machine that is functioning as expected. If the machine jams, repeatedly strikes something hard, displays an unexplained error, fails to feed as expected, makes abnormal noise, behaves unpredictably, or produces a result that cannot be explained by the baseline you just verified, stop treating the session as a beginner operating lesson. The next question is no longer simply which control to use.
Do not respond by turning every available dial. Recheck only the basic setup items the manual explicitly asks an owner to verify. If the condition remains, move to symptom-led troubleshooting or qualified service as appropriate to the machine documentation and the severity of the condition.
Safety stop: Smoke, burning odor, overheating, damaged cords, sparks, exposed wiring, uncontrolled motion, a hard mechanical lock, or repeated hard needle strikes are not practice-seam problems. Stop using the machine and follow the manufacturer’s service or safety direction.
A malfunction should not be normalized as something every beginner must sew through.
Change the setup when the fabric changes the job
The stable woven scrap used for the first seam is a baseline, not a universal fabric recipe. A knit that stretches, a slippery lining, a bulky intersection, a dense woven, or a multi-layer stack can change how the material needs to be supported, fed, stitched, and paired with the machine’s routine setup. That is a material decision, not evidence that the first workflow was wrong.
A common beginner misunderstanding is to assume that success on ordinary woven cotton proves the same setup should work unchanged on every fabric. It does not. Once the material behavior changes, the useful question becomes which baseline variables should change with it and which machine limits need to be respected.
Use sewing different fabrics by machine when stretch, thickness, surface, layers, or feed behavior becomes the reason you need a different setup.
Move from a practice seam to a defined construction result
After one repeatable seam, the next lesson should be tied to a real construction result. A seam, hem, zipper, elastic application, shaped section, or edge finish each asks the machine to do something more specific than simply advance stable fabric under a straight stitch. That gives you a reason to change a stitch, foot, position, handling method, or sequence.
You do not need to learn every construction method before making anything. You need to recognize that the basic operating workflow remains underneath them, while the exact technique changes what comes next.
For new-work construction, continue with machine garment construction techniques for seams, hems, zippers, elastic, shaping, and finishing decisions.

This six-inch sewing gauge uses a sliding marker that can hold a measurement for repeated marking. The ruler shows inches and centimeters and is designed for measuring hem depth, buttonhole spacing, tucks, and pleats. Its compact format makes it useful when moving from basic practice seams into more defined sewing construction tasks.
Check On AmazonIf you click this link and buy, we earn a commission at no additional cost to you.
Treat finished-garment changes as a different sewing situation
Mending or altering an existing garment starts with constraints that a fresh piece of scrap does not have. Existing seams, hems, hardware, worn areas, limited access, and the need to preserve surrounding construction can all affect where the machine can sew and how the work is positioned. The machine still needs a known operating state, but the task is no longer a simple first seam.
For a beginner, “I can sew a straight line” and “I can shorten or repair this finished garment” are different jobs. The second adds decisions about what can be opened, retained, repositioned, or stitched again.
When the object is already finished, route the work to beginner machine sewing alterations rather than treating it as another basic setup exercise.
See More in This Section
Once one baseline seam is repeatable, the next useful topic is the one that matches the variable you actually need to change. The sections below separate setup, controls, stitch behavior, material handling, new construction, and work on finished garments so you can move one decision at a time.
| Topic | What you’ll find |
|---|---|
| Threading and Bobbin Setup | Model-first preparation of the upper thread and lower-thread system before routine sewing. |
| Sewing Machine Settings | How tension, pressure, feed engagement, speed, and related controls affect ordinary operation. |
| Stitches and Stitch Controls | Selection and execution of stitch types, length, width, needle position, reverse, and buttonholes. |
| Sewing Different Fabrics | Setup and handling changes when stretch, thickness, layers, or surface behavior changes. |
| Garment Construction Techniques | Machine techniques for seams, hems, zippers, elastic, shaping, and edge finishing on new work. |
| Beginner Sewing Alterations | Machine mending and alteration decisions for garments that are already assembled. |
If the immediate task is setup, continue with threading. If you want to change what the machine sews, move to stitch operation. If the same baseline stops making sense because the material has changed, move to fabric-specific machine handling.
Final Thoughts: learn one baseline before changing variables
Using a sewing machine becomes easier to reason about once you can repeat one reliable first-use sequence: identify the exact model, use its manual, prepare the upper and lower thread systems correctly, confirm the basic foot and needle position, select a simple stitch, control the speed, and sew a short seam on stable scrap. That baseline gives every later change a purpose.
From there, follow the job rather than the control panel. Threading has its own setup logic, settings have their own boundaries, stitches change machine motion, materials change handling requirements, and garment construction or alterations add task-specific decisions. If the machine stops behaving as expected, stop the operating lesson and treat the condition as a separate problem instead of trying random adjustments.
Frequently Asked Questions
📖 Do I really need the manual before using a sewing machine?
Yes, especially for an unfamiliar model. Threading paths, bobbin orientation, power-state instructions, stitch controls, needle positions, and presser-foot requirements can differ even between machines from the same manufacturer.
🧵 Should I learn threading before I practice sewing?
You need the upper and lower thread systems prepared correctly before the practice seam, but learn them from the exact model instructions. Do not memorize a generic threading route and assume it applies to every machine.
🎛️ What tension setting should a beginner start with?
Use the starting state specified for your machine and selected stitch rather than a universal number. If the machine does not sew as expected from a correctly prepared setup, do not treat random tension changes as the default fix.
🪡 What stitch should I use for my first practice seam?
Use the basic straight-seam setup identified in your machine manual with the appropriate foot and needle position. Keep the first test simple so speed, guiding, feeding, starting, and stopping are the main variables you are learning.
🐢 Is it better to sew slowly when I am learning?
A controllable speed is more useful than maximum speed while you learn how the machine starts and stops. Use the foot controller, speed limiter, or start and stop controls according to the exact model instructions.
🧶 Can I practice on any fabric I have?
Stable woven scrap is useful for a first baseline because it removes some of the stretch, slipperiness, bulk, and feed variables that other materials introduce. Once the baseline is familiar, change the setup according to the material you actually plan to sew.
⚠️ What should I do if the machine jams during the first seam?
Stop the first-use exercise and follow the exact manual for owner-level checks. If the jam, error, abnormal motion, repeated needle strike, or other symptom remains, move to troubleshooting or qualified service rather than continuing to experiment with controls.
References and Sources
These manufacturer sources support the model-specific setup and first-use boundaries used above. They are not substitutes for the exact manual supplied for, or published for, the machine being operated.
- SINGER threading guidance: Confirms that upper-threading details vary by model and directs users to the machine’s instruction manual.
- Brother machine threading support: Provides a manufacturer example of model-group threading states, including presser-foot, needle, spool, and power instructions.
- Brother start-sewing support: Documents a basic sewing sequence for covered models, including stitch selection, presser-foot position, fabric placement, and gradual foot-controller operation.
Use the matching manufacturer documentation for the exact machine whenever its instructions differ from the general workflow described here.