Threading a domestic sewing machine is not one continuous universal path. It is a set of separate jobs: preparing the upper thread path, winding a bobbin, inserting that bobbin correctly, and, on machines or techniques that call for it, bringing the lower thread to the top. The exact model manual controls spool orientation, bobbin direction, needle-threader eligibility, power state, and thread-tail handling. Once those jobs are separated, a first-time owner can follow the machine in front of them instead of trying to copy a diagram from a different design.
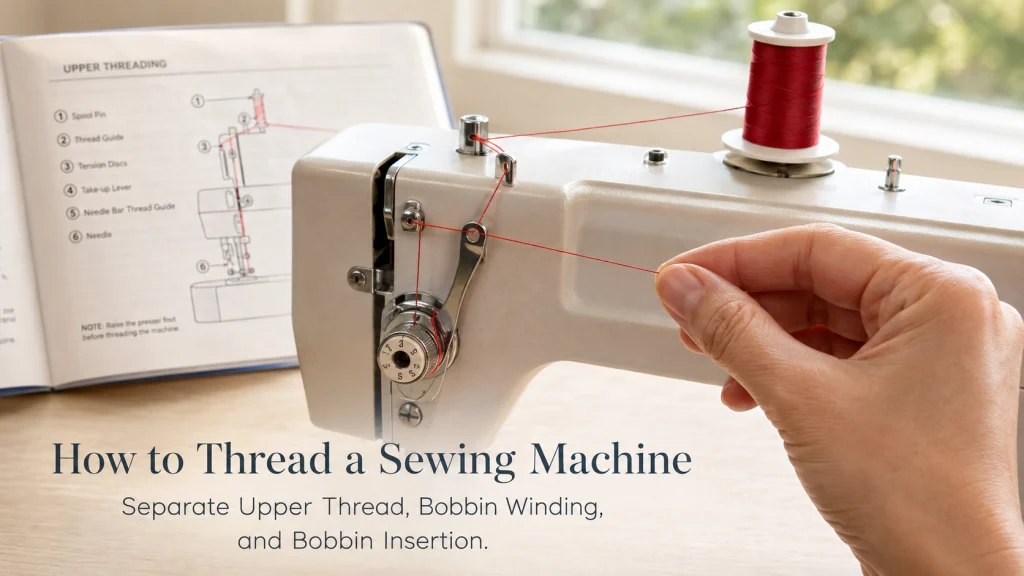
Identify the exact model before copying a thread path
How to thread a sewing machine starts with the model number, not with a generic picture. Two domestic machines can both use a spool, take-up lever, needle and bobbin while still placing the guides differently, loading the bobbin from different directions, or requiring different machine states before the threader can be used. A diagram is useful only when it belongs to the same model or to a manufacturer support answer that explicitly lists your model.
This matters even before the thread touches the first guide. Threading a sewing machine from a generic picture is risky because current manufacturer instructions do not use one universal power sequence. Brother’s NQ550PRW support sequence tells the user to power the machine on, raise the presser foot and needle, then turn the machine off before continuing through the upper path, while the Janome 1522 instruction book gives its own needle-area safety directions and threading sequence. The practical rule is simple: identify the machine, open its manual, and copy its state and path rather than a look-alike machine.
Key point: A familiar-looking spool pin, bobbin cover or thread guide does not prove that another machine’s threading direction applies to yours. Use the exact manual whenever direction, power state, bobbin orientation or threader position is involved.
Separate upper thread, bobbin winding and bobbin insertion
Manufacturer support often splits sewing machine threading into distinct operations rather than one continuous diagram. Each job has its own finish line. Upper threading ends when the upper thread has followed the documented guides, passed through the take-up system and reached the needle eye or built-in threader. Bobbin winding ends with a correctly wound bobbin removed or returned from the winder state. Bobbin insertion is a different operation again, because the wound bobbin must enter the holder or case in the model’s specified orientation and route through its lower-thread guide or tension path.
Raising the bobbin thread is a fourth job, not an automatic extra step to add to every machine. Some manuals show a manual pickup sequence, while some quick-set or drop-in arrangements allow sewing to begin after the bobbin thread has been routed through the built-in slit and cutter. Keeping these jobs separate prevents one of the most common beginner errors: trying to diagnose the entire thread system when only one stage has not been completed.
| Thread job | What it accomplishes | What controls the exact steps |
|---|---|---|
| Upper threading | Routes the spool thread through guides, tension path, take-up system and needle area | Exact model diagram, presser-foot state, needle position and spool setup |
| Bobbin winding | Transfers thread evenly onto the correct bobbin using the winder system | Winder shaft, pretension route, engagement method and model instructions |
| Bobbin insertion | Seats the wound bobbin and routes lower thread through the intended slot, spring or guide | Top-loading or front-loading arrangement and the exact bobbin direction |
| Lower-thread pickup | Brings a bobbin-thread loop through the needle plate when the model or intended technique calls for it | Manual instructions and lower-thread system |
Think of that table as a job map, not as a substitute for the manual. Once you know which job is unfinished, you can use the matching instructions without changing an unrelated part of the setup.
Put the machine in its documented threading state
The machine state determines whether the thread can enter the path the way the manufacturer intended. On many domestic models, the presser foot must be raised so the upper tension path is open or released, and the needle or take-up lever must be at the specified high position. Brother’s NQ550PRW instructions add a needle-position button, thread shutter and power-state step, while the Janome 1522 manual uses a handwheel and presser-foot sequence for its own layout.
Do not turn those shared ideas into a universal sequence. One mechanical model may use a handwheel to place the take-up lever at its highest point, while another machine may instruct the user to press a needle-position control before switching the power off. The correct preparation is whatever the exact manual says must be true before the upper thread enters the first guide.
- Confirm the exact make and model.
- Check whether the machine should be on, off or unplugged for the step you are about to perform.
- Set the presser foot to the manual’s required position.
- Put the needle and take-up mechanism in the stated threading position.
- Confirm that the bobbin winder is not left in a winding state if the manual requires it returned for sewing.
- Keep the foot controller clear so it cannot be pressed accidentally.
If the exact model uses a movable bobbin-winder spindle, returning it from the winding position can be part of that state check. SINGER’s current machine FAQ tells users to push the bobbin-winding spindle back to the sewing position before sewing because the machine will not operate normally while that winding state remains engaged. Treat that as a documented model-family example, not as a universal left-or-right rule for every machine.
That short check avoids a frustrating situation where the visible path looks correct but the machine is still configured for another job. Preparation is part of threading, not housekeeping before the real work begins.
Follow the upper thread path and take-up lever
Upper threading should be read as a sequence of named checkpoints on the actual machine. The spool feeds the thread into one or more upper guides, through the machine’s tension path, around or through the take-up system, down to a needle-bar guide and finally toward the needle eye. The shape of the channel may be hidden behind a cover or marked by arrows and numbers, but the job remains the same: the thread must reach every checkpoint in the order documented for that model.
Spool support belongs to that model-specific setup as well. If the machine uses a spool cap, match its size and placement to the manual instead of treating the cap as decoration. Brother’s NQ550PRW instructions warn that incorrect spool or spool-cap placement can let thread tangle around the spool pin, which is a useful reason to verify the setup before tracing the rest of the path.
The take-up lever deserves special attention because it is easy to miss when it sits partly inside the machine housing. On the Janome 1522, the manual tells the user to raise the take-up lever with the handwheel, raise the presser foot, draw the thread through the guide and tension area, then bring it through the take-up lever before moving down to the needle-bar guide. Brother support likewise warns on several domestic models that a lowered needle can leave the take-up lever in a position where the upper thread cannot be routed correctly.
| Checkpoint | What to verify on the exact machine | Common reading mistake |
|---|---|---|
| Spool setup | Pin position, spool cap if used, and the documented unwind direction | Copying another machine’s spool direction because the pin looks similar |
| Upper guides | Every numbered or illustrated guide before the tension path | Skipping a small guide because the main channel looks continuous |
| Tension path | Presser-foot state and the channel or discs shown in the manual | Trying to change tension settings instead of first completing normal threading |
| Take-up lever | Lever position and the stated direction through or around it | Thread passing beside the lever rather than engaging it |
| Needle-bar guide | The final guide immediately above the needle area | Jumping directly from the main channel to the needle eye |
When a machine is new to you, trace the path with a fingertip while the machine is safely in the manual’s threading state, then route the thread in the same order. Do not open service covers or expose internal moving parts to follow a thread path that the owner manual does not present as user-accessible.

This set contains 20 spools of Sew-All thread, with 100 meters on each spool. The polyester thread is designed for both machine and hand sewing and can be used for seams, quilting, and decorative stitching. The assortment provides multiple basic colors for routine machine threading and general sewing projects.
Check On AmazonIf you click this link and buy, we earn a commission at no additional cost to you.
Finish the needle eye manually or use the built-in threader only if eligible
Manual needle threading is the simplest endpoint when the manual directs the thread straight through the needle eye. The direction still belongs to the exact machine, so follow the diagram instead of assuming the eye is always approached the same way. Keep the machine in the required power state and avoid moving the handwheel or needle-position controls while your fingers are in the needle area unless the manual explicitly calls for that action.
A built-in needle threader adds another mechanism with its own limits. The Janome 1522 manual gives a defined needle position, knob and hook sequence rather than treating the threader as something that can be pulled down from any state. That is enough reason to check the exact model’s eligibility and sequence before using the feature.
Warning: Do not force a needle-threader lever, hook or knob that does not enter the needle eye cleanly. Stop and check the model manual for needle position, needle size, thread limits and any stitch-position requirement before trying again.
If the thread or needle combination is outside the built-in threader’s stated range, manual threading can be the correct normal setup rather than a failure. The purpose of the feature is to help pass the thread through the eye when its conditions are met, not to override the machine’s needle and thread requirements.

This Dritz tool combines a machine needle inserter with a needle threader. The inserter holds the needle steady during insertion and removal, while the threading side helps pass thread through the needle eye. It can be useful when manual needle threading is preferred instead of forcing a built-in threader that is not lining up correctly.
Check On AmazonIf you click this link and buy, we earn a commission at no additional cost to you.
Treat bobbin winding as its own setup job
Bobbin winding uses a different route from upper threading. The thread typically moves from the spool through a dedicated winder guide or pretension device before reaching the bobbin on its winder shaft, but the route, start method and stopping behavior vary by machine. Janome’s 1522 manual, for example, sends the thread around the bobbin-winder guide, through the bobbin hole, onto the winder spindle and into the engaged winding position before the foot control is used.
Because that sequence is a complete task, do not mix its directions into the upper-thread path. If the bobbin is empty or needs to be rewound, continue to the dedicated instructions on how to wind the bobbin. That page can stay focused on winding state, bobbin placement and the finish condition without turning this article into four overlapping procedures.
Note: Bobbin compatibility is a different decision from bobbin winding. This page assumes the machine already has the correct bobbin type specified for the exact model.
Load the wound bobbin through the correct lower-thread path
A full bobbin is not ready to sew until it is inserted in the correct orientation and its thread is routed through the lower-thread path the machine expects. This is where generic instructions become especially risky. Singer’s current support material shows a top drop-in example in which the bobbin turns counterclockwise when the thread is pulled, while its front-load example uses a separate bobbin case and a different direction. Those are two documented layouts from the same support system, not competing universal rules.
The same distinction appears across domestic machines generally: a top cover does not imply that every top-loading machine uses identical slots, cutters or thread direction, and a removable front bobbin case adds its own case-loading and insertion steps. For the full lower-thread procedure, use the article on inserting a bobbin correctly and keep the exact manual open beside the machine.
Once the bobbin is seated and the thread is under the specified guide, spring or slot, stop adding steps that belong to another design. The manual will show whether a thread tail remains above the cover, routes under the presser foot, is cut by a quick-set path, or needs to be brought up manually.
Raise the bobbin thread only when the machine or technique calls for it
Manual lower-thread pickup is a valid normal step on machines that document it. The Janome 1522 instruction book tells the user to hold the needle thread lightly, turn the handwheel toward the user until the needle travels down and back up, then draw the needle thread to form a loop of bobbin thread. Singer support describes the same general kind of operation for machines that require the bobbin thread to be raised.
That does not make pickup mandatory on every domestic model. Brother’s support for some quick-set bobbin arrangements states that sewing can begin after the wound bobbin is inserted and the thread is guided through the intended slit, without first pulling the lower thread to the top. If your manual does call for pickup, follow the dedicated sequence for raising the bobbin thread rather than borrowing the motion from another machine.
Key point: “I always pull up the bobbin thread” and “you never need to pull it up” are both too broad. The correct action depends on the machine and the sewing operation documented for it.
Position thread tails only as required
Thread-tail placement is another detail that looks universal until two manuals are compared. A manual-pickup machine may tell you to pull both threads under the presser foot and toward the back before starting a normal seam. A quick-set lower-thread arrangement may cut the bobbin thread into its starting position, changing what is left for the user to handle. Buttonholes and other specialized operations can also have their own starting-tail directions.
SINGER’s current top drop-in instructions provide a useful bounded example: they route a measured bobbin-thread tail toward the back under the presser foot and note that this helps keep the lower thread from slipping out of position. That supports following the starting-tail path for the exact machine, but it does not prove that one universal tail direction prevents every missed first stitch.
Use the length and direction stated in the exact procedure instead of memorizing a fixed number. The Janome 1522 manual, for example, specifies a 10 cm or 4 inch lower-thread tail in its bobbin-case and pickup instructions, but that measurement belongs to that documented workflow. A number from one machine should not become a universal tail rule for another.
Once the required tails are placed, the normal threading job is complete. Stitch settings, fabric handling and tension adjustment are separate operating decisions and should not be changed merely because the thread was just installed.

These compact detail scissors measure about 4.5 inches and use stainless steel blades with a fine Nano Tip. Their small format is designed for controlled detail cutting during sewing and craft work. They are convenient for trimming loose thread ends after the required thread-tail position and length have been established.
Check On AmazonIf you click this link and buy, we earn a commission at no additional cost to you.
Stop when correct setup turns into a fault
This article assumes a functioning domestic machine being prepared for normal sewing. If the exact documented path has been followed and the machine is already nesting thread, jamming, repeatedly breaking thread, failing to pick up the lower thread or refusing to move normally, the job has changed. Repeating the normal setup indefinitely is not the same as diagnosing why the machine cannot sew.
The useful boundary is whether you are still completing an instructed setup step or responding to a symptom. A missed take-up lever during first setup belongs here because it is visible in the normal thread path. A machine that is correctly threaded according to its manual but repeatedly locks, strikes hard, behaves unpredictably or shows an electrical warning needs a troubleshooting or service path instead.
Do not remove service covers, alter timing, probe energized parts or force a stuck threader to make a normal threading article solve a mechanical or electrical fault. That is the point where the symptom, not the threading sequence, owns the next decision.
Continue with the threading job you need
The complete first-use sequence sits in how to use a sewing machine. When the unresolved step is specifically in the thread system, the three focused topics below let you continue without mixing winding, loading and lower-thread pickup into one procedure.
| Topic | What you’ll find |
|---|---|
| Wind the bobbin correctly | How to identify the winder state, route the winding thread and finish with a properly prepared bobbin. |
| Insert the bobbin correctly | How lower-thread loading changes between top-loading and front-loading arrangements and why direction is model-specific. |
| Raise the bobbin thread | When manual lower-thread pickup is documented and how to separate it from machines that use a quick-set path. |
Choose the article that matches the unfinished job. That keeps the current machine and manual at the center of the setup instead of replacing them with a generic sequence.
Final Thoughts: identify the job before copying the path
Correct threading is less about memorizing one diagram and more about knowing which operation you are performing. Upper threading, bobbin winding, bobbin insertion and lower-thread pickup have different endpoints, and the exact model controls the directions and machine state inside each one.
Keep the manual beside the machine, complete one job at a time, and stop when a normal setup step turns into a repeated symptom. That approach is slower than copying a random diagram once, but much faster than untangling several mixed instructions afterward.
Frequently Asked Questions
🧵 Do I need to raise the presser foot before threading my sewing machine?
Many domestic machines require the presser foot to be raised during upper threading so the thread can enter the intended tension path. Check the exact manual because the machine may also require a specific needle position, power state or thread-shutter state.
🪡 Does the needle need to be at the highest position before threading?
Often, yes, because the high needle position also places the take-up mechanism where it can receive the thread. Use the handwheel or needle-position control only as the model manual directs.
🧶 Is bobbin winding part of upper threading?
No. Bobbin winding uses its own winder path and ends with a wound bobbin, while upper threading routes the spool thread through the machine toward the needle. Treating them as separate jobs makes the setup easier to check.
🔄 Which way should the bobbin turn when I insert it?
There is no single direction for every domestic machine. Top-loading and front-loading examples can use different directions, so copy the arrow or diagram in the exact model manual.
🧷 Do I always have to pull up the bobbin thread?
No. Some machines document a manual pickup sequence, while some quick-set bobbin systems allow sewing to begin after the lower thread is routed through the built-in path. Follow the procedure for the model and sewing operation in front of you.
⚙️ Can I use the automatic needle threader with any needle and thread?
Not necessarily. Built-in threaders can have needle-position, needle-size, thread and stitch-position limits. If the mechanism does not line up cleanly, stop and check the manual rather than forcing it.
🛑 What if the machine is threaded correctly but the thread still nests or jams?
Once the documented setup has been verified, repeated nesting, jamming, thread breakage or lower-thread pickup failure becomes a troubleshooting problem rather than a normal threading lesson. Stop changing unrelated settings and move to the appropriate diagnostic or service path.
References and Sources
- Brother NQ550PRW upper-threading support: verifies a model-specific threading state that uses power to position the machine before switching it off for the upper path.
- SINGER machine FAQ: supports returning the bobbin-winding spindle to the sewing position before normal operation on the covered machines.
- SINGER bobbin setup support: documents separate bobbin winding, top drop-in insertion, front-load insertion, lower-thread pickup and a starting-tail path intended to keep the bobbin thread in position.
- Janome 1522 instruction book: provides an exact domestic-machine example for bobbin winding, bobbin-case threading, upper threading, built-in needle threading, lower-thread pickup and needle-area safety.