Presser foot pressure controls how firmly an eligible sewing machine holds fabric against the feed system while stitching. Before changing it, confirm that the exact model actually provides an owner-adjustable pressure control, record the documented normal setting, and test on the same fabric stack you plan to sew. Pressure changes should be small, deliberate, and tied to one visible fabric-hold result rather than used as a general cure for sewing problems. If the machine has fixed pressure, the correct next step is to leave that system alone and address the actual sewing decision through the controls the manufacturer provides.
First confirm the machine can adjust presser foot pressure
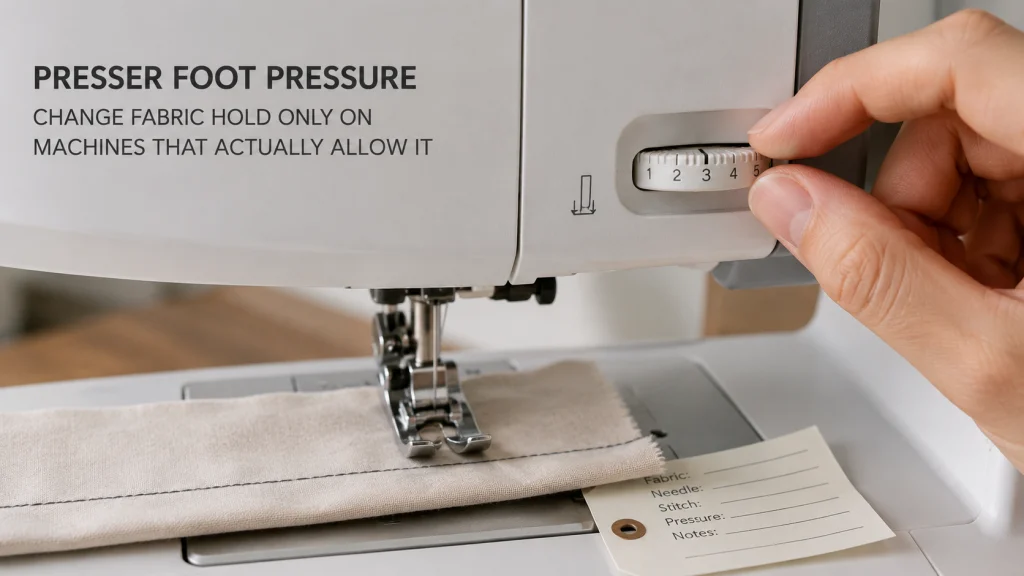
Presser foot pressure is not a universal sewing-machine setting. Brother currently lists the PS500 among models covered by a support procedure with a physical pressure dial, while its CS7000X appears in separate support documentation stating that presser foot pressure cannot be adjusted on that machine. Those two examples make the first decision simple: identify the exact model before looking for a dial, screw, menu value, or suggested number.
If you are searching for how to adjust presser foot pressure, start with the model manual or the manufacturer’s support page rather than a fabric rule from a general sewing article. A control that exists on one machine may be absent on another, and a control that looks similar may use a different scale or normal position. Owner questions often start one step earlier than the adjustment itself: they are trying to determine whether their exact machine has an adjustable pressure control at all. The adjustment workflow in this article applies only after the documentation confirms that the control is intended for normal owner use.
This eligibility check prevents a normal sewing adjustment from turning into an attempt to modify a spring or internal presser-bar mechanism. It also keeps the decision separate from understanding sewing machine settings, where other owner controls can be checked when pressure is fixed.
Find the documented normal pressure state
An adjustable control needs a starting point. On Brother’s support page for models including the PS500, the physical dial has four levels and the documented standard setting is 3. On another Brother support page covering models with an on-screen pressure setting, including the SE1900, the normal sewing value is also 3. That shared number is useful only as an example of those covered models, not as a number to copy to a different machine.
Record the exact baseline before moving anything. If the manual calls the position standard, normal, default, or uses a mark rather than a number, write down what the machine actually shows. A useful presser foot pressure adjustment begins with a state you can restore, because otherwise a temporary material experiment can become an unexplained permanent change.
| Test log field | What to record |
|---|---|
| Machine | Exact brand and model number |
| Baseline | Documented normal pressure value or mark |
| Material stack | Fabric type, number of layers, seam allowances, and any interfacing |
| Sewing setup | Presser foot, stitch, needle, and thread used for the test |
| Pressure test | Each pressure value tried and the visible result at that value |
The log matters most when several variables could change at once. Keeping the foot, stitch, needle, thread, and material stack stable makes it easier to tell whether a pressure change affected the specific result you intended to evaluate.
Define the fabric-hold result you want to change
Pressure is useful only when the goal is about how the presser foot holds the fabric while the feed system moves it. Brother’s dial-based support guidance, for example, discusses changing pressure when material stretches, layered material does not feed evenly, the feed dogs mark or damage the material, or material slips. Those are fabric-hold observations, which is narrower than saying pressure should be changed whenever a seam looks wrong.
Describe one result before touching the control. You might be checking whether a test strip is visibly stretching under the foot, whether two layers remain aligned through the same short seam, or whether the top surface shows unwanted feed-dog marking under the documented setup. If the real concern is thread balance, stitch formation, a skipped stitch, a jam, or a machine that will not move fabric normally, pressure is no longer the only variable and this workflow should not be used as a shortcut.
Key point: Change pressure to evaluate a defined fabric-hold behavior on a functioning machine, not to chase every visible sewing defect with the same control.
That distinction also prevents overlap with adjusting sewing machine tension. Tension changes thread balance; pressure changes how an eligible machine holds fabric against its feed system.
Build a representative test stack
A pressure test should resemble the section of the project that prompted the adjustment. Use the same fabric, the same number of layers, the same interfacing if present, and a similar seam allowance or bulky intersection when that feature is part of the real sewing task. Testing a single scrap of stable cotton tells you little about how a different multi-layer stack will behave.
Keep the rest of the setup stable for the first comparison. Use the same presser foot, stitch, needle, thread, speed approach, and fabric orientation across the baseline and adjusted samples. The purpose is not to create laboratory data, but to avoid changing three controls and then guessing which one produced the difference.
- Start with the documented normal pressure state.
- Use a scrap or test stack that matches the real project layers.
- Mark the baseline sample so it cannot be confused with later tests.
- Change only the documented pressure control for the next sample.
- Record the setting and the visible fabric-hold result before another change.
A representative stack also helps expose when pressure is the wrong question. If the machine behaves normally on the project stack until a presser foot, stitch, feed-dog state, needle, or thread is changed, restore the known setup before treating pressure as the cause.

The Dritz 3100 is an aluminum measuring gauge with 14 commonly used measurements in a single tool. Its marked measurements range from 1/8 inch to 2 inches and can be used to check small dimensions while sewing or quilting. The compact gauge is designed for measuring details such as seam allowances, hems, buttons, and appliqué placement.
Check On AmazonIf you click this link and buy, we earn a commission at no additional cost to you.
Change pressure only through the documented user control
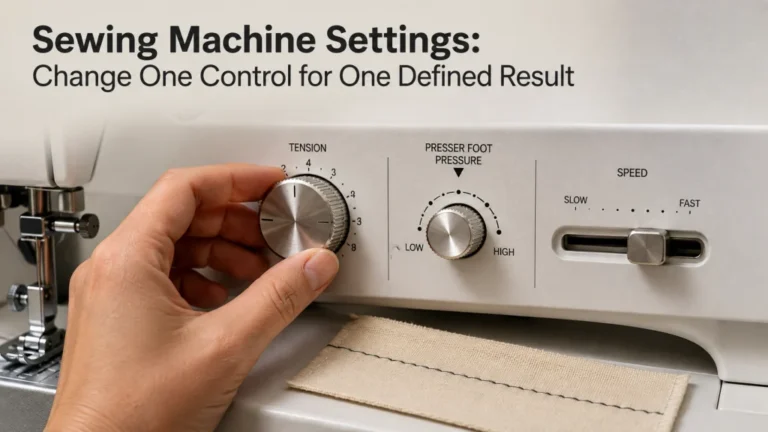
Adjustable presser foot pressure can be implemented in different ways. Brother’s current support information includes models with a four-level dial and other models that place pressure inside the machine’s sewing settings menu. The interface therefore belongs to the exact machine, even when two models use similar language for the function.
Follow the control direction described for that model. On the Brother dial procedure, a larger number means stronger pressure; on the Brother menu procedure, a higher number also increases pressure. That agreement should not be converted into a universal rule for every brand or mechanism, so the manual remains the authority for the machine in front of you.
The interface also changes how you record and repeat a test. A physical dial with numbered positions can be read directly at the control, while a menu-based model requires you to open the sewing settings, locate the pressure value, change it with the on-screen controls, and then leave that screen. Neither interface is automatically better or more precise. For repeatable tests, the useful habit is the same: write down the exact documented value or mark instead of relying on memory of where a dial sat or which screen value you last used.
Warning: Do not remove covers, alter a presser-bar spring, turn an undocumented internal screw, or force a pressure control beyond its intended range. If the manual does not identify the part as an owner adjustment, leave it alone.
The practical boundary is easy to apply: use the knob, dial, screen, or adjustment point the manufacturer names for the exact model, and nothing else. An internal mechanism that happens to influence foot pressure is not automatically an owner control.
Move one documented step at a time
Large changes make comparison harder. If the machine uses discrete levels, move one documented level and sew another short test on the same stack. If a machine uses a different style of control, follow its own markings and instructions rather than borrowing a quarter-turn, half-turn, or numbered recipe from another model.
After each sample, compare the result with the baseline and write down what changed. If the material hold improves for the defined goal without introducing another unwanted effect, you have useful model-specific evidence for that project stack. If the result becomes worse or simply different, return toward the baseline instead of continuing farther because a generic article said that a certain fabric always needs more or less pressure.
Pro Tips: Photograph the control position beside the labeled test sample if the setting is hard to describe. A visual record can be more reliable than remembering where an unnumbered mark was located.
Small steps also make the reset easier. The objective is a controlled temporary change, not discovering the most extreme position the machine will allow.
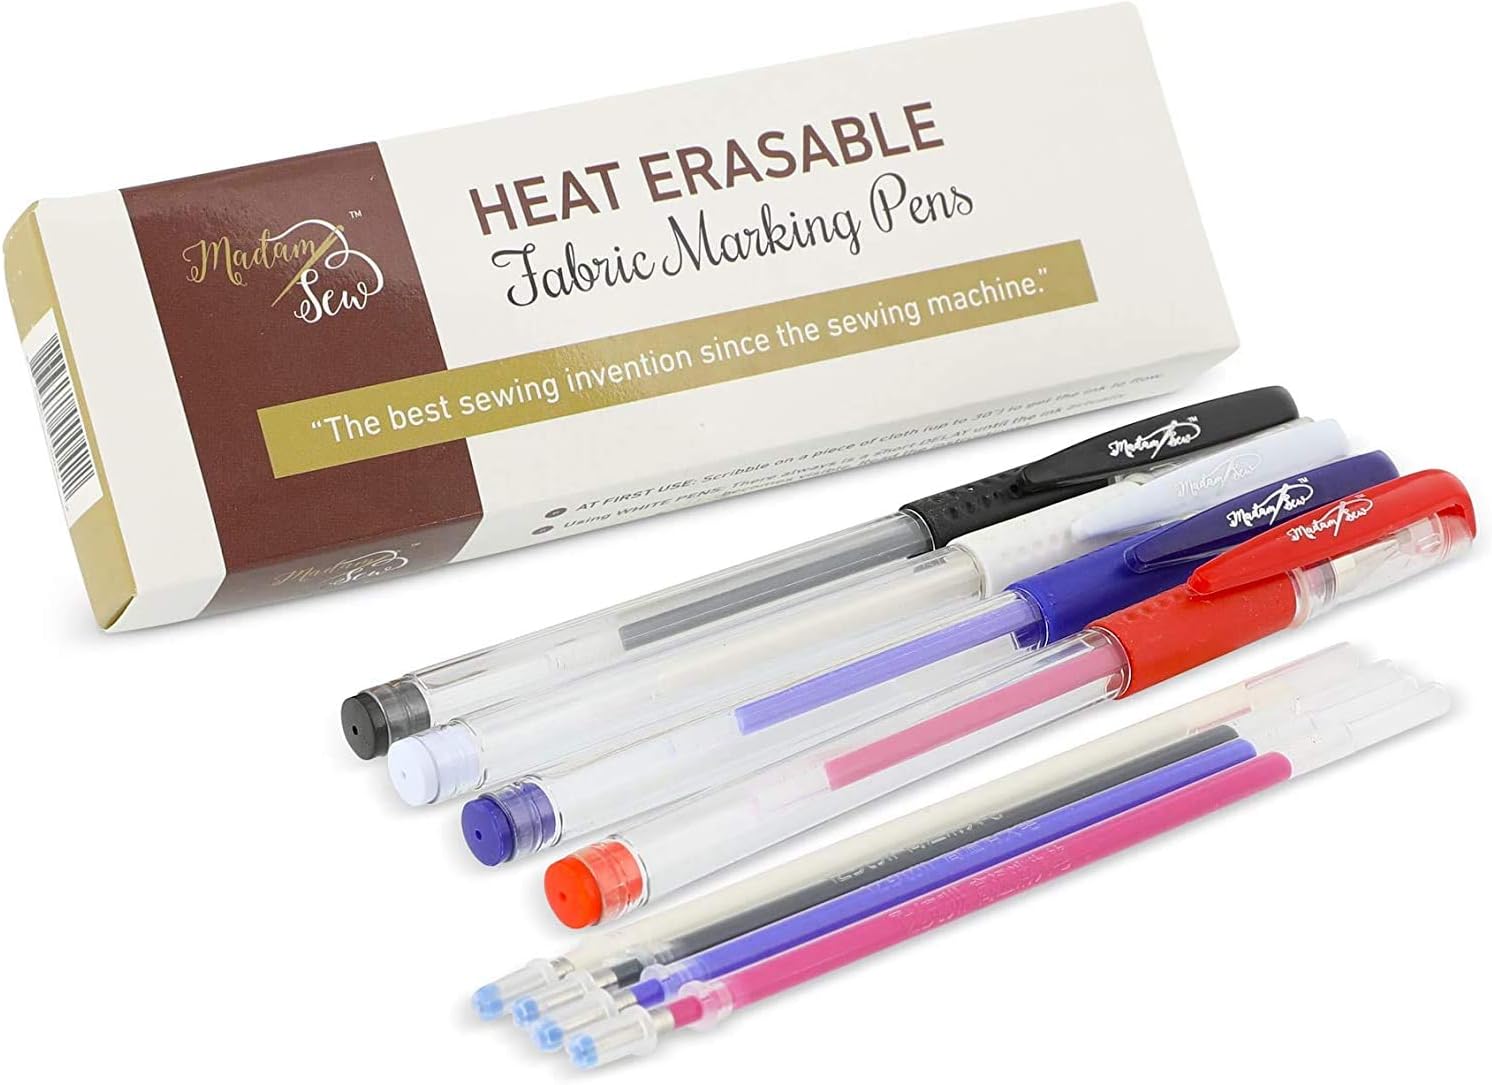
These Madam Sew fabric marking pens use heat-sensitive gel ink for temporary sewing and quilting marks. The set includes red, white, blue, and black pens plus one refill for each color. Their fine 0.7 mm points create narrow markings, and the marks can be removed with heat after the sewing work is complete.
Check On AmazonIf you click this link and buy, we earn a commission at no additional cost to you.
Observe feeding without diagnosing unrelated faults
During a pressure test, watch the fabric behavior you defined at the start. Note whether layers stay aligned, whether the fabric appears to stretch under the foot, whether the surface shows marking, or whether the material slips under the documented conditions. Those observations are enough for an adjustment test because they describe what happened without assigning a mechanical diagnosis.
Stop the experiment when the machine stops behaving like a normally functioning machine. Fabric that suddenly will not advance, repeated hard needle strikes, a jam, abnormal mechanical resistance, or a control that will not move through its documented range belongs to troubleshooting or service rather than continued pressure testing. Do not increase pressure repeatedly in an attempt to overpower a fault.
Note: A deliberate pressure test starts from a working machine. A machine that cannot feed ordinary fabric normally has crossed into a different problem.
If the intended change is the feed mechanism itself rather than how firmly the foot holds fabric, use the machine’s documented feed control instead. The separate explanation of raising or lowering feed dogs covers that owner-level setting without treating pressure as a substitute.
Keep presser-foot selection separate from pressure
The presser foot and presser foot pressure are related in the sewing system, but they are not the same choice. Pressure is the downward hold applied through the installed foot on a machine that allows adjustment. Foot selection is about using a foot that is appropriate for the stitch, machine interface, and sewing task.
Brother’s adjustable-pressure support even directs users to confirm the correct presser foot for the selected stitch if the desired result is not achieved. That is a useful boundary: do not keep pushing the pressure setting farther when the installed foot itself may be wrong for the stitch or task.
Keeping those decisions separate prevents one control from absorbing every material-handling problem. It also avoids implying that a pressure setting can make an incompatible or incorrect foot suitable for the machine.

This Stormshopping set contains 52 different presser feet for a range of sewing tasks, including zipper, quilting, button, and overcast work. It is made for most domestic low-shank sewing machines and includes a manual covering the included feet. The set is not designed for industrial, old, or mini sewing machines, so the machine shank type should match the listed compatibility.
Check On AmazonIf you click this link and buy, we earn a commission at no additional cost to you.
Restore the baseline after the special case
Temporary pressure changes should end with a deliberate reset. Brother instructs users covered by its four-level dial procedure to return the dial to 3 after sewing, and its menu-based procedure identifies 3 as the normal sewing setting for the covered models. Your machine may use another number, mark, or default, so restore the baseline you recorded from its own documentation.
Resetting matters because the next project may use a completely different fabric stack. Leaving a special-case pressure value in place creates an invisible setup change that can confuse the next sewing session, especially when the control is on the back of the machine or buried in a settings screen.
Note: The repeated value of 3 in the two Brother support examples is model-group documentation, not a universal pressure standard. Record the baseline for the exact machine rather than carrying that number across brands or models.
If a particular project repeatedly benefits from the same verified setting, keep it in the project notes alongside the fabric stack, foot, stitch, needle, and thread. That record is more useful than turning one successful test into a permanent machine rule.
Stop if the control sticks or fabric will not feed normally
An adjustable pressure control should be used only within the movement or values the manufacturer documents. If a dial, menu control, or adjustment point is stuck, unusually hard to move, or will not return to its documented baseline, do not force it. A resistant mechanism is no longer a normal settings question.
The same boundary applies to feeding. If ordinary fabric will not advance normally at the documented setup, or if the machine jams, strikes hard, overheats, smells of burning, shows exposed wiring, or behaves unpredictably, stop using the adjustment workflow. Check the exact manual for owner-level steps and use qualified service when the problem exceeds those instructions.
Warning: Pressure adjustment is not permission to modify internal spring systems or keep sewing through a hard mechanical problem. Stop before a simple settings experiment becomes equipment damage or a safety issue.
Once the machine is back to normal operation, you can return to the test from a known baseline. Until then, the useful decision is not which pressure number to try next, but why the machine is no longer operating normally.
Use the control that matches the variable you actually mean to change
Pressure belongs to one narrow part of the sewing setup: fabric hold at the presser foot. When the visible issue is thread balance, move to the machine’s tension controls instead. When the intended change is whether the feed dogs are engaged, use the documented feed-dog control rather than compensating with pressure.
For a wider view of what belongs in normal setup, using a sewing machine correctly connects these settings to the rest of the machine without treating any one control as a universal answer. That model-first approach is especially important on machines with fixed pressure, because the absence of an adjustment is itself a documented design condition, not a missing feature the owner should try to create. If adjustable pressure becomes a repeated requirement across the materials you actually sew, record that as a feature to verify the next time you compare machines rather than trying to modify the current one.
The shortest useful decision path is therefore: confirm eligibility, record baseline, define one fabric-hold goal, test one documented change, observe the result, and restore normal pressure afterward. If the problem turns out to be another variable, route the decision there instead of stretching this control beyond its job.
Final Thoughts: pressure is an eligible control, not a universal cure
Presser foot pressure is useful when three conditions are true: the exact machine provides an owner-adjustable control, the machine is otherwise functioning normally, and the sewing goal is specifically about how the fabric is held while feeding. Start from the documented normal state and keep the rest of the test stack stable so one pressure change can be evaluated without guessing.
Machines with fixed pressure need a different decision path, and machines showing abnormal feeding or a stuck control need troubleshooting rather than more adjustment. The practical habit is simple: use only the controls the exact model gives you, change one variable for a defined reason, and leave yourself a reliable path back to baseline.
FAQs
🦶 What is presser foot pressure on a sewing machine?
It is the downward pressure the presser-foot system applies to hold fabric against the feed system while sewing. Some machines let the owner adjust it, while others use a fixed configuration.
🎛️ How do I know whether my machine has adjustable presser foot pressure?
Check the exact model manual or current manufacturer support page for a named pressure dial, menu setting, or owner adjustment. Do not assume a machine has the control because a similar model does.
🔢 What number should presser foot pressure be set to?
Use the normal or standard value documented for the exact model. Brother uses 3 as the normal value on some covered machines, but that is not a universal setting for other models or brands.
🧵 Should I lower presser foot pressure for knit fabric?
Do not start from a universal knit number. If the machine allows adjustment, test the documented direction on a representative knit stack and judge the specific fabric-hold result you are trying to change.
⚙️ Can pressure adjustment fix fabric that will not feed?
Not as a general rule. A machine that will not feed ordinary fabric normally needs a troubleshooting path, because feed-dog state, setup, obstruction, damage, or another fault may be involved.
📖 Should I reset the pressure after a special sewing task?
Yes, when the model documentation identifies a normal or standard baseline. Record that value before testing and restore it when the special case is finished.
References and Sources
These manufacturer references are included because the article relies on model-specific control eligibility, range, and baseline details that should be checked against current documentation.
- Brother dial pressure instructions: Verifies the four-level adjustable control, direction of change, model coverage, and standard setting of 3 for the covered machines.
- Brother menu pressure instructions: Verifies models that adjust pressure through sewing settings and identifies 3 as the normal sewing value for the covered machines.
- Brother fixed-pressure model list: Verifies that presser foot pressure is not owner-adjustable on listed models including the CS7000X.
Together, these manufacturer pages show why eligibility and baseline must be checked by exact model before any pressure value is suggested. They support the control examples used here without turning one model family’s settings into a universal rule.