Sewing machine tension should be adjusted from a known, correctly threaded baseline, not from a random dial position or a symptom that has not been checked. The useful control for normal owner adjustment is usually the user-facing upper-thread tension control, and its starting value depends on the exact machine documentation. A representative test sample lets you change one variable at a time and compare thread balance before deciding whether the adjustment helped. Persistent looping, nesting, breakage, or a control that no longer behaves normally belongs in troubleshooting or service, not in repeated tension changes.
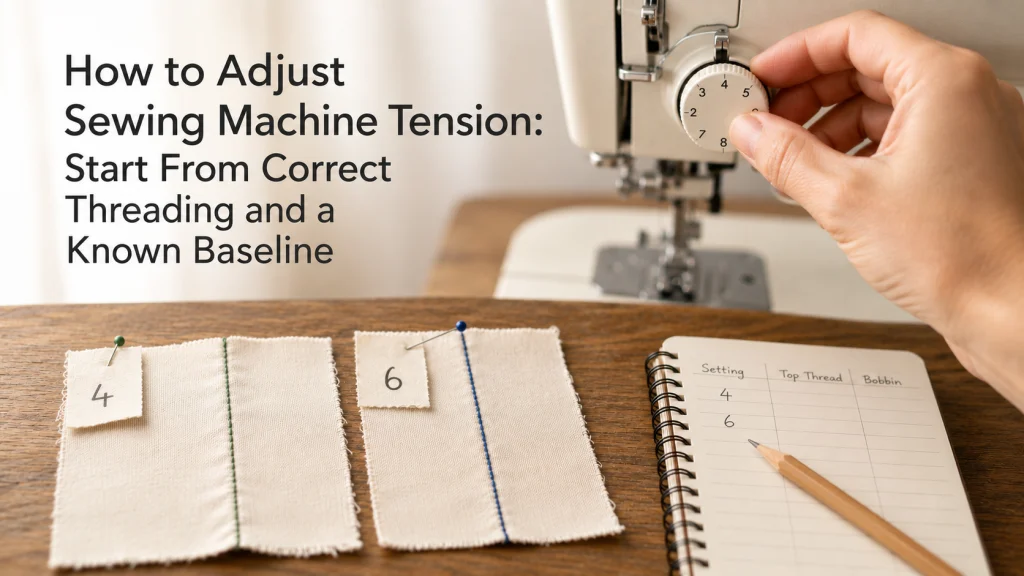
Start from correct threading and a known baseline
A sewing machine tension adjustment should begin only after the machine is threaded correctly and sewing normally enough to produce a repeatable test seam. That distinction matters because turning the dial cannot compensate reliably for thread that missed a guide, a bobbin installed incorrectly, or a machine that has developed an unrelated fault. If the machine is new to you, first make sure you can use a sewing machine correctly before treating the tension control as the next variable.
If you are learning how to adjust sewing machine tension, the goal is not to discover one permanent number. The goal is to preserve the machine’s documented normal setting, test the actual fabric and thread combination, and make a deliberate upper-thread change only when the stitch balance calls for it. That keeps the adjustment reversible and makes each sample useful evidence instead of another guess.
Key point: Record the documented starting setting before changing anything. If you do not know the baseline, find it in the exact machine manual or manufacturer support page first.
Find the exact machine’s documented normal tension
There is no responsible universal number for sewing machine tension. Brother, for example, lists a standard setting of 4 for a support group that includes the XM3700 and XR3774, while a different Brother support page covering models such as the LX2375 lists a basic setting of 5. Those are manufacturer examples for named machines, not a reason to copy either value onto a different model.
Start with the manual or support page for the model in front of you, then note whether the control is a numbered dial, an electronic setting, or another user-facing system. This is also where the broader main sewing machine settings matter: tension is only one adjustable variable, and the machine may document a different default for a specialty stitch or operating mode.
| What to record | Why it matters |
|---|---|
| Exact machine model | Baseline values and control behavior are model-specific. |
| Documented normal setting | This is the return point after testing. |
| Stitch selected | Some machines or stitch modes can use different defaults. |
| Upper-thread control type | A mechanical dial and an electronic setting may be adjusted differently. |
The practical takeaway is simple: write down the machine’s own baseline before you sew the first comparison sample. A remembered number from another machine is not a baseline for this one.
Confirm upper and lower threading before changing a control
Thread tension can only be evaluated if the thread is actually following the machine’s intended path. Brother’s SE700 support material, for example, states that incorrect upper or lower threading can prevent the tension from being adjusted correctly even when the upper tension dial is turned. That is a useful evidence boundary because it separates a normal setting change from a threading problem that the setting cannot fix.
Use the exact threading sequence for the machine rather than a generic diagram. On models that require the presser foot to be raised while threading, that position allows the upper thread to enter the intended tension path. Confirm the bobbin orientation and threading path as well, then return the upper control to the recorded baseline before evaluating the seam.
- Use the exact spool path and thread guides shown for the model.
- Confirm the take-up path and needle threading direction.
- Install the bobbin in the documented orientation and path.
- Use a needle and thread combination appropriate for the material and machine.
- Return the upper-thread control to the recorded normal setting before the test.
This check is intentionally narrow. It does not turn the article into a fault diagnosis procedure; it simply establishes that the machine is in a known state before a normal adjustment begins.

These SCHMETZ Universal size 80/12 needles are designed for home sewing machines. The listing describes a slightly rounded point for use across woven and knit fabrics made from natural or synthetic fibers. This package contains ten five-needle cards, providing 50 universal needles for household sewing.
Check On AmazonIf you click this link and buy, we earn a commission at no additional cost to you.
Define the thread balance required for the intended seam
For a conventional two-thread lockstitch, a useful reference is where the upper and bobbin threads interlock within the fabric stack rather than being pulled prominently to one surface. Brother’s sewing guidance for the SE700 describes correct balance as the upper and bobbin threads crossing near the center of the fabric. The exact visual result can still change with fabric thickness, thread size, stitch choice, and whether the seam is decorative or structural.
That means thread tension should be judged against the seam you are actually trying to sew. A two-layer cotton test for an ordinary straight seam is a different condition from a decorative topstitch using a heavier visible thread. Keep the intended result explicit so you do not keep moving the dial simply because the two sides of a specialty sample do not look identical.
| Sample view | Thread relationship | What it means for this adjustment |
|---|---|---|
| Right side | Upper thread remains on the right side without bobbin thread being pulled prominently through. | Consistent with a balanced test when the underside also looks correct. |
| Inside the fabric stack | Upper and bobbin threads interlock within the layers. | This is the target location for the lock in a normal balanced seam. |
| Wrong side | Bobbin thread remains on the wrong side without loose upper-thread loops. | Confirms the underside should be checked, not ignored. |
The table is a location check, not a universal appearance guarantee. Different stitches and materials can change how much thread is visible, so the machine documentation and the intended seam still control the final judgment.
Build a representative test sample
A tension test is useful only when it represents the real seam. Use the same fabric type, approximately the same number of layers, the same upper and bobbin thread, the same needle, and the same stitch you intend to use in the project. If the actual seam crosses an interfaced area or a folded allowance, include that stack in a separate test rather than assuming a single layer of scrap tells the whole story.
For example, if you are preparing a straight seam in two layers of medium-weight woven cotton, make the baseline sample in two layers of that cotton with the planned needle and thread. If you later switch to a heavier topstitching thread, treat that as a new test condition. Changing thread weight and tension at the same time without a baseline makes it harder to tell which variable changed the result.
Keep the test materials consistent enough that you are comparing the control rather than the supplies. That means using the same thread type and needle for the comparison set, cutting enough scrap for several repeatable seams, and having a simple way to label each sample. These are ordinary sewing supplies, but consistency matters more here than adding anything specialized.
Note: Mark the right side and wrong side of each sample before sewing. A removable fabric marker, small paper label, or pencil notation on the seam allowance can keep the samples identifiable without changing the test itself.

This is Gutermann Sew-All polyester sewing thread in black and a 100-meter format. Amazon describes it for machine or hand sewing across different materials and seam types, with a uniform construction intended to sew without fiber lint. The listing also notes high tear and abrasion resistance and a silk-like gloss.
Check On AmazonIf you click this link and buy, we earn a commission at no additional cost to you.
Change only the user-facing upper tension control
Once threading, the baseline, and the test sample are controlled, change only the upper thread tension that the manual identifies as user-adjustable. On the Brother SE700 and related models covered by the manufacturer’s support page, turning the tension dial counterclockwise loosens the upper thread tension and turning it clockwise tightens it. Other machines can use buttons, screen controls, or a differently marked dial, so follow the exact model documentation rather than copying the physical direction blindly.
The reason for changing only one control is diagnostic clarity, not complexity. If you alter upper tension, bobbin tension, stitch length, needle, and thread all at once, the next seam cannot tell you which change mattered. One controlled change gives the next sample a clear comparison point.
That boundary is especially useful for a first-time owner. The visible dial or documented electronic control is meant to be reversible; an internal or bobbin-case adjustment may have a different service or setup procedure and does not belong in this sequence.
Move in small steps and record every value
Small steps keep the test interpretable. The exact increment depends on the control scale, so do not assume that one full number is always the correct amount. If the dial has intermediate marks, or the manual specifies a particular increment, use that documented scale and record the exact value after each change.
A simple log prevents circular adjustment. Instead of moving from 4 to 5, then back to 3, then wondering which sample looked better, assign each seam a sample number and record the condition beside it. The log becomes especially helpful when a fabric stack needs a temporary special setting that you will want to reverse later.
The recording method should match the control you actually have. With a mechanical dial, note the visible number or mark and whether the pointer sits between labeled positions. With an electronic control, record the displayed value and the stitch or mode active at the time, because the machine may handle defaults differently across settings. Do not assume that switching stitches, powering off, or returning to a menu restores the same value unless the exact model documentation says it does.
| Sample | Upper setting | Fabric and layers | Thread and needle | Observed balance |
|---|---|---|---|---|
| Baseline | Documented normal value | Project fabric and representative stack | Planned combination | Record where each thread appears |
| Test 1 | One small documented change | Unchanged | Unchanged | Better, worse, or no meaningful change |
| Test 2 | Next deliberate value if needed | Unchanged | Unchanged | Compare with baseline and Test 1 |
You do not need a long experiment for an ordinary seam. The point is to make each change traceable and stop once the intended balance is reached rather than continuing to turn the control simply because more range is available.

This is a blue water-soluble fabric marking pen for transferring pattern, needlecraft, and quilting markings. The product information states that its marks can be removed with a damp cloth and that the pen can be used repeatedly for temporary marking. The package contains one pen, and the product is not recommended for dry-clean-only fabric.
Check On AmazonIf you click this link and buy, we earn a commission at no additional cost to you.
Compare each sample with the baseline
Lay the baseline and changed sample side by side and inspect both surfaces. Look for the location of the thread interlock, whether one thread is being drawn prominently to the opposite side, and whether the seam remains appropriate for the intended fabric stack. A change that merely shifts the problem from one surface to the other is not a successful adjustment.
Use the baseline as evidence, not as a rule that must always win. A special thread or material can legitimately need a different upper setting, but the changed sample should show a clear reason for keeping that value. If the sample does not improve in a consistent direction, return to the baseline before changing another variable.
For a beginner, this comparison also prevents a common misunderstanding: the largest number is not “stronger” and the smallest number is not “gentler” in a general sewing sense. They are positions on a particular machine’s tension control, and their usefulness depends on the thread, stitch, fabric stack, and documented control behavior.
Keep bobbin-tension screws outside normal adjustment
This procedure deliberately leaves bobbin-tension screws alone. Brother states on a support page covering models such as the LX2375 that bobbin thread tension is factory adjusted for general use and that no adjustment is needed for most applications on those listed machines. That does not prove every bobbin system on every machine is permanently fixed, but it shows why a lower-tension screw should not be treated as the normal companion to every upper-thread change.
If an exact manual provides a separate bobbin-tension procedure for a specific machine, thread, or specialist task, follow that procedure in its own context. Otherwise, preserve the lower system’s documented state. A tiny screw can be easy to turn and difficult to return precisely if its original position was never recorded.
Boundary: Do not use this article to adjust a bobbin-case tension screw, remove a tension unit, alter timing, or perform internal repair. Those actions require model-specific instructions and may exceed normal owner adjustment.
Keeping that boundary clear also protects the usefulness of your test log. When only the upper control changes, the next seam still has a known lower-thread reference.
Return to baseline when the special case is finished
A temporary adjustment for one fabric, thread, or decorative seam should not silently become the machine’s new normal. Once that job is finished, return the upper control to the documented baseline you recorded at the start and sew a short verification sample with the usual setup. That step prevents the next project from beginning with an unexplained setting left over from the previous one.
This is also why the log matters more than memorizing a favorite number. A sewist might use one upper setting for an ordinary two-layer woven seam and a different value for a specific heavier thread, but both values make sense only with their test conditions attached. The machine’s baseline remains the reliable reset point between those cases.
Pro Tips: Keep the baseline and any repeatable special-case settings on a small machine note with the fabric, thread, needle, stitch, and layer conditions. Record conditions, not just numbers.
Stop if looping, breakage, nesting, or control failure persists
Normal tension adjustment assumes the machine is correctly threaded and functioning predictably. If repeated correct threading and a return to the documented baseline still produce persistent looping, thread nesting, shredding, breakage, or a tension control that no longer changes the seam in a sensible way, stop treating the dial as the whole problem. Those symptoms can involve setup, needle and thread compatibility, the thread path, contamination, damage, or a mechanical issue that needs a different troubleshooting sequence.
Do not keep increasing or decreasing upper tension through the full range just to force a result. If the machine has a hard mechanical lock, repeated hard needle strikes, abnormal heat, smoke, burning odor, sparks, exposed wiring, or uncontrolled motion, stop using it and follow the exact manual or qualified service guidance rather than continuing test sewing.
| Situation | Next move |
|---|---|
| Machine is correctly threaded, baseline is known, and the test seam changes predictably with the upper control. | Continue normal upper-thread adjustment in small recorded steps. |
| Fabric is being held or fed differently but thread balance is otherwise normal. | Check whether you need to adjust presser foot pressure instead of changing thread tension. |
| Looping, nesting, shredding, breakage, or erratic response persists after correct setup and baseline reset. | Stop normal adjustment and use the appropriate troubleshooting path. |
| Electrical danger, overheating, smoke, a hard lock, or repeated hard needle strikes occur. | Stop using the machine and follow model-specific service guidance. |
The purpose of the stop point is not to make a simple setting sound risky. It keeps a normal sewing control from becoming a substitute for diagnosing a machine that is no longer behaving normally.
Final Thoughts: adjust from a known baseline, not from guesswork
A good sewing machine tension adjustment is controlled and reversible. Confirm threading, record the exact machine’s normal setting, reproduce the real fabric, thread, needle, and layer conditions, change only the documented upper control, and compare each sample with the baseline. Keeping the fabric, thread, needle, marking method, and sample labels consistent makes each comparison easier to read and easier to reproduce later.
When the project needs a different fabric-holding variable rather than a thread-balance change, move to the appropriate setting instead of forcing the tension dial to solve it. When the machine shows persistent fault symptoms, stop normal adjustment and troubleshoot the cause. The useful habit is knowing what the upper control can change, what it cannot prove, and how to get back to a known state.
FAQs
These questions focus on normal adjustment of a correctly threaded, functioning machine. They do not replace model-specific troubleshooting when the machine has persistent faults.
🧵 What number should sewing machine tension be set to?
Use the documented normal setting for the exact machine. Brother support examples alone show why a universal number is unsafe: some named models use 4 as the standard setting while another documented group uses 5 as the basic setting.
🪡 How do I know if my thread tension is balanced?
For a normal lockstitch, compare both sides and look for the upper and bobbin threads interlocking within the fabric stack rather than one thread being pulled prominently to the opposite surface. Judge the result on the actual fabric, thread, needle, and stitch you plan to use.
🎛️ Should I increase or decrease upper thread tension?
Follow the control direction in the exact machine documentation. On Brother SE700-family guidance, a lower setting loosens upper tension and a higher setting tightens it, but do not assume another control is marked or operated the same way.
🧶 Do I need to change tension when I change thread?
Sometimes, but test first. A different thread weight or construction changes the test condition, so use the same fabric stack and needle you intend to sew with and compare the new sample against the documented baseline.
🔩 Should I adjust the bobbin tension screw too?
Not as part of this normal upper-thread adjustment procedure. Leave the bobbin system at its documented state unless the exact machine manual provides a specific lower-tension procedure for your situation.
🧰 Why does changing the tension dial not fix the stitch?
If threading is incorrect, the tension control may not produce a meaningful correction. If correct threading and a baseline reset still leave persistent looping, nesting, breakage, or an erratic control response, move to troubleshooting instead of continuing to turn the dial.
For any setting that differs from the examples above, the exact model manual remains the authority on the baseline, control direction, and owner-service boundary.
References and sources
Manufacturer documentation is used here only for the model-specific facts that should not be generalized from memory, especially normal settings, threading prerequisites, control direction, and the lower-tension boundary.
- Brother SE700 thread tension guidance: Verifies correct lockstitch balance, threading checks before adjustment, and the documented direction for loosening or tightening upper tension on the listed models.
- Brother standard tension setting: Lists a standard setting of 4 for the named model group, including XM3700 and XR3774.
- Brother basic tension setting: Lists a basic setting of 5 for the named model group and states that bobbin tension is factory adjusted for general use on those models.
These examples demonstrate why the exact model documentation matters. They are not a universal setting table for machines outside the listed Brother model groups.