Sewing velvet is mainly a problem of controlling nap, pile, and layer movement before changing machine settings. The fabric can look like a different color when the nap is reversed, two piled layers can creep against each other, and careless pressure can leave visible marks that ordinary woven fabric would not show. Identify the velvet type, fix visible-piece orientation, test the real layer stack, and treat feet or pressure controls as machine-specific choices. This article stays with normal home-machine handling and routes stretch-dominant behavior, garment construction, accessory fit, and abnormal feeding to their separate decisions.
Velvet Has Direction Before It Has a Seam
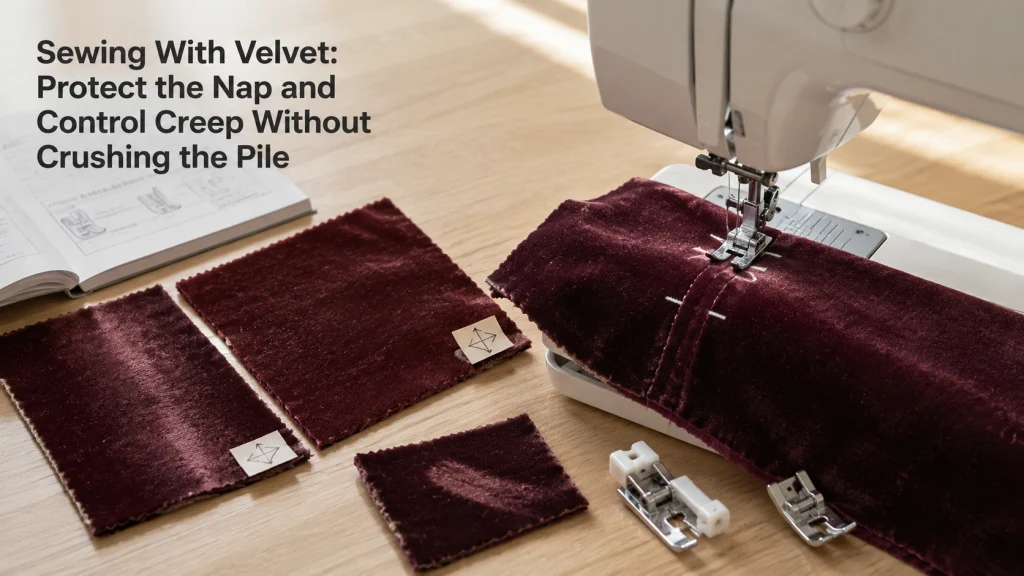
Sewing velvet gets easier when nap direction is treated as a setup decision instead of a detail to fix later. Lay two pieces from the same cut side by side, then rotate one piece 180 degrees and view them from the same angle. The apparent color and sheen can change because the pile is now lying in the opposite direction, even though both pieces came from the same fabric. That visual change is why orientation belongs at the beginning of the workflow, before a seam allowance, foot choice, or pressure setting enters the discussion.
A second issue appears when two piled faces meet and the layers begin to walk in opposite directions under the presser foot. That movement is not identical to ordinary slipperiness because the pile itself can influence how the surfaces interact and how pressure changes the visible finish. A functioning domestic machine may sew a stable test well and still show creep when the actual velvet stack is introduced. Start by controlling the fabric conditions first, then use the broader sewing with different fabrics workflow when another material behavior becomes the dominant problem.
Identify Woven Versus Stretch Velvet and Find the Nap Direction
Before cutting, identify whether the fabric behaves primarily like a woven velvet or whether stretch is a major part of the material response. Gently compare the fabric along the main directions without forcing it, because a velvet with meaningful stretch can bring needle, stitch, and recovery questions that are not controlled by pile alone. Then brush the surface lightly in opposite directions and compare it in consistent lighting. One direction commonly appears darker or richer while the other appears lighter or shinier, which gives you a practical nap reference for layout and testing.
| Nap check | What to compare | Decision |
|---|---|---|
| Brush one way | Color, sheen, resistance | Record the direction |
| Brush the opposite way | Same fabric from the same viewing position | Choose the project orientation |
| Rotate a test piece | Appearance beside an unrotated piece | Confirm visible pieces will match |
Do not assume there is one universally correct direction for every velvet project because the visual preference depends on the fabric and the intended appearance. What matters here is consistency once the project requires visible pieces to read the same way. Mark the chosen direction on the wrong side or on removable planning notes rather than relying on memory after the pieces have been moved around the table. If you are learning how to sew velvet, this one decision prevents a visually reversed piece from being mistaken later for a stitching or pressing problem.
Keep Visible Pieces Oriented Consistently Where the Project Requires It
Velvet pieces that will sit next to each other should be checked as a group before they are separated into different stages of the project. Place the marked nap arrows in the same relationship to the top, bottom, front, or other stable project reference that makes sense for the layout. This is especially important for paired or mirrored pieces because turning a shape to save fabric can also reverse its visible nap. A mirrored shape is not permission to reverse pile direction unless the project intentionally uses that effect.
Keep a marked offcut beside the work area while pieces are moved, stacked, or transferred to the machine. That reference is more reliable than trying to remember which way the surface felt when it was first cut. If two pieces look different, compare their nap orientation before changing tension, stitch settings, or pressing technique. A visual mismatch caused by orientation will not be corrected by a machine adjustment, so solving it at the layout stage prevents a false troubleshooting trail.
Handle and Cut Without Shifting Pile Layers Unnecessarily
Velvet deserves a calmer cutting setup than a fabric that can be folded, dragged, and restacked without changing its surface relationship. Support the fabric so the pile is not being compressed by unnecessary weight, and avoid repeated sliding of one velvet face over another while aligning pieces. When the material creeps during layout, cutting more layers at once can preserve the error rather than save time. A single-layer planning approach can be useful when the specific project layout allows it because each piece can be checked against the nap mark before it is cut.
Keep the cutting decision separate from full garment-construction technique, which belongs elsewhere on the site. This section is about preserving orientation and reducing unnecessary movement before the material reaches the machine. If project instructions require a different layout method, follow them while keeping the chosen nap direction visible and testable. When two piled layers need temporary control, test pins, clips, or basting on scrap and keep any marks inside the seam allowance or another hidden area when the project permits. The goal is for each cut piece to reach the machine with known orientation, stable layers, and no avoidable pile marks.
Separate Generic Slipperiness From Pile Creep
Two fabrics can both shift under a presser foot and still need different reasoning. A smooth satin-like fabric may slide because its surfaces offer little grip, while velvet can move as two pile surfaces press and travel against each other. The visible consequence can also differ because velvet may show crushed or disturbed pile in addition to seam misalignment. That combination is why generic slippery-fabric advice should not automatically become the first response to every velvet problem.
| Observed behavior | Likely controlling factor | Best next check |
|---|---|---|
| Smooth layers slide with no pile | General slipperiness | Use the slippery-fabric workflow |
| Piled faces walk against each other | Pile creep | Test layer control and pressure |
| Surface looks flattened or shiny | Pile compression | Change handling and pressing conditions |
| Machine feed is irregular on a verified test | Possible machine or setup fault | Stop material-only troubleshooting |
Use a small two-layer test to identify what is actually moving before adding another control. Mark matching points across both layers, sew only after the stack is aligned, and check whether one layer advances farther than the other or whether the main problem is surface marking. If a smooth fabric with no pile is the real issue, move to the slippery fabric handling workflow instead of treating it as velvet. If pile direction, pile pressure, or pile-to-pile movement is controlling the result, stay with this velvet-specific path.
Verify Any Velvet, Walking, or Dual-Feed Foot for the Machine You Own
A specialty foot can change how fabric is supported or fed, but its generic name does not prove that it fits a particular sewing machine. Check the machine model, the manufacturer’s accessory list or compatibility chart, the attachment interface, and any operating instructions before mounting a different foot or engaging a feed feature. The same rule applies to built-in or attachable dual-feed systems because their setup and allowed positions are machine-specific. Do not force a shank, holder, lever, feed unit, or raised position that the machine documentation does not describe.
Wrong approach:
Choose a foot because the listing calls it a velvet, walking, or even-feed foot and the attachment looks similar.
Right approach:
Match the machine model to manufacturer compatibility evidence, then follow the documented attachment and operating method.
This distinction matters because velvet tutorials often mention walking feet, roller-style feet, or other feeding aids as though the label alone settles the question. A current Janome velvet-foot page, for example, identifies a specific part number and a limited model compatibility list, which demonstrates why visual similarity is not evidence of fit. That manufacturer page is useful as a compatibility example, not as a recommendation for this project or for another brand of machine. For a broader explanation of interfaces and machine controls, use the machine setup and operation reference before treating an accessory as interchangeable.
Use Presser-Foot Pressure Only as the Machine Documentation Allows
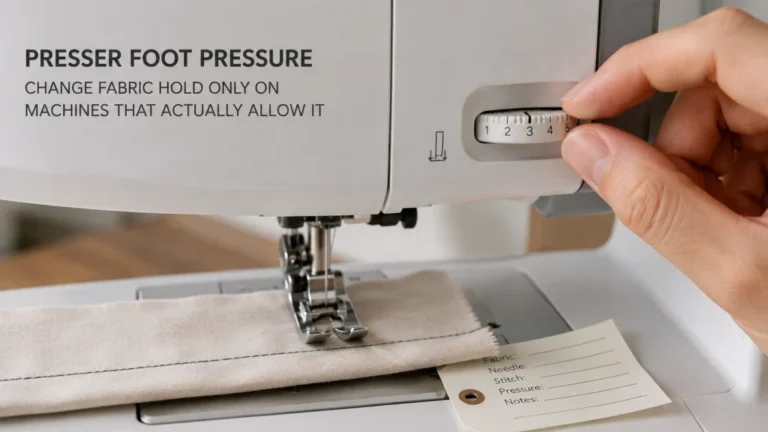
Presser-foot pressure can affect how firmly the fabric stack is held, but not every machine gives the owner the same control over it. Some models provide an adjustment, some automate parts of the process, and others do not offer an owner-adjustable pressure control at all. If the model manual documents a pressure adjustment, change only that owner-accessible control and judge the result on a scrap made from the actual velvet layers. Do not invent a universal number because pile height, backing, layer count, foot geometry, and machine design all change the useful range.
BERNINA’s velvet education discusses reducing presser-foot pressure as one possible way to help velvet feed, but that advice still depends on a machine that supports the adjustment and on a test that does not damage the pile. The useful question is whether that model allows the change and whether the test stack feeds more evenly afterward. If a pressure change increases shifting, leaves marks, or creates unstable feeding, return to the documented baseline and reassess the fabric stack. A setting should earn its place by improving the actual test, not by appearing in a generic list of velvet tips.
Protect the Pile From Crushing During Machine Handling and Pressing
Velvet can record pressure in ways that ordinary flat woven fabric does not, so machine handling and pressing should be judged by the surface left behind. Avoid resting heavy objects on the right side, dragging the fabric under tools, or pressing a velvet face against a hard flat surface without first checking the material’s care guidance. BERNINA’s velvet education specifically warns that heat, moisture, and pressure can mark the pile, which is enough reason to test before applying any pressing method to the project. Fiber content, pile construction, finish, and manufacturer care instructions can all change what the fabric tolerates.
- Check the velvet’s care guidance before heat, steam, or moisture.
- Test the right side, wrong side, and seam area on a scrap before the project.
- Judge the test in the lighting used for the nap check.
- Watch for flattened pile, shine, color shift, water marking, or distortion.
- Stop using a method that leaves a visible change the pile does not recover from.
Make a small test that reproduces the real contact the fabric will experience at the machine and at the pressing area. Compare the untouched surface with the handled sample from the same viewing angle, then look for flattened tracks, shine changes, crushed patches, or a nap that no longer recovers normally. If the test changes the appearance, reduce unnecessary pressure and use a pile-safe support or pressing method that suits that fabric rather than improvising on the finished piece. Pressing is successful only when it achieves the needed shaping or seam treatment without leaving a surface change that the project cannot accept.
Test Two or More Actual Layers Before the Project
A single strip under the presser foot does not reproduce the condition that causes most velvet creep questions. Build the test from the same velvet, the same number of layers, the same nap relationship, and any other material that will actually be present at that stage of the project. Use only a needle, foot, thread path, and machine setting already verified for the machine and material being tested. Then mark alignment points across the layers so movement can be seen instead of guessed from the final seam.
After sewing the sample, check more than whether the stitches formed. Look at whether the top and bottom layers finish at the same reference marks, whether the pile is flattened under the foot path, whether the backing ripples, and whether the machine feeds the stack without abnormal resistance. If one change improves alignment but worsens surface damage, the setup is not yet a good trade. Velvet testing works best as a controlled comparison in which one documented variable changes at a time and the same physical outcomes are checked after each run.
Change Direction When Stretch Behavior Dominates the Velvet
Stretch velvet still has pile, but the fabric may behave more like a knit when stretch and recovery control the sewing result. If the main problem is seam stretch, recovery, skipped stitches linked to elastic material behavior, or distortion caused by the fabric extending under handling, pile-only troubleshooting is no longer enough. Keep the nap orientation work from this article, because the visible direction still matters, but treat the stretch system as a separate technical decision. That may change the verified needle system, stitch choice, support method, or test conditions depending on the machine and fabric.
The boundary becomes clearer when you ask what makes the sample fail. If the layers stay aligned but the seam cannot move with the fabric, stretch behavior is controlling the problem. If the seam can stretch appropriately but the two velvet faces walk past each other or the pile is crushed, the velvet-specific workflow remains central. Do not solve a stretch failure by repeatedly lowering pressure or adding a feeding accessory when the evidence points to the needle, stitch, or recovery behavior instead.
Keep Seams, Zippers, and Buttonholes in the Construction Workflow
This article stops before seam-type selection, zipper installation, buttonhole construction, facings, hems, and other project-building decisions. Velvet handling affects those operations, but each one adds geometry, stabilization, opening behavior, or finishing choices that deserve their own construction logic. The useful preparation here is to deliver oriented, undamaged pieces and a tested machine setup to that later stage. Once that condition is met, the project can move forward without turning material handling into a substitute for construction instruction.
Keeping the boundary clear also prevents a successful two-layer test from being treated as proof that every seam detail will behave the same way. A zipper area may add tape and extra layers, while a buttonhole can introduce dense stitching and stabilization that the basic test never reproduced. Build a new representative sample when the layer stack or operation changes materially, then apply the relevant construction method separately. The velvet workflow supplies the fabric conditions; it does not decide every seam or closure for the project.
Stop if Feeding Remains Abnormal or the Setup Damages the Pile
Velvet should not be used to explain away a machine that is feeding abnormally under a verified owner-level setup. Stop the test if the fabric stalls repeatedly, the needle deflects hard, the handwheel becomes difficult to turn, the machine makes abnormal mechanical noise, or the pile is being visibly damaged by a setup that should be ordinary for the model. Remove power before any owner-accessible needle, presser-foot, bobbin-area, or needle-plate work whenever the model manual requires it. Do not force the handwheel, feed mechanism, foot system, pressure control, or any undocumented screw in an attempt to push the velvet through.
Separate a material limit from a fault by returning to a documented baseline and testing conditions the machine is known to handle normally. If ordinary supported fabric also feeds incorrectly, or the machine shows a hard mechanical lock, repeated hard needle strikes, overheating, smoke, burning odor, sparks, exposed wiring, or visible broken internal parts, stop owner troubleshooting and use qualified service. If only the velvet stack fails, narrow the test to layer count, pile interaction, verified accessory setup, and documented machine limits rather than assuming an internal defect. The next move should follow the evidence from the test, not the frustration created by a difficult fabric.
Final Thoughts: Control Nap and Pile Before Chasing Settings
Velvet is easier to reason about when the fabric is stabilized conceptually before the machine is adjusted. Identify the material type, mark the nap, keep visible pieces oriented consistently, and test the real pile-to-pile stack before changing a documented control. A straight seam is not the only pass condition because the pile also needs to remain visually acceptable and the machine needs to feed normally. That sequence turns a vague complaint about difficult fabric into a small set of observable decisions.
If long pile and a distinct backing become the main issue instead, use the faux fur pile and backing workflow rather than carrying velvet assumptions into a different material. If the fabric is smooth and slippery without pile, move to the slippery-fabric path instead. Keep accessory fit, stretch behavior, construction details, and machine faults in their own decision tracks so one problem does not contaminate another. The practical finish line is not a universal setting; it is a repeatable sample with consistent nap, controlled layers, undamaged pile, and normal machine behavior.
FAQs
Velvet questions often sound like setting questions even when the first useful check is the fabric itself. The nap may be reversed, the two piled faces may be creeping, or the surface may be showing pressure that would be invisible on a flat woven. A good answer therefore starts by identifying the condition that is actually failing. The questions below keep those decisions separate so a material problem does not become an unnecessary machine adjustment.
Use the answers as a triage step rather than as universal settings for every velvet and machine. Exact controls depend on the machine model, while heat and pressing tolerance depend on the actual fabric and its care guidance. Any specialty foot or feed system still requires model-specific compatibility evidence. If the machine itself stops feeding normally, leave the material workflow and troubleshoot the machine condition instead.
🧭 How do I know which way the nap should run on velvet?
Brush and rotate a sample in steady lighting, then choose the appearance the project requires and mark that direction on the wrong side. There is no single universal direction that every velvet project must use. The important part is keeping visible pieces consistent once the direction is chosen.
🧵 Why do my two velvet layers creep while I sew?
The pile surfaces can move against each other as the stack is handled and fed, so the problem is not always ordinary slipperiness. Mark matching points on a two-layer scrap and watch which layer advances. Change only documented setup variables and judge both alignment and pile condition after the test.
🦶 Do I need a walking foot to sew velvet?
Not automatically. A walking, dual-feed, roller-style, or velvet foot must first be confirmed for that machine model, and a compatible accessory still does not guarantee that every velvet stack will feed perfectly. Test the verified setup against the machine’s documented standard setup.
⚙️ Should I lower presser-foot pressure for velvet?
Only if the machine provides a documented pressure control. Test a small change on the real velvet stack and check layer alignment, feeding, and surface marking. Do not copy a universal pressure number from another machine.
♨️ Can I press velvet with an iron?
Follow the care guidance for that velvet and test first because heat, moisture, and pressure can change or crush the pile. Avoid assuming that a method safe for one fiber or finish is safe for another. Judge the test under consistent light before using the method on the project.
🧶 What if my velvet stretches a lot while I sew?
Keep the nap-direction controls, but treat stretch and recovery as a separate fabric-system problem when they dominate the result. That can change the verified needle, stitch, and test conditions. Do not try to solve a stretch failure only by changing pressure or adding a feeding accessory.
References and Sources
The published claims in this article rely on material-specific education and manufacturer compatibility evidence rather than a universal velvet formula. BERNINA’s velvet education supports the distinctions around nap, creep, surface marking, and the need to test pressure changes against the actual material. Janome’s accessory page is used only to demonstrate that a specialty velvet foot can have a specific part number and a limited compatibility list. Neither source is used to claim that one foot, pressure setting, needle, or pressing method is correct for every machine or velvet.
These sources are intentionally narrow because broader construction, product selection, and repair topics are outside this article’s job. Model-specific controls still belong to the exact sewing-machine manual, and fabric care still belongs to the specific velvet’s care information. Community discussions were useful for identifying common wording around creep and crushing, but they are not used here as technical proof. That keeps the evidence tied to the decisions the reader can actually verify at the machine and on a scrap.
- BERNINA WeAllSew velvet tips: Supports nap direction, pile sensitivity, creep, careful layer holding, and testing pressure and handling on velvet.
- Janome velvet-foot compatibility page: Demonstrates that a specialty velvet foot can be tied to a specific part number and listed machine compatibility.