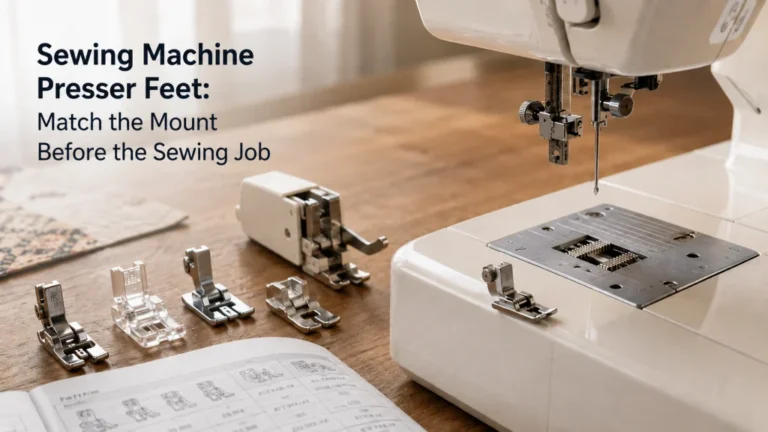
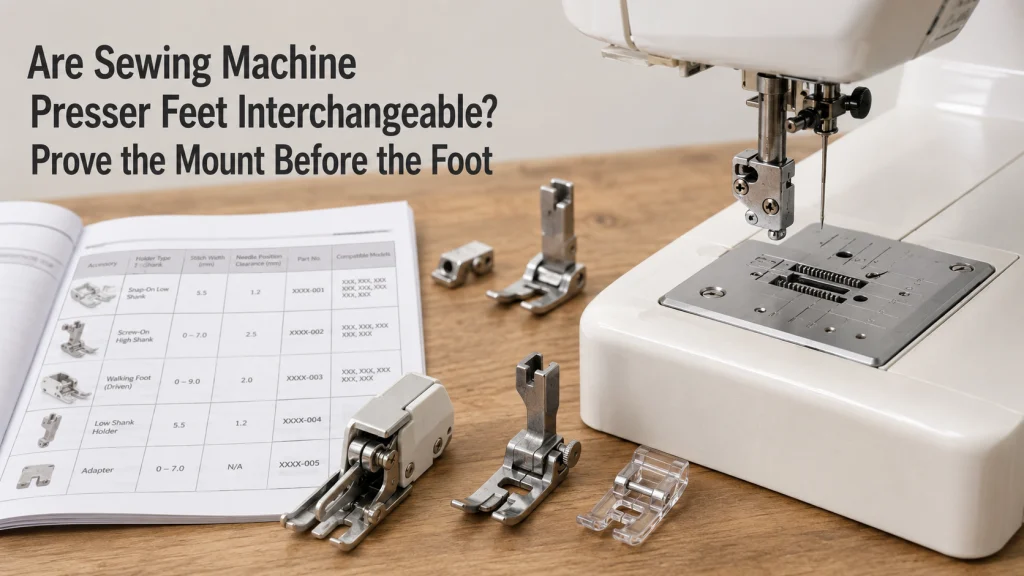
Presser feet can be interchangeable across some domestic sewing machines, but a shared job name, similar shape, or “universal” listing is not enough to prove fit. The useful test starts with the exact machine, then checks how the foot attaches, which shank or holder system the machine uses, how much needle movement the foot permits, and whether the manufacturer lists the model or accessory family. Snap-on and screw-on parts can belong to different compatibility chains even when they are sold for the same sewing task. By the end, you should be able to classify a candidate foot as documented compatible, documented incompatible, or still unknown before you buy or attach it.
Start With the Machine, Not the Word Universal
Are sewing machine presser feet interchangeable? Sometimes, but the answer only becomes useful after the machine is identified and the mounting assumptions are separated. Imagine three listings that all use the word “universal”: one is a snap-on sole, one is a complete screw-on foot, and one is an attachment that replaces the normal holder. Those three parts may perform ordinary domestic sewing jobs, yet they do not connect to the machine in the same way.
The broad presser-foot compatibility framework starts with the physical interface before the sewing job. A zipper foot and an all-purpose foot can share a mounting family, while two feet with the same job name can require different holders or shank arrangements. That is why “universal” needs a boundary such as a named machine family, mount type, or manufacturer compatibility list. If the listing supplies none of those boundaries, treat the fit claim as incomplete rather than convenient shorthand.
| Evidence level | What it tells you | How to use it |
|---|---|---|
| Foot purpose or appearance | What the accessory is intended to do | Use only to identify the job, not fit |
| Mount and holder description | How the part is expected to attach | Compare with the exact machine |
| Shank or accessory family | Which mechanical family may accept it | Narrow the candidate list |
| Stitch-width and needle-clearance information | Whether the needle path can remain inside the opening | Confirm against the machine documentation |
| Manufacturer model list or part number | Named compatibility evidence | Use as the strongest purchase proof |
The evidence ladder prevents a familiar shape from becoming the final answer. Appearance can start the check, but it cannot finish it. Evidence becomes stronger as it reaches the exact machine and accessory identity. That order keeps marketplace wording below model-specific documentation.
Record the Exact Make and Model Before Comparing Feet
The model number is the first compatibility field because one brand can use several accessory systems across its domestic machines. A machine page may identify snap-on feet, a low-shank accessory family, a maximum stitch width, or a specific list of compatible attachments. Another machine from the same manufacturer can use a different width family, holder, or feed system. Brand recognition narrows the search, but model identification turns it into a checkable question.
Write down the model exactly as it appears on the machine label or manual instead of relying on a family nickname. Then record the existing holder, the way the current foot attaches, the stated maximum stitch width, and any accessory group named by the manufacturer. The broader sewing machine accessory compatibility process uses the same principle because machine-interface parts need model-level evidence. If the model cannot be confirmed, the safest result is “unknown” until the identity can be established from reliable documentation.
Separate Snap-On Feet From Screw-On Attachments
A snap-on foot is normally a removable sole that clips to a holder already attached to the presser bar. A screw-on foot or attachment may replace that holder and connect more directly to the presser bar or another mounting point. The two descriptions answer different questions, so a machine that accepts snap-on soles does not automatically accept every screw-on attachment sold for a similar job. You need to know which component stays on the machine and which component the new accessory replaces.
This distinction matters most when listings use “foot” for both a small snap-on sole and a complete mechanical attachment. A screw-on walking-style attachment, for example, has more geometry to match than a simple snap-on utility sole. Conversely, two snap-on soles can still differ in the bar, holder, width family, or needle opening they expect. Treat “snap-on” and “screw-on” as attachment descriptions, not universal compatibility classes.
The practical question is therefore not which attachment style is better. It is whether the candidate part connects to the exact hardware already documented for the machine. Once that is known, the sewing job becomes relevant because you can compare compatible candidates within the correct mounting family. Without that first match, the job name is only a label.
Identify the Shank or Holder System as a Separate Gate
Shank language describes part of the mounting geometry, while a presser-foot holder is the intermediate part that may carry a snap-on sole. Those ideas overlap, but they are not interchangeable terms. A low-shank machine can still require a particular holder shape, snap-on bar, accessory family, or width classification before a foot belongs on it. The machine manual or official accessory list should tell you which description actually controls the fit.
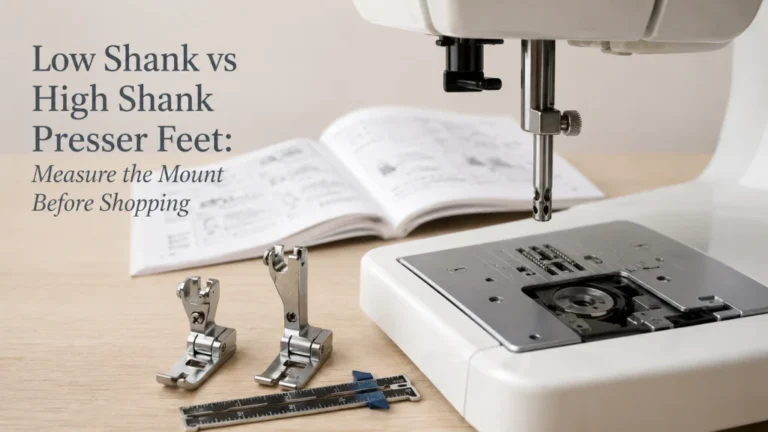
If you are unsure whether the machine is low shank, high shank, slant shank, or another arrangement, do not guess from a product photo. Use the dedicated low-shank and high-shank presser-foot check when shank height is the unresolved part of the purchase. Once the shank family is known, return to the holder, foot geometry, and model list instead of treating shank height as the final answer. A correct shank category is useful evidence, but it is only one gate in the chain.
- Exact machine make and model
- Existing holder or ankle type
- Snap-on sole versus complete screw-on attachment
- Shank or manufacturer accessory family
- Maximum stitch width and allowed needle positions
- Exact manufacturer part number or model list when available
Mount terms: Shank describes the presser-bar mounting geometry, while the holder or ankle is the intermediate part that carries some snap-on soles. Snap-on describes how the sole connects to that holder, while screw-on describes an attachment that fastens through mounting hardware. A driven-feed interface adds another machine-side connection beyond ordinary holder fit. Keeping those terms separate prevents one familiar label from standing in for the whole compatibility chain.
This checklist is short because each field should be verifiable before another compatibility claim is added. A missing field does not automatically mean the foot is incompatible. It means the next step is to resolve that part of the interface. That is stronger evidence than assuming the most common domestic arrangement applies.
Check Stitch Width and Needle-Position Clearance
A foot can mount correctly and still be wrong for the machine’s available needle movement. The needle opening has to accommodate the stitch width and needle positions that the machine may use with that foot. A narrow opening paired with a wider zigzag family creates a different risk from a mounting mismatch because the foot may appear installed correctly until the needle path changes. This is why mount fit and needle clearance need separate entries in the compatibility check.
Manufacturer pages can make this distinction visible by tying an accessory family to a stated stitch-width range or a named machine group. One Janome domestic model page, for example, identifies snap-on feet, a 5 mm maximum stitch width, and a low-shank accessory family rather than leaving the accessory question at “snap-on.” That combination shows why the mount label alone is too coarse for presser foot compatibility. The foot opening adds another physical limit that has to match the machine’s permitted movement. The usable opening and the machine’s documented needle movement still have to agree.
Warning: Do not use powered stitching as a compatibility test when needle clearance is uncertain. A foot that attaches normally can still place metal inside a permitted needle path. Check the documented stitch and needle-position limits before operation. If the manual or accessory documentation does not establish the permitted combination, keep the result unresolved rather than risking needle-to-foot contact.
Clearance is also stitch-specific, so one safe center-needle position does not authorize every zigzag width or shifted needle position. A straight-stitch-only opening is an obvious example, but specialty feet can impose less visible limits too. Record the allowed stitch or position only when the documentation actually supplies it. If the foot’s opening or permitted movement is unclear, stop the compatibility decision there.
Treat Driven-Feed and Proprietary Systems as Their Own Boundary
Some attachments do more than rest on the fabric, so their connection requirements extend beyond an ordinary holder. A driven-feed foot may need a mechanical link, dedicated fork, proprietary connection, or machine-specific feed interface. An accessory that looks like a normal presser foot can therefore belong to a system that an otherwise similar low-shank machine cannot operate. The machine’s feed architecture controls this question, not the visual similarity of the sole.
Manufacturer accessory catalogs show this separation by organizing certain feet around dedicated feed systems or accessory groups rather than a generic domestic mount. Stop applying ordinary snap-on assumptions once a foot depends on synchronized movement or another machine-side feature. A proprietary holder can also change how the foot aligns with the needle and feed dogs. Compatibility must include the system connection, not merely whether a screw hole lines up.
Names such as walking foot, dual feed, or integrated feed describe a function more readily than a shared interface. A similarly named system from another brand may use different drive geometry, alignment points, or mounting hardware. Even within one brand, a later machine generation may place a familiar function inside a different accessory family. Treat the system name as a routing clue, then verify the exact machine-side connection separately.
Use Manufacturer Model Lists and Part Numbers as the Purchase Proof
Once the physical mount looks plausible, the strongest next evidence is a manufacturer model list, accessory finder, manual, or exact part number tied to the machine. These sources can reveal exclusions that a broad term such as “low shank” hides. A manufacturer may describe one accessory as fitting most machines in a family while another foot with the same job name lists specific series or requires an additional holder. The difference is exactly why a generic compatibility label should not replace the model list.
Record the candidate part number beside the machine model and note where the match was found. If the manufacturer provides several versions of the same foot purpose, do not assume the cheapest or most familiar version is the one intended for your machine. Matching the part number to the model list also makes later replacement easier because you know which identity was actually verified. This is the point where “looks right” becomes a documented purchase decision.
Note: Manufacturer pages can pair broad low-shank language with narrower model-series or adapter requirements on other foot pages. The same sewing job can therefore appear under different compatibility descriptions. Read a broad family label together with the exact accessory page. This is why “universal” needs a documented machine boundary.
A retailer listing can still be useful when it reproduces the exact manufacturer part number and compatibility scope. It should not become the sole technical authority when the manufacturer provides a more specific model list or accessory finder. If the two descriptions conflict, resolve the conflict before buying instead of averaging the claims. Compatibility is a yes, no, or unknown decision, not a popularity vote.
When Shank Height Is the Open Question, Solve That First
Sometimes the only unresolved field is whether the machine uses a low, high, slant, or other shank arrangement. That is a narrower question than general interchangeability because it focuses on the presser-bar geometry rather than the full accessory chain. Solving it can eliminate whole groups of incompatible feet before you spend time comparing job names or listings. It still does not settle holder shape, needle clearance, or model-list evidence by itself.
Use the machine documentation or a manufacturer-specific measurement method whenever one is available. If the result identifies the machine as low shank, bring that result back into the checklist instead of treating “low shank” as a shopping pass. Older or less common machines can use a familiar-looking holder with a different attachment assumption. The goal is to reduce uncertainty one field at a time.
Machine generation can matter even when the brand name stays the same. An older mechanical model and a newer computerized model may belong to different holder or accessory families. Do not substitute a current accessory chart for an older machine’s own documentation unless the manufacturer explicitly includes that model. The exact model number is more useful compatibility evidence than brand continuity.
Use an Adapter Only When the Adapter Itself Is Documented
An adapter can change the attachment interface, but it cannot erase the other compatibility requirements. The adapter has to fit the machine first, and the intended foot then has to fit the adapter with the required alignment and clearance. A generic ankle or holder sold as a converter is therefore another machine-interface component that needs its own evidence. Adding one unknown part to another unknown part does not create a verified system.
When an adapter appears necessary, move to the dedicated presser-foot adapter compatibility check instead of improvising the connection. Confirm the adapter part number or exact machine list, then verify which feet that adapter is intended to carry. Do not modify the holder, enlarge an opening, stack improvised spacers, or force a screw because the accessory seems nearly aligned. A documented adapter expands a known system; an undocumented adapter only moves the uncertainty to a different joint.
Treat Walking-Foot Fit as a Separate Compatibility Question
A removable walking-style attachment illustrates why a specialty foot can need more checks than an ordinary snap-on sole. It may replace the standard holder, engage with the needle-bar area, or use a moving arm that has to clear nearby hardware. A machine being low shank can narrow the candidates, but the attachment geometry still has to match the exact model or documented accessory family. The sewing job explains why you want the foot, while the machine-side geometry decides whether that particular attachment belongs there.
Keep this section at the fit level rather than turning it into a technique lesson. Questions about how to sew multiple layers, how to set stitch length, or how fast to run the machine belong to use guidance after compatibility has been established. The same boundary applies to free-motion, buttonhole, zipper, and other specialty feet: first prove the interface, then learn the technique. That order keeps a useful accessory idea from becoming an unsafe mounting experiment.
Mark Undocumented Fit as Unknown Instead of Guessing
The hardest compatibility result is often not “no” but “not documented.” A foot can look right, share a brand, clip onto a holder, and still lack evidence for the exact machine. Partial evidence can narrow the search without completing it. That state should remain unknown until the missing field is resolved through a manual, accessory finder, part-number list, or manufacturer support channel. The absence of a warning is not the same as a positive compatibility statement.
This rule is especially useful for used machines, discontinued accessories, mixed-brand foot sets, and listings that use broad language without a model list. You can still record what is known, such as snap-on style or shank family, while leaving needle clearance or holder compatibility unresolved. A disciplined unknown result prevents a partial match from being mistaken for proof. It also tells you exactly what information must be found before the purchase can move forward.
Key point: If the exact machine-to-foot connection cannot be documented, classify the result as unknown. Keep the verified fields in your notes so you know what remains unresolved. Do not convert a partial match into permission to operate the machine. Do not force the foot, improvise the holder, or use powered needle movement to discover whether the opening clears.
That stop rule is not overly cautious; it is simply the logical end of the evidence ladder. Every compatibility claim should be traceable to a machine identity and an attachment identity. When one of those identities is missing, there is no reliable pair to compare. A clear unknown is more useful than a confident guess because it preserves the next question you actually need to answer.
Final Thoughts: Foot Purpose Never Proves Mount Compatibility
Presser feet become easier to compare once job name and machine fit are treated as separate decisions. Start with the exact model, identify the attachment style and holder, resolve the shank family, then check stitch width, needle clearance, and any driven-feed requirement. Finish with the manufacturer model list or part number whenever that evidence exists. If one gate remains undocumented, keep the answer at unknown instead of letting “universal” close the gap.
This process also tells you where to go next without turning every foot question into one oversized article. When shank height is the unresolved variable, solve that geometry first; when a documented adapter is necessary, verify the adapter as its own machine-interface part. Once compatibility is established, the specific sewing technique can be handled separately from the purchase decision. The useful order is machine first, mount second, foot purpose third.
FAQs
Presser-foot questions often sound simple because the parts are small and many listings use the same few attachment words. The practical answer changes when the exact machine, holder, shank, stitch width, or accessory family changes. A short yes or no is useful only when those boundaries are already known. The questions below keep the same compatibility-first rule without turning into installation or sewing-technique instructions.
Use the answers as a screening step before buying or attaching a foot. If your machine manual or manufacturer accessory list is more specific, follow that model-specific information instead of a general rule. Do not force a foot that does not seat normally, and do not use powered stitching to investigate uncertain needle clearance. When documentation is missing, keep the result unresolved until the machine and accessory identities can be matched.
🦶 Are sewing machine presser feet universal?
No, not in an unlimited sense. Some feet can cross compatible domestic machine families, but the mount, holder, shank, needle clearance, and model list still control the fit.
🧵 Do all presser feet fit all sewing machines?
No. Two machines can use different holders, shank arrangements, stitch-width families, or driven-feed systems even when the feet have similar names.
🔩 Can a snap-on foot fit any snap-on sewing machine?
Not automatically. The holder geometry, snap-on bar, width family, needle opening, and manufacturer compatibility scope still need to match.
📏 Is low shank enough to prove a presser foot will fit?
No. Low shank narrows the mounting family, but it does not by itself verify the holder, stitch-width clearance, needle positions, or exact model list.
🧩 Can an adapter make any presser foot compatible?
No. The adapter must be documented for the machine, and the foot must then be documented for that adapter with the required alignment and clearance.
📖 What should I do if my machine is missing from a compatibility list?
Treat the fit as unknown unless another official manual, accessory finder, part-number list, or manufacturer support source confirms it. A similar model name is not enough evidence.
References and Sources
Presser-foot fit is a machine-interface question, so the references below focus on manufacturer compatibility material. They show how low-shank scope, snap-on feet, stitch-width families, model lists, and holder requirements are described. The sources support the checking method rather than a product recommendation. General marketplace wording does not override model-specific fit information.
A broad mounting label cannot settle every machine. Low-shank language can coexist with a narrower model list or an added holder requirement. That variation is why the exact model and part identity carry more weight. Current model documentation should control the final decision.
- Singer presser-foot compatibility page: shows broad low-shank compatibility language while directing owners to confirm their machine system.
- Singer model-series fit example: shows a foot page with named machine series and an additional holder requirement for some models.
- Janome domestic machine specifications: identifies snap-on feet, maximum stitch width, and the accessory family for one domestic model.
- Janome presser-foot catalog: shows separate presser-foot families and system-specific accessories rather than one universal attachment class.
These references are limited to material that supports the fit hierarchy used here. A shared mounting term still does not establish that every accessory in that family fits every machine. Resolve a specific purchase with the model page, manual, accessory finder, or exact part listing. That keeps the evidence tied to the actual machine-accessory pair.