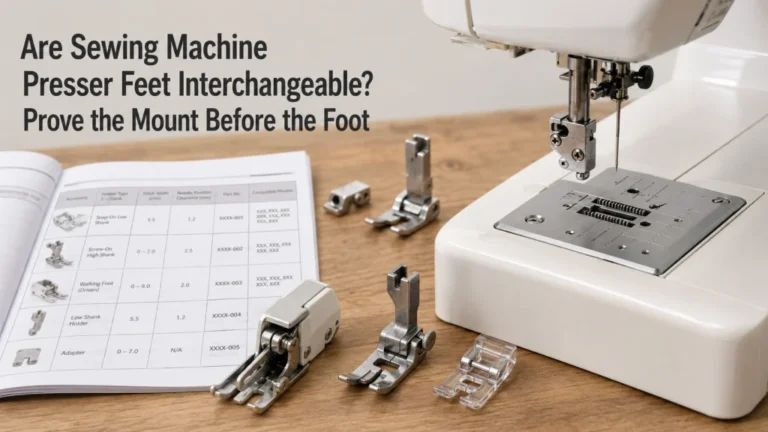
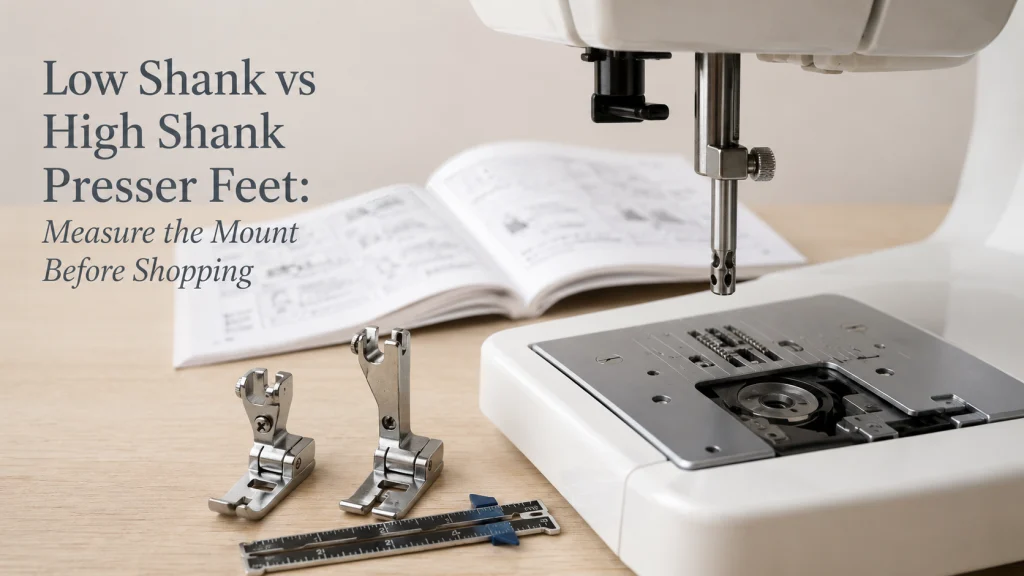
Low shank and high shank describe the height relationship between a sewing machine’s presser bar and the foot or holder that mounts to it. Start by identifying the complete machine model and checking the manufacturer’s fit information, then reach for a ruler only if those materials do not classify the mount clearly. Snap-on and screw-on refer to a different part of the attachment system, so neither label proves shank height. The goal is to separate these terms, recognize exceptions, and know which fit checks matter before shopping.
Same Foot Job, Different Mounting Height
Identifying low shank vs high shank presser feet matters when two accessories perform the same sewing job but connect to the machine at different heights. An adjustable zipper foot is a useful example because the working end can look nearly identical across separate mounting families. Matching the sewing task is only the first filter, not proof that the foot belongs on the machine. The complete model number, presser-foot system, and the maker’s stated fit list give the comparison a firmer basis than appearance alone.
This distinction matters before the foot ever reaches the needle plate. A first-time owner may see two feet described for zippers, quilting, or another familiar task and assume the version with the right working shape should fit. In reality, the mounting geometry can differ even when the function is nearly identical, which is why manufacturer listings often separate accessory families. This article stays focused on identifying that mounting family before purchase, not on detailed installation technique or specialist industrial presser systems.
High Shank vs Low Shank Presser Feet Are Not Snap-On vs Screw-On
Shank height and foot attachment style answer two different compatibility questions. Shank height concerns where a directly mounted foot or holder connects to the presser bar, while snap-on or screw-on describes how a particular foot or holder is retained. A low shank presser foot can be a direct screw-on design, and a low-shank machine can also use a holder that accepts snap-on soles. Treating “snap-on” as a synonym for “low shank” can therefore send the search in the wrong direction.
The same separation matters on machines that use high-shank systems. A manufacturer may describe a machine as high shank while also listing snap-on presser feet among its normal features, because the snap-on sole can attach to a holder that belongs to the high-shank system. The useful question is not simply whether the visible foot clips on, but what mounting family the machine and holder belong to. For a broader explanation of the interfaces involved, check whether presser feet are interchangeable before treating any generic fit claim as proof.
The distinction is easy to miss because online listings often stack several labels beside one accessory. Read each label as a separate fit filter instead of treating them as different names for the same feature. Once shank family and attachment style are separated, you can evaluate holder type, needle clearance, and other interface details without mixing the questions together. From there, the machine’s own manual or accessory chart is more useful than another product photo.
Identify the Exact Machine Before Comparing Feet
Begin with the full sewing-machine model number, then look for its manual, model page, accessory chart, or official fit list. Janome’s HD-1000 materials place the machine in a low-shank accessory family, while the Skyline S3 is associated with a high-shank family. Both are domestic sewing machines, which shows why a brand-wide or machine-type assumption can fail. The manufacturer’s own classification gives you the correct branch of the search before you compare individual feet.
Buying by brand alone skips too many variables. One manufacturer can use different hook systems, stitch widths, feed arrangements, holders, and shank families across its domestic lineup, and any of those differences can change what fits. Copy the complete model number from the machine label and compare it with the fit information for the foot or attachment you are considering. If the question extends beyond presser feet, verify sewing machine accessory compatibility using the same model-level approach.
- Write down the complete machine model number, including meaningful letters or suffixes.
- Check the manufacturer model page, manual, accessory chart, or support information for the presser-foot system.
- Check the desired accessory’s exact compatibility list or stated machine family.
- Confirm shank family separately from snap-on, screw-on, stitch-width, and feed-system requirements.
- Use measurement only when the manufacturer information does not answer the identification question.
This checklist takes a little longer than matching a photo, but it removes several weak assumptions in one pass. It also gives you something concrete to compare when two retailer descriptions disagree. If the maker already names the machine family and the supported accessory family, a rough ruler reading should not displace that information. Measuring becomes useful when the official materials leave the mount unclear or the machine cannot be identified another way.
Use Measurement Only as a Secondary Identification Check
Measurement is useful for narrowing an unknown mount, not for creating a universal fit formula. Brands, generations, holder designs, and measuring diagrams can use different reference points, so a number copied from a generic chart may not line up with the method intended for your machine. If the manufacturer already identifies the model as low shank or high shank, treat the ruler as a cross-check rather than a competing answer. Measure when the machine information is missing, incomplete, or unclear about the presser-foot family.
Before measuring, power the machine off and use clearly defined reference points for that system. The total height of a loose foot on the table tells you very little because it ignores the holder, mounting screw, presser bar, and lowered position. If no machine-specific measuring method is available, write down exactly where the ruler started and ended so later comparisons use the same points. Treat the result as a clue that narrows the family, not as permission to ignore a direct fit listing.
Warning: Do not lower the presser bar onto an unverified foot to see whether it “looks right.” Do not run the machine under power to test needle clearance with an accessory whose fit has not been established. A foot that sits at the wrong height or places metal in the needle path can create a hard strike. Keep the machine powered off while checking an uncertain mount. Stop before powered testing and return to the machine manual and the accessory fit list.
Older or inherited machines deserve extra caution because the installed holder may not be original. A previous owner may have added an adapter, changed the ankle, or stored unrelated feet in the same accessory box, so nearby parts do not automatically reveal the factory setup. A known model number plus a repeatable measuring method is more useful than the contents of a mixed parts drawer. Once the mounting family is reasonably identified, you can compare only the relevant accessory family instead of measuring every candidate on the table.
Identify Low-Shank Accessory Families Without Assuming Universal Fit
A low shank presser foot clears only one compatibility gate: the mounting family. Janome’s MOD-50 and HD-1000 information places both machines in low-shank accessory groups while still distinguishing other machine details and supported accessories. Those details matter because a foot has to do more than reach the mounting screw. Its needle opening, sole geometry, holder relationship, and any moving mechanism still have to line up with the machine.
Think of “low shank” as a gate that narrows the catalog, not a stamp that approves everything behind it. A direct-mount quilting foot, a snap-on utility sole, and an even-feed attachment can all meet the same low-shank machine at different interfaces, and some require a particular holder or machine group. After confirming the machine’s family, compare the exact foot’s supported models and connection requirements. A generic low-shank label can put an accessory in the right neighborhood while still leaving the final fit unresolved.
| Evidence | What it can establish | What it cannot establish alone |
|---|---|---|
| Exact machine manual or model page | Manufacturer-stated shank or accessory family for that model | Fit of an accessory that is not listed or otherwise verified |
| Exact accessory compatibility list | Models or machine families the manufacturer supports | Compatibility with visually similar unlisted machines |
| Shank-height measurement | A secondary clue when model information is missing | Holder style, needle clearance, feed-system fit, or full compatibility |
| Snap-on or screw-on label | How the foot or holder attaches at one interface | The machine’s shank family by itself |
Use the table as an evidence hierarchy rather than a shopping shortcut. The upper rows can tie the answer to a named machine, while the lower rows solve only part of the fit question. If two sources conflict, do not average them into a guess or choose the one with the easier answer. Recheck the model number, source, and interface until the disagreement has a clear reason.
Identify High-Shank Accessory Families the Same Way
A high shank presser foot creates a different branch of the same fit problem. Janome places the Skyline S3 in a high-shank accessory family, and its free-motion quilting foot information separates high-shank and low-shank versions by machine group. That comparison is useful because the sewing purpose stays the same while the mount changes. Terms such as “free-motion” or “quilting” describe the job, not which version belongs on the machine.
The term high shank is not another word for industrial. Some domestic machines use high-shank systems, while specialist machines can have mounting arrangements that fall outside a simple domestic low-versus-high comparison. Machine type alone therefore cannot identify the shank. Use the maker’s model information to place the machine in the correct family, then keep any feed-system or holder requirements in the fit check.
Consider two free-motion feet that look almost identical from below. One version can be assigned to low-shank models and another to high-shank models, so the visible quilting opening does not settle the choice. The useful comparison is between the machine family and the maker’s supported model list, not between two similar package photos. A marketplace heading that simply says “high shank” still needs that model-level match.
Treat Slant and Proprietary Mounts as Separate Exceptions
Not every sewing machine belongs neatly in a low-shank or high-shank decision. Some older machines use slant-style arrangements, some brands use proprietary holders, and some specialist systems have attachment geometry that should be identified on its own terms. If the presser bar, mounting screw, holder, or foot sits at an unusual angle, stop trying to force it into a familiar category by appearance. The model number, original manual, and parts information become the better route from that point.
Online community discussions are useful here because they reveal how these exceptions are encountered in real ownership. People describe inherited machines, mixed accessory boxes, unlabeled feet, and attempted conversions between mounting families, all of which explain why a simple visual label can fail. A forum photo may suggest what to inspect next, but it cannot settle fit without a matching machine and accessory reference. Use the discussion to frame the question, then verify the hardware through a stronger source.
The same boundary applies to specialist industrial presser systems, which sit outside this domestic low-versus-high identification problem. A machine can have a tall-looking mount and still require a dedicated foot that is not equivalent to a standard high-shank domestic accessory. Do not use a domestic shank label as a reason to convert or modify that system. When the mount falls outside the common domestic families, use the exact manual, parts list, or a qualified service source for that machine.
Consider an Adapter Only After the Mounting Family Is Known
An adapter is not the first answer to a shank-height mismatch. Before considering one, identify the machine, its native mounting family, the installed holder, and the connection required by the desired foot. An adapter may bridge one interface while leaving needle clearance, stitch-width clearance, moving-arm engagement, feed behavior, or operating geometry unresolved. A label such as “high to low” or “universal” therefore describes a proposed connection, not proof that the whole combination is suitable.
This order matters because adapter questions begin only after both sides of the connection are known. If the machine family is still uncertain, adding another part creates another unknown instead of solving the first one. If you already know the machine and the desired foot, check when a presser foot adapter fits and verify the exact interfaces before buying anything. The goal is not to make every foot attach somehow, but to preserve the geometry and movement the machine expects.
A common beginner misunderstanding is that an adapter turns any low-shank accessory into a safe option for any high-shank machine. Bridging the screw position does not erase differences in needle position, feed features, holder geometry, or driven attachment mechanisms. That is why an adapter should solve a known interface problem rather than serve as a workaround for an unidentified mount. A manufacturer-supported adapter path has a clear basis; an improvised stack of parts does not.
Route Broad Universal Claims to a Full Compatibility Check
Low shank and high shank labels are useful sorting terms, but neither makes every foot within that group interchangeable. Stitch width, needle position, holder design, feed system, direct-drive arms, ankle geometry, and physical clearances can still eliminate an otherwise plausible foot. Read “universal low shank” as a broad seller claim that still needs a machine-level match. Apply the same standard to a generic high-shank listing.
Break a broad fit claim into four concrete questions: which machine is this, which mounting family does it use, which holder or interface is installed, and does the accessory maker support that machine or family. When all four answers line up, the shopping decision becomes much clearer. When one is missing, marketplace wording cannot supply the missing geometry. For the larger decision tree, understand sewing machine presser feet before comparing specialty shapes or functions.
The payoff is not merely a cleaner terminology lesson. A foot can be ideal for the intended stitch or fabric and still present the wrong physical interface, while another foot with the same sewing purpose may belong to the correct family. Shank height reduces the candidate pool; holder, clearance, feed, and supported-model checks decide what remains. That keeps the purchase focused on the machine’s actual interface instead of the resemblance between two product photos.
Final Thoughts: Check the Model Before You Measure
Read the machine label before shopping for the foot. If the maker identifies the presser-foot family, use that as the starting constraint and compare only accessories that meet the remaining interface requirements. Reach for a ruler when the family is unclear, and keep the measuring points consistent so the result can be checked against another source. Snap-on, screw-on, stitch width, feed system, and adapter requirements still deserve their own yes-or-no checks.
The extra minute spent identifying the mount can prevent a much longer detour with the wrong accessory. It also tells you when to stop: an inherited machine, proprietary holder, slant mount, or specialist system may need its own parts information instead of another low-versus-high guess. Keep uncertain hardware away from powered clearance tests and do not force the presser bar down onto a questionable foot. A good buying decision ends with a compatible interface, not merely a familiar label.
FAQs
The questions below address the labels that most often get mixed together during a presser-foot search. They separate shank family from attachment style, adapter use, and broad seller claims so each question has a clear job. Machine manuals and official fit lists settle more than photos or package wording can. Measurements remain useful when the machine’s mount is not clearly identified elsewhere.
Keep the machine powered off while checking an unknown mount or accessory. Do not use an unverified foot as a live clearance test under the needle. If the machine uses an unusual holder, proprietary system, or specialist mount, stop the low-versus-high comparison and identify that system directly. These boundaries keep a simple shopping check from turning into an unsafe fit experiment.
🦶 How do I know if my sewing machine is low shank or high shank?
Find the complete model number, then check its manual, model page, or official accessory chart for the presser-foot family. If those sources do not classify the mount, use a measuring method with clearly defined reference points. Treat the measurement as a secondary identifier rather than a replacement for a direct model listing.
📏 Can I measure shank height with a ruler?
Yes. A ruler can help when the machine’s shank family is not stated in the available model information. Use clearly defined reference points because different diagrams may measure from different places. The number identifies only part of the fit question and does not prove that a particular foot is compatible.
🔩 Does snap-on mean low shank?
No. Snap-on describes how a removable sole connects to a holder, while shank height describes a different part of the mounting system. A machine can use snap-on feet and still belong to a high-shank family.
🧰 Can a screw-on foot be low shank?
Yes. Low-shank feet can attach directly with a screw instead of snapping onto a separate holder. Check the machine model and the exact foot’s compatibility information rather than using screw-on status to infer shank height.
⚙️ Will an adapter let me use a low-shank foot on a high-shank machine?
Only when the adapter is supported for the machine and the desired accessory path. Changing the mounting interface does not automatically settle needle clearance, feed-system fit, moving-arm engagement, or other geometry. Verify the whole combination before use.
🪡 Are all low-shank presser feet interchangeable?
No. Low shank is one compatibility category, not a universal fit guarantee. Stitch width, holder design, needle position, feed features, and supported-model lists can still change what fits.
If a seller’s label conflicts with the machine maker’s fit information, give more weight to the source tied to the exact model. An unlisted accessory needs a clearer fit basis than visual similarity or a broad category name. Older machines may also carry replacement holders or mixed accessories that make photographs especially misleading. What matters is a traceable path from the machine to its mount and then to the accessory interface.
Once those pieces line up, broader labels add little. Low shank, high shank, snap-on, screw-on, and adapter status each describe a specific part of the decision rather than the entire answer. Keeping the terms separate makes retailer copy easier to evaluate and exceptions easier to spot. The result is a purchase based on the machine’s interface instead of the most persuasive wording on the listing.
References and Sources
Shank classification and accessory fit are technical claims tied to specific machines, so this article relies on manufacturer material for the examples that need proof. The sources below show named low-shank and high-shank model families and separate accessory versions used for similar sewing jobs. They support the compatibility distinctions in the article rather than serving as shopping recommendations. No return-rate, durability, or universal-fit claim is inferred from them.
Janome’s model pages are useful here because they connect named machines with the accessory families assigned to them. The foot pages add another piece by showing that a similar sewing function can be offered for different mounting groups. Together, those examples support the distinction between function and physical interface. They also show why an approximate measurement chart should remain a fallback instead of becoming a universal rule.
- Janome HD-1000 model page: identifies the machine’s compatible accessory family as low shank and provides presser-foot information for that model.
- Janome Skyline S3 model page: identifies a high-shank accessory family while also listing snap-on presser feet, supporting the distinction between shank height and snap-on status.
- Janome free-motion quilting feet: lists separate low-shank and high-shank versions for different model groups.
- Janome adjustable zipper foot: shows the same general foot function divided into separate mounting and model families.
These references do not prove fit for an unlisted machine or for an accessory from another manufacturer. They show why a named machine and a named accessory family carry more weight than visual similarity or generic marketplace wording. If your machine is not one of the examples, use that machine maker’s manual, parts information, or fit list instead of transferring a Janome classification across brands. The checking method can travel from one brand to another, but the final fit answer cannot.
Community discussions were reviewed only to confirm that owners do encounter confusion around shank height, snap-on holders, adapters, and inherited accessories. Those discussions were not used to establish fit, dimensions, or safety claims. Technical examples are tied to manufacturer material instead of being promoted from anecdote to fact. That keeps the evidence boundary clear for a purchase decision that depends on exact hardware.