Denim becomes difficult when the real project stack gets denser or taller than the simple fabric sample that first looked easy. A functioning domestic machine may sew two flat layers cleanly yet behave very differently at a folded seam, belt-loop area, or other abrupt thickness change. The useful test is not whether the fabric is called denim, but whether the exact machine, verified needle and foot setup, stitch choice, and thickest representative stack work together without forcing the feed. This article shows how to map that stack, test it under controlled conditions, and recognize when the task has moved beyond normal material handling.
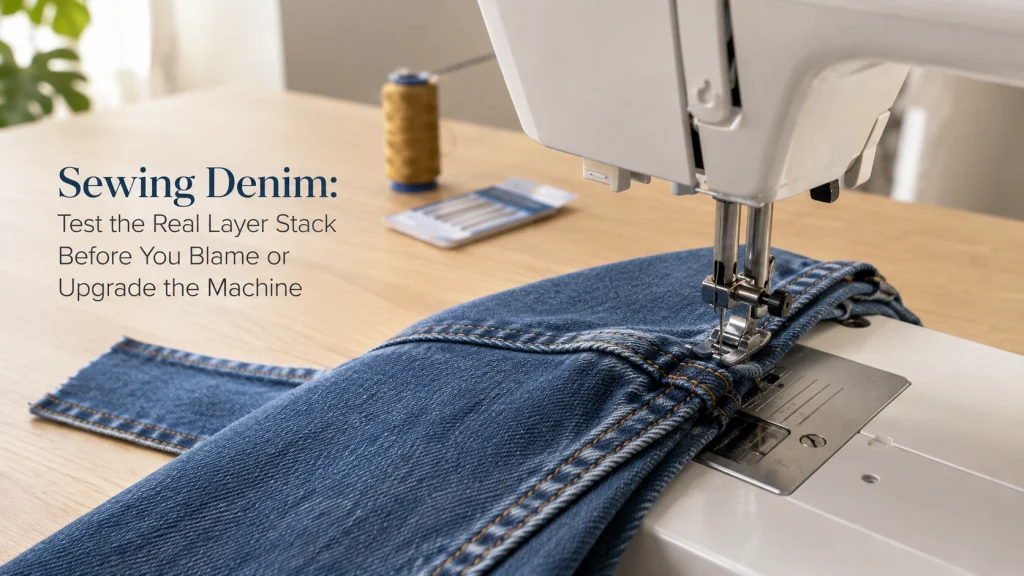
Sewing Denim Starts With the Real Layer Stack
A domestic machine may sew the flat portion of a denim project comfortably yet work much harder where several folded layers meet. The fabric itself has not changed, but the needle now has more material to penetrate and the presser foot may approach the stack at a steep angle. That difference is why a machine can make a clean test seam through two layers and then hesitate at a bulky intersection. Before blaming the machine, identify the hardest physical stack the project will actually ask it to cross.
This article stays with normal material handling on a domestic machine that otherwise works correctly. If you need a broader foundation for machine controls and normal setup, how to use a sewing machine provides that context, while sewing with different fabrics explains how material behavior changes setup decisions. Here, the goal is narrower: decide whether the existing machine can sew the real denim stack without force. Machine shopping, internal faults, and jeans-construction technique belong to different decisions.
Identify Denim Weight and Stretch Content if Known
Denim is not one uniform material. A lighter garment denim can feel supple in two layers, while a dense rigid denim may become noticeably resistant as folds accumulate. Stretch denim adds another variable because elastane or another stretch component changes how the fabric relaxes, feeds, and responds to handling. If the fabric weight, fiber content, or stretch percentage is printed on the seller information or project notes, record it before testing.
If those specifications are unknown, do not guess a fabric weight from color or hand feel alone. Record what you can verify instead, such as whether the fabric stretches across the width, whether it returns promptly after stretching, and how thick a folded sample becomes under light finger pressure. Results become more predictable when the test sample matches the material actually used in the project. The description does not need to be laboratory precise, but it should be specific enough that you can reproduce the same stack later.
Map the Thickest Point in the Actual Project
Trace the sewing path and mark every place where the layer count changes. A flat seam may be two layers, while a folded edge or crossing seam can create a much taller stack. Count the layers at each point and note whether the transition is gradual or abrupt. The hardest point should control the test, not the easiest straight section.
Build the map from the project pieces whenever possible because allowances, pockets, interfacing, and enclosed edges can add hidden bulk. A two-layer scrap tells you little about a junction that will contain several folded layers. If exact counting is difficult, record the folds and compare the total compressed thickness. The useful question is what will actually sit under the presser foot at the most demanding point.
| Project location | What to record | Why it matters |
|---|---|---|
| Flat seam | Base layer count and fabric condition | Establishes the easy baseline. |
| Folded edge | Number of folds and total stack thickness | Shows how much material the needle must penetrate. |
| Cross seam | Layer count before, on, and after the intersection | Reveals the abrupt height change the foot must cross. |
| Reinforced area | Extra fabric, interfacing, or overlapping allowances | Identifies local density that a flat swatch misses. |
This map turns a vague claim that a machine can sew denim into conditions you can reproduce. Keep it beside the machine while you build the test sample. Update it if assembly changes the real stack. The thickest verified condition remains the one that matters.
Check the Exact Machine’s Thickness and Capability Guidance
No universal number of denim layers applies to every domestic sewing machine. Manufacturer support can define limits by fabric thickness, needle range, presser-foot position, or warnings against pushing thick material. One Brother support page for a listed domestic model group warns that material thicker than 6 mm, or fabric pushed with too much force, can bend or break the needle. That number belongs to the models covered by that page, not to every machine. Treat model-specific limits as a boundary for the test, not as a target to reach.
Check the manual and support information for the exact model before accepting any online layer count. Look for thick-fabric warnings, allowed needle sizes, presser-foot lifting positions, approved leveling features, and instructions for fabric that will not feed. If the documentation gives no denim maximum, do not borrow one from another machine. Test conservatively and stop when normal feeding or needle travel is no longer controlled.
Capability stop gate: Continue only when the exact machine documentation does not prohibit the stack, the material fits under the foot as intended, the needle path remains clear, and the machine feeds the representative sample without being pushed or pulled.
This stop gate prevents both overconfidence and premature machine shopping. A manageable stack should be tested correctly before the machine is blamed. A documented limit should not be defeated by force. Capability is established by the exact documentation and the representative test together.
Verify the Needle and Leveling or Feeding Foot Separately
Safe denim setup also depends on the needle and presser-foot combination, but those components must be verified for the exact machine rather than selected from a generic product label. Manufacturer fabric charts commonly pair thicker woven fabrics with a larger compatible needle range, and they warn that a needle that is too fine for dense material can bend or break. The correct choice still depends on the machine’s allowed needle system, fabric density, thread, and stitch. Treat those checks as compatibility work, not as proof that the machine itself can handle any stack.
The same rule applies to a leveling feature, seam aid, or alternate feeding foot. A foot that looks suitable for denim is not automatically compatible with the machine’s holder, shank, feed system, stitch width, or needle position. Use the exact manual or manufacturer compatibility information to confirm fit and operation before the denim test begins. Once the needle and foot are verified, return to the layer stack, because a correct accessory does not erase a machine’s physical limit.
Choose Stitch Geometry for the Seam You Are Testing
The representative test needs the same basic stitch geometry the project will use at the difficult point. A straight seam, edge stitching line, reinforcement pattern, and decorative topstitch do not load the needle in exactly the same way. Select a stitch that is documented for the machine and appropriate to the actual construction step, then keep it consistent while comparing stacks. Changing several settings at once makes it harder to tell whether the layer transition or the stitch choice caused the change in behavior.
Do not copy one stitch length from a different machine and treat it as a denim rule. Heavy-fabric education often uses longer stitches as bulk increases, but the useful setting still depends on the exact machine, thread, fabric density, and seam purpose. Begin from the manual and the project’s normal seam requirement, then test on the representative stack. If the stitch cannot form normally without forcing the fabric, the correct response is to stop and reassess, not to keep increasing settings until the machine crosses the stack.
Use Controlled Speed Without Forcing the Stack
Dense material rewards control more than momentum. Approach the test seam at a speed that lets you hear and feel whether the machine is feeding normally, especially before an abrupt rise in thickness. Support the weight of the project so it does not drag sideways or backward, and let the feed system move the layers. Pushing from behind or pulling from the front can deflect the needle and makes the test less representative of normal machine operation.
A slower approach is useful because it gives you time to stop before a small change becomes a hard strike or jam. It is not permission to force the handwheel through resistance, and it does not turn an over-limit stack into an acceptable one. If the machine has a documented speed-control feature, use it according to the manual rather than trying to restrain the fabric with your hands. The test is successful only when the machine crosses the sample under controlled feeding, not when the operator physically helps it through.
Keep the Presser Foot Level Across Abrupt Thickness Changes
An abrupt denim hump can tilt the presser foot upward at the front and reduce stable feed contact. Some machines document a locking pin, height compensation method, or another model-specific way to keep the foot level while climbing a thick section. Brother support material shows such a method for listed models when thick fabric will not feed at the start. Use that type of technique only when the exact machine documentation provides it. The useful check is whether the foot can stay supported through the transition while the feed system continues to move the stack normally.
The goal is to support the foot while the feed system moves the fabric, not to pry the foot over the hump. A verified leveling aid may reduce the angle as the foot reaches the high point. Do not improvise a rigid object near the needle or feed dogs when the manual does not allow it. After the transition, confirm that the foot returns normally and the fabric keeps advancing evenly.
Repeat the seam-hump check on scrap before using the project piece. Watch the foot angle, needle path, feed movement, and machine sound. A clean flat seam does not cancel a problem at the hump. The difficult transition remains the deciding condition.
Test the Hardest Representative Stack Before the Project
A useful sample reproduces the thickest project condition as closely as practical. Use the same denim, folds, verified needle and foot, thread, and stitch geometry. Include any extra seam allowance or reinforcement that makes the real junction harder than a flat scrap. The purpose is to challenge the setup before a finished piece depends on it.
Sew a flat baseline first, then the representative hump, and compare the behavior. Record starting, feeding, foot position, needle path, sound, and stitch formation. Do not judge success only by whether the needle eventually crossed the stack. A pass means the machine handled the sample normally and repeatably without force, abnormal sound, repeated deflection, or loss of feed.
| Test item | Record | Pass condition |
|---|---|---|
| Machine | Exact model and relevant manual guidance | No documented limit is exceeded. |
| Denim | Weight if known, stretch content if known, and fabric condition | Sample matches the project material. |
| Stack | Layer count, folds, thickness, and hump shape | Hardest project point is represented. |
| Setup | Verified needle, foot, thread, stitch, and speed control | All components are approved for the machine and task. |
| Behavior | Feed, needle path, sound, stitch formation, and transition | No forcing, abnormal strain, or repeated deflection occurs. |
Keep the short log if the project will be repeated. The result is useful only when its conditions are recorded. Rebuild the sample when the material or stack changes. That is stronger evidence than remembering that the machine once “sewed denim.”
Keep Jeans Seams, Hems, and Topstitch Construction Separate
This page does not teach flat-felled seams, jeans hems, waistband assembly, pocket construction, or decorative topstitching technique. Those construction choices can create the dense stacks discussed here, but each has its own order of operations and seam-quality requirements. Treat the completed construction plan as an input to the layer-stack test. Once you know where the thick points will be, this workflow tells you how to evaluate whether the existing machine can cross them normally.
That separation matters because a construction shortcut can change the stack itself, while a machine-handling adjustment changes how the existing stack is approached. Mixing the two makes it hard to know whether the solution was a different seam design or better control at the machine. If your main question is how to build a particular jeans seam or hem, solve that construction question first. Then return with the final layer geometry and test the actual stack before sewing the garment.
Know When the Normal Machine Class Is the Wrong Fit
A failed representative test does not automatically mean the machine is defective. The project may simply require a stack, feed architecture, presser-foot clearance, or sustained workload that the current domestic machine was not designed to handle. If the exact manual sets a limit below the real project condition, that ends the normal handling test. Do not defeat a documented boundary by pushing harder, repeatedly changing needles, or adding an unverified attachment.
The next decision may be whether a different domestic machine class or a specialist system better matches the work, but that is a buying and equipment-selection question rather than a denim technique question. Make that change only after the test has isolated a genuine capability mismatch. A single difficult seam does not prove that every project needs a more powerful machine. The evidence should be the documented limit and repeatable behavior of the representative stack, not the words printed on a machine’s marketing badge.
Stop When Needle, Motor, or Feed Behavior Becomes Abnormal
Stop if the needle repeatedly deflects, strikes, bends, or breaks. Also stop for abnormal motor loading, a burning smell, unusual heat, smoke, sparks, a hard mechanical lock, uncontrolled motion, or fabric that will not feed normally after correct owner-level setup. These are not signals to press the pedal harder or drag the denim through. They move the problem beyond normal material handling.
One hesitation at a hump may have a documented leveling solution, but repeated abnormal behavior needs a different diagnostic path. Remove power before changing the needle, foot, or another owner-serviceable component as directed by the manual. Do not attempt internal timing, electrical, motor, gear, or linkage adjustments to make the machine accept the stack. If ordinary verified fabric still sews normally, that contrast can help isolate the denim stack as the triggering condition.
- Stop for repeated needle deflection, strikes, bending, or breakage.
- Stop for abnormal motor strain, heat, burning odor, smoke, or sparks.
- Stop when the feed becomes abnormal and documented owner-level checks do not restore normal movement.
- Stop when the exact manual or support documentation sets a limit below the real project stack.
A stop is part of the test rather than a reason to force completion. Record where the behavior changed. Note the stack and setup at that point. That evidence is more useful than saying the machine simply “doesn’t like denim.”
Final Thoughts: Test the Hardest Stack, Not the Fabric Label
The best way to judge a denim task is to reproduce its hardest physical condition before the finished project reaches the machine. Identify the material, map the thickest junction, check the exact manual, verify the needle and foot separately, then test the real stack under controlled feeding. If that sample passes without force or abnormal behavior, you have useful evidence for the project in front of you. If it does not, stop at the boundary the machine is showing rather than converting extra pedal pressure into a capability test.
Material problems also change when density is no longer the main issue. For a coarse open weave where fraying and pullout dominate, move to sewing burlap on a machine; for a smooth nonwoven surface where tack and permanent needle holes change handling, use sewing vinyl on a machine. Those materials need different checks even when they can also feel difficult under the foot. For denim, the practical rule remains simple: test the stack the project will actually create.
FAQs
Most denim questions become easier once the fabric label is separated from the actual stack under the presser foot. A flat sample can tell you whether the basic setup works, but it cannot prove that the machine will cross a folded intersection. The exact model documentation and representative test carry more weight than a universal layer count. These answers keep the focus on normal domestic-machine use rather than machine shopping or internal repair.
If a question involves needle or foot compatibility, verify the exact interface before acting. If it involves abnormal feed, repeated needle strikes, or motor strain, stop the material test and move to troubleshooting. Do not use a successful result from another machine as proof for your own. The same denim can create very different demands when the layer geometry changes.
👖 Can a regular home sewing machine sew denim?
It may be able to sew a particular denim project if the exact machine documentation allows the setup and the real layer stack passes a controlled test. Do not assume that success on two flat layers proves the machine can cross every folded seam or reinforcement.
📚 How many layers of denim can a domestic machine sew?
There is no universal layer count. Check the exact model’s documented thickness or material guidance, then test the hardest representative stack without pushing or pulling the fabric.
🪡 Why does the needle bend when I reach a thick denim seam?
The stack may be too dense, the foot may be climbing an abrupt height change, the needle may be unsuitable for the verified setup, or the fabric may be getting pushed off its normal feed path. Stop and inspect the condition rather than forcing the machine through the resistance.
🦶 What should I do when the presser foot tilts at a denim hump?
Use only the leveling feature or compatible method documented for the exact machine. The goal is to keep the foot supported while the feed system moves the fabric, not to lever or drag the stack under the needle.
⚙️ Should I upgrade the machine if it struggles at one denim intersection?
Not from that observation alone. Reproduce the intersection on scrap, verify the normal setup and documented limits, and determine whether the problem is a real capability mismatch before turning the issue into a machine-selection decision.
References and Sources
External sources are included only where the article makes a technical safety or capability distinction. Brother material supports model-specific fabric, needle, thickness, and presser-foot leveling guidance. WeAllSew supports representative heavy-fabric testing and normal feed handling. None of these sources establishes a universal denim layer count.
Manufacturer limits apply only to the machines identified by the documentation. That is why the article sends the reader back to the exact manual instead of copying one number across domestic machines. Example settings from material education also remain context-specific. The practical decision comes from combining documented limits with a representative test.
- Brother fabric, thread, and needle guidance: supports matching needle and thread to fabric thickness and warns about needle bending or breakage with unsuitable combinations.
- Brother thick-fabric support guidance: documents model-specific leveling methods and a thickness warning for the listed machines.
- WeAllSew heavy-fabric handling guidance: supports representative stack testing, controlled speed, support for bulky work, and letting the feed system move the fabric.
These links remain because the published article relies on their specific technical boundaries. Community discussions helped identify common questions but are not used as proof of capability, compatibility, or safety. No external source is included merely to make the page look researched. The exact machine documentation remains the controlling reference for the reader’s setup.
Keeping the source list narrow also prevents general denim advice from overruling model-specific instructions. A method shown on one machine may not exist on another. A successful stack in one demonstration does not create a universal limit. The article therefore publishes only the sources needed to support those distinctions.