Fleece can challenge a normally functioning domestic machine in more than one way because stretch, loft, layer count, and lint do not always matter equally. The useful setup starts by identifying which fabric behavior controls the seam instead of reaching for a universal fleece setting. A representative test stack can show whether the issue is seam stretch, compressed bulk, uneven feeding, or an abnormal machine symptom. The goal is to keep ordinary fabric handling separate from compatibility decisions, machine-specific adjustments, and service-level problems.
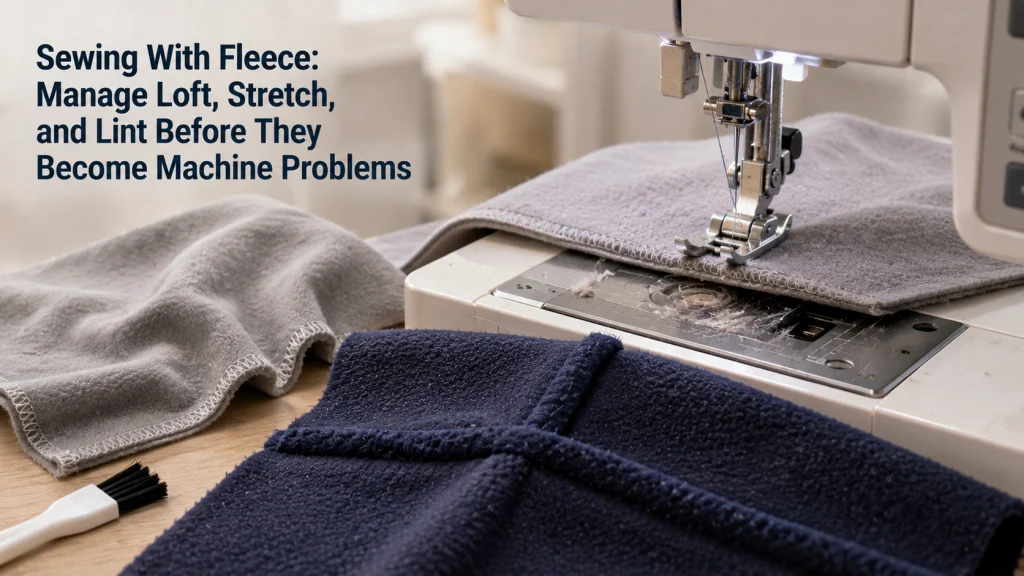
Identify Fleece Type, Stretch, and Loft Before Setup
The most useful tips for sewing fleece begin by identifying what the fabric is asking the machine to manage. Put a thin microfleece beside a thicker anti-pill fleece, then compare how each behaves when the same seam intersection adds more layers. One may act mainly like a stretch fabric, while the other creates a taller, more compressible stack under the presser foot. That difference matters more than the shared fleece label because it changes what the first test should investigate.
“Fleece” covers fabrics that can feel very different at the machine, so the label alone is not a setup specification. Stretch can vary by direction, loft can change how the fabric compresses under the foot, and the hardest point may appear only where several layers overlap. Check the fabric in the orientation it will be sewn, then compare a single layer with the thickest planned stack and notice whether the plies shift against each other. Those observations show whether seam stretch, loft, or layer movement should control the next setup decision instead of changing several machine variables at once.
| Behavior to check | What to observe | Why it changes the test |
|---|---|---|
| Stretch | Direction and amount of give in the actual seam orientation | Shows whether the seam must tolerate movement |
| Loft | How much the fleece compresses and rebounds under light pressure | Shows whether bulk under the foot is likely to dominate |
| Layer stack | Height at the thickest real overlap | Reveals a condition that a flat scrap may miss |
| Layer movement | Whether the plies creep or shift against each other | Shows whether feeding control needs closer attention |
The table is a decision aid, not a recipe. Two fabrics can both be sold as fleece and still land in different rows as the controlling concern. Keep the result beside the machine so later changes have a clear reason. That makes the test easier to interpret if the fabric starts to stretch, bunch, or climb unevenly at a bulky point.
Map the Thickest Layer Stack, Not Just the Flat Fabric
A flat two-layer sample can sew cleanly and still tell you almost nothing about the hardest part of the project. Seam allowances, folded edges, crossed seams, facings, bindings, or another construction layer can create a short section that is much taller than the rest. Fleece adds another complication because that height can be soft and compressible rather than dense and rigid. The machine still has to keep the foot stable, advance the stack, and form the stitch while the thickness changes.
Build a scrap that copies the thickest realistic transition before committing the project to it. Use the same fleece, the same number of layers, and the same fold or seam intersection that will appear in the finished work. Do not create an exaggerated stack just to see whether the machine can punch through it, because that test does not represent normal sewing. The useful question is whether the documented machine setup can move through the real stack smoothly without hand force, repeated needle strikes, or loss of stitch formation.
- Match the project fleece and its orientation.
- Match the actual number of layers at the overlap.
- Reproduce the same folded or crossed-seam transition.
- Keep the verified needle, foot, thread, and stitch setup unchanged during the first comparison.
- Note whether the transition changes feeding or stitch formation without adding hand force.
This is also where fleece differs from a dense heavy woven. A tall fleece stack may compress substantially, while a dense woven stack can resist the needle and feed system in a different way. Similar height does not prove that the machine is dealing with the same mechanical demand. If dense woven thickness is the real issue in another project, use the site’s guidance for matching machine setup to fabric behavior rather than carrying a fleece assumption into a different material.
Decide Whether the Finished Seam Must Stretch
Fleece can stretch, but that does not mean every seam in every fleece project needs the same amount of stretch. The seam direction, garment or project function, fabric construction, and amount of give in the actual piece all matter. A seam that must expand with the fabric has a different requirement from a straight structural seam cut in a comparatively stable direction. That distinction should be settled before stitch selection, because stitch choice is supposed to serve the seam rather than the fabric name.
Test the fabric by gently extending it in the direction the seam will run, then compare that movement with what the finished seam needs to do. If the seam must move repeatedly, the selected stitch family needs enough give for that condition without being treated as a universal fleece rule. If the seam is effectively stable, adding more stitch complexity simply because the material is called fleece may not solve any real problem. When stretch is clearly the dominant behavior and loft is minor, the more focused machine setup for stretch knits becomes the better path.
Select a Stitch Family From the Seam Requirement
Once the seam requirement is clear, choose from the stitches the exact machine actually provides. A straight stitch, a narrow zigzag, or a dedicated stretch stitch can behave differently, but the correct choice depends on the seam and the machine rather than a single fleece formula. The machine manual is the first place to confirm how a named stitch is selected and which controls affect it. This matters especially on machines where stretch stitches share a selector position or require a separate stitch-length range.
Use scrap fleece to compare stitch behavior under the same layer and stretch conditions that the project will see. After sewing, let the sample relax before checking whether the seam lies flat, whether it feeds evenly, and whether it tolerates the amount of stretch the seam requires. Do not compensate for a poor result by changing tension, pressure, stitch length, needle, and foot all at the same time. A controlled comparison is more informative because each change can be tied back to the specific behavior you are trying to improve.
Verify the Needle and Any Specialty Foot Separately
Needle choice and presser-foot choice are separate compatibility decisions, even when both affect the same fleece test. Do not treat a generic “fleece needle” label or a visually similar foot as proof that the part belongs on the machine. The needle system, needle type, and size need to suit the exact machine, thread, fabric structure, and layer condition. A specialty foot must also match the machine’s attachment system and any model-specific restrictions before it is installed.
Begin with the machine manual or the manufacturer’s compatibility information, then use the fabric test to judge the result. If a standard verified foot feeds the representative stack cleanly, there is no reason to add a specialty attachment merely because fleece is bulky. If layer movement remains the clear problem, then a compatible feeding aid can be evaluated as a separate variable. For the broader method, verify machine setup before changing components so a fabric-handling issue does not get mixed up with an attachment-fit problem.
Adjust Presser-Foot Pressure Only When the Machine Supports It
Fleece can be distorted if the layers are compressed too aggressively, but presser-foot pressure is not an available user control on every domestic machine. Some models provide an adjustment, others use a fixed system, and the control itself can work differently from one machine to another. That means “reduce the pressure” is not a safe universal instruction. First confirm that the exact model exposes this adjustment to the owner and identify the normal reference position described by its documentation.
If the control exists, change it only in response to a test result you can observe, such as the upper layer being pushed ahead or the fabric becoming visibly stretched under the foot. Make one small documented change, sew the same representative stack again, and compare the samples after they relax. If the machine has no owner-adjustable pressure control, do not improvise by altering unrelated settings or hardware. Feeding problems that persist on ordinary fabric as well as fleece belong to troubleshooting, not to an increasingly aggressive fleece setup.
Feed Fleece Without Compressing or Stretching It by Hand
The feed system should move the fabric; your hands should guide direction and support the weight. Pulling from behind can stretch the fleece and alter stitch formation, while pushing from the front can make a thick transition hit the foot or needle area harder than the feed system intended. Heavy fabric hanging off the table can also tug on the seam before it reaches the needle. Support the project so the portion around the needle stays close to its natural shape.
At a bulky intersection, slow down and watch whether the presser foot stays reasonably level as it approaches the change in height. If the machine’s documented accessories or controls include a method for handling a height transition, use only the method that is verified for that model. Do not press the stack flat with your hands in an attempt to “help” the machine climb it. If normal guiding turns into sustained pushing or pulling, stop and reassess the stack because the test is no longer showing how the machine feeds under normal use.
Test the Representative Fleece Stack Before the Project
A useful test sample should reproduce the part of the project most likely to change machine behavior. Record the fleece type or weight if known, the direction of stretch, the number of layers, and the thickest transition. Also record the machine, verified needle and foot, selected stitch, relevant settings, and anything unusual you observe during feeding. That creates a comparison you can repeat instead of relying on memory after several changes.
Sew a control area first, then continue through the representative bulky or stretchy section without changing the setup mid-sample. Afterward, inspect both sides for skipped stitches, looping, bunching, excessive compression, or a seam that no longer returns to shape. Stretch the sample only as much as the finished seam is expected to move, not until it fails. If you change one variable for the second sample, note that change so the improved or worse result can be traced to something specific.
| Test field | Record before sewing | Record after sewing |
|---|---|---|
| Fabric | Fleece type or known weight, stretch direction | Visible distortion or recovery |
| Stack | Layer count and thickest transition | Where feeding changed, if anywhere |
| Machine setup | Machine, verified needle, foot, stitch, settings | Any setting changed for the next sample |
| Result | Expected seam stretch and appearance | Skipped stitches, loops, bunching, or clean formation |
| Lint | Existing machine condition before the sample | Visible loose fiber accumulation noticed afterward |
The worksheet is most valuable when it prevents random adjustment. If one sample feeds well but fails only when the seam is stretched, that points to a different next step from a sample that bunches before reaching the bulky transition. If both the control and the fleece sample fail in the same way, fabric setup may not be the main issue. That is the point where normal sewing advice should give way to symptom-led troubleshooting.
Separate Normal Lint Awareness From Machine Maintenance
Fleece can shed fibers during cutting and sewing, so visible lint near the normal owner-accessible sewing area is not automatically evidence of a mechanical fault. Material guidance from BERNINA’s WeAllSew notes both fleece bulk and stretch during sewing, and it also calls attention to lint from the fabric. That is useful as a fabric-behavior warning, not as permission to invent a cleaning interval or open parts of the machine. The exact model manual still controls what the owner may remove, open, brush, oil, or service.
Keep lint awareness simple while the project is underway. Notice whether loose fibers are accumulating unusually quickly, and follow the documented owner-cleaning procedure only when the machine is in the safe state specified by its manual. Do not use compressed air if the documentation prohibits it, and do not open powered covers or move into internal service areas just to chase fleece fibers. If lint appears alongside abnormal feeding, repeated stitch failure, hard mechanical resistance, or another persistent symptom, treat the symptom separately from routine fabric mess.
| What you notice | Normal project response | When to change direction |
|---|---|---|
| Loose fleece fibers in an owner-accessible area | Use only the manual-approved cleaning method | Documentation is unclear or access requires disassembly |
| More lint than with a stable woven | Observe and clean according to the exact manual | Do not invent a time-based cleaning schedule |
| Lint plus repeated feeding or stitch failure | Separate the symptom from routine lint | Troubleshoot the symptom rather than blaming fleece alone |
| Hard resistance, abnormal noise, or repeated needle impact | Do not continue the fleece setup | Use the manual and qualified service boundary |
This boundary keeps routine sewing advice from turning into a repair procedure. Fleece may create more visible mess than some fabrics, but that observation does not diagnose a clogged mechanism or justify deeper access. The owner-level task is to follow the exact cleaning instructions and watch whether normal operation returns. Anything beyond those documented steps belongs to a different troubleshooting path.
Use Knit-Specific Guidance When Loft Is No Longer the Main Issue
Not every soft synthetic fabric needs a fleece-specific workflow. If the material is low-loft, the stack remains easy for the machine to manage, and the main challenge is stretch or edge distortion, then the sewing decision is being controlled by knit behavior. Continuing to focus on fleece bulk at that point adds noise instead of solving the seam requirement. The cleaner next step is to evaluate stretch direction, seam recovery, and stitch behavior as a knit problem.
This distinction is especially useful for beginners because fabric labels can encourage overgeneralization. Two materials can both feel soft and stretchy, yet one creates a tall compressible stack while the other stays flat under the presser foot. The machine reacts to those physical conditions, not to the store label, and the test should reflect that difference. When stretch clearly dominates, continue with sewing stretch knits on a domestic machine and leave fleece-specific bulk decisions behind.
Do Not Treat Dense Woven Thickness Like Fleece Loft
A bulky fleece seam and a thick dense woven seam can both look tall, but they do not load the machine in the same way. Fleece loft may compress significantly under the foot, while a dense woven stack can remain firm and resist penetration or feeding more directly. That difference matters before any needle, foot, or setting is blamed. A test based on fleece behavior should not be carried over to denim, canvas, or another dense woven simply because the stack has a similar visual height.
If the project changes material, rebuild the test around the new material instead of reusing the old conclusion. Compare thickness, density, fold structure, seam intersections, and the machine’s documented capability for the actual work. A machine that handles a tall soft fleece overlap smoothly has not thereby proven that it can handle an equally tall dense woven stack. Keep the decision tied to the real material and the verified setup so the test remains meaningful.
Stop When Feeding or Stitch Formation Becomes Abnormal
Normal fleece setup assumes the machine is functioning correctly on ordinary fabric. If the machine starts skipping most stitches, making repeated hard needle strikes, refusing to advance the fabric, jamming, or producing the same failure on a stable test fabric, stop treating the symptom as a normal fleece quirk. More pressure, more hand force, or a larger stack is not a diagnostic method. Return to a known-good setup and determine whether the problem follows the fleece, the representative stack, or the machine itself.
A useful comparison is a stable woven sample sewn with a verified normal setup that the machine has handled correctly before. If that sample is normal and the fleece sample fails only under one identifiable condition, continue investigating that condition one variable at a time. If the control sample also fails, move away from fabric advice and into symptom-based troubleshooting or qualified service as appropriate. That separation prevents a real machine problem from being hidden under increasingly complicated fleece adjustments.
Final Thoughts: Identify Which Fleece Behavior Controls the Setup
Successful sewing with fleece is easier to reason through when the fabric is treated as a set of behaviors rather than a single special-case material. Identify stretch, loft, layer count, and layer movement, then build a representative sample that copies the hardest real seam condition. Choose the stitch from what the seam must do, and verify the needle, foot, and any machine adjustment independently. That sequence keeps a normal setup decision from becoming a pile of unrelated changes.
When stretch dominates, use knit-focused guidance; when long pile and backing control the work, move to machine handling for faux fur; when loop pile is the defining material behavior, use sewing guidance for terry cloth. If dense woven resistance becomes the issue, treat it as a different material problem rather than a fleece problem. The material behavior should determine which setup logic you carry forward. Most importantly, stop normal fabric testing when feeding or stitch formation becomes abnormal, because forcing the project through the machine does not produce useful evidence.
FAQs
🧵 What stitch should I use for fleece?
Choose the stitch from the seam’s required stretch and the stitches supported by your exact machine. Test the real fleece and layer stack on scrap rather than using one stitch setting for every fleece project.
🪡 Do I need a special needle for sewing fleece?
Not automatically. Verify the needle system for the machine first, then choose needle type and size for the fleece structure, thread, and actual layer condition instead of relying on a generic fleece label.
🦶 Should I use a specialty presser foot for fleece?
Only when the test shows a feeding problem that the attachment is intended to address and the foot is verified as compatible with the machine. If the standard verified foot feeds the representative stack correctly, an additional foot is not required just because the fabric is fleece.
📏 Why does fleece stretch while I sew it?
The fabric may be stretching because of its construction, hand pressure, unsupported project weight, or the way the layers are feeding under the foot. Support the fabric, avoid pulling it through, and compare a controlled scrap before changing multiple settings.
🧹 How often should I clean lint when sewing fleece?
Do not use a universal time or seam-count schedule. Follow the exact machine manual for owner cleaning, watch for visible fiber accumulation, and stay within the parts and procedures the manufacturer makes user-accessible.
⚙️ Why will my machine sew flat fleece but not a bulky seam intersection?
The intersection may create a taller or less stable stack than the flat test sample. Reproduce that exact transition on scrap and check whether the machine can feed it normally without pushing, pulling, repeated needle impact, or loss of stitch formation.
References and Sources
- BERNINA WeAllSew fleece guidance: Supports the article’s material-level discussion of fleece bulk, stretch during sewing, presser-foot pressure considerations, and lint awareness.