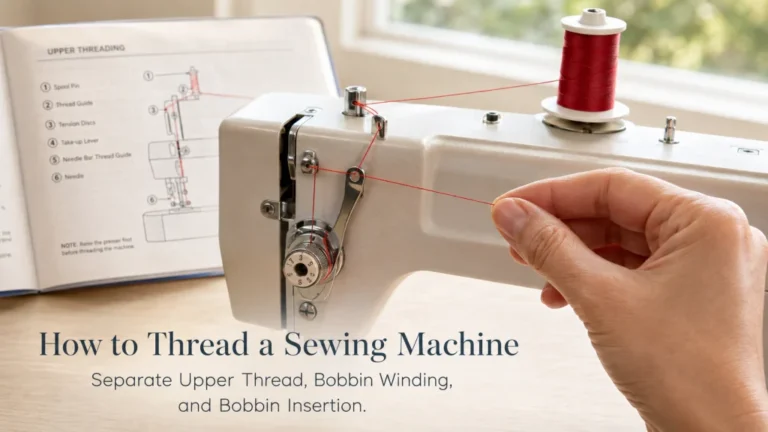
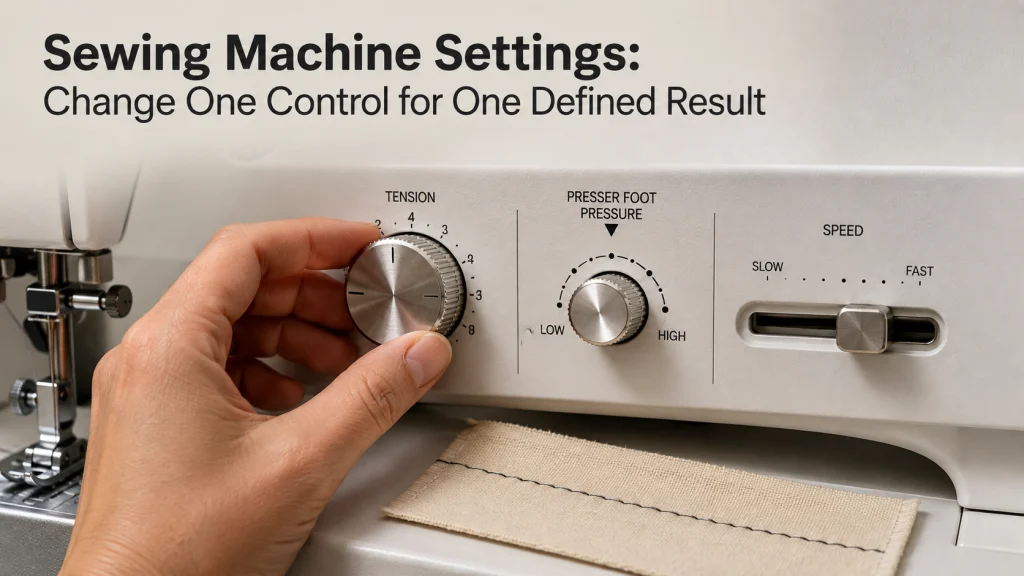
Sewing machine settings are easier to use when each control is tied to one defined result instead of treated as part of a universal chart. On a functioning domestic machine, upper thread tension changes thread balance, presser-foot pressure changes how firmly fabric is held against the feed system, a speed control can limit sewing speed, and a drop-feed control changes whether the feed dogs are engaged. The useful starting point is the exact machine manual, followed by one controlled change on a test sample that matches the real material stack. If the machine is already jamming, nesting thread, breaking needles, or ignoring a control, stop treating the situation as a normal settings question and move to fault diagnosis.
Choose the result before the control
Sewing machine settings become much less confusing when the first question is not “Which number should I use?” but “What am I trying to change?” A tension dial, presser-foot pressure control, speed slider, and drop-feed lever can all alter the sewing experience, but they do different jobs. Moving several of them at once makes it difficult to tell which change helped, which one did nothing, and which one created a new problem.
For a functioning machine, start with one intended result. You may want a better-balanced lockstitch, a different amount of pressure on the material, a lower maximum sewing speed, or the feed dogs intentionally disengaged for a supported task. Those are four separate control paths. Before changing one, check how the manual identifies that control and its normal state instead of borrowing a number from another machine.
Key point: Define the result first, identify the control that owns that result, and change only that control until you know what effect it had.
Start from the machine’s normal control state
Sewing machine controls are model-specific enough that two domestic machines can put similar-looking controls in different places, use different scales, or omit an adjustment entirely. That is why the manual or manufacturer support page should establish the starting state before you move anything. The goal is not to memorize a generic number. It is to know what your machine calls the control, what its normal position is, and whether the control is designed to be changed by the owner.
This model-specific approach also keeps a normal adjustment from drifting into service work. A user-facing tension dial is not the same thing as altering internal tension hardware, and a drop-feed lever is not permission to calibrate feed-dog height. For broader operating context, the site’s article on using a sewing machine correctly keeps normal controls separate from maintenance and repair boundaries.
| Control question | What to confirm first | What not to assume |
|---|---|---|
| Upper thread tension | Exact control, normal range or baseline, correct threading state | That the same number means the same thing on another model |
| Presser-foot pressure | Whether the machine actually provides owner adjustment | That every domestic machine has a pressure dial |
| Maximum sewing speed | Whether the model has a slider, menu control, or another documented limiter | That pedal feel and maximum-speed control are the same setting |
| Feed-dog state | Exact lever or switch position and re-engagement instructions | That moving the lever always makes the feed dogs rise immediately |
The ledger is intentionally about control purpose, not recommended numbers. A numeric value matters only in the context of the machine and sewing condition for which it was specified or tested.
Separate thread balance, fabric pressure, feed engagement, and maximum speed
Upper thread tension changes the resistance applied to the upper thread so the upper and lower threads can seat appropriately in the material. Presser-foot pressure changes how firmly the presser foot holds the fabric against the feed system. Feed-dog engagement determines whether the machine’s feed dogs are participating in fabric movement. A supported speed limiter changes how fast the machine is allowed to sew, but it does not replace the other three controls.
These functions can influence the same project without being interchangeable. On a layered quilt sandwich, for example, presser-foot pressure and feed engagement can both affect how the stack moves, but they act at different points in the feeding system. If the feed dogs are intentionally disengaged for a supported task, changing foot pressure does not turn automatic feeding back on. A lower maximum speed still does not change thread balance, and feed-dog state does not change stitch width. Keeping those jobs separate prevents one control from being used to compensate for another.
- Choose tension when the intended result is deliberate upper-thread balance on a correctly set up, functioning machine.
- Choose presser-foot pressure when the model supports it and the intended result concerns how firmly the fabric is held during feeding.
- Choose maximum speed when the machine provides a supported speed-control feature and the intended result is a slower or faster operating ceiling.
- Choose feed-dog state when the task specifically calls for intentional disengagement or re-engagement according to the manual.
If the desired result does not fit one of those jobs, another control or another article probably owns the question.
Keep stitch length, width, and needle position out of this control set
Stitch length, stitch width, stitch selection, needle position, and buttonhole programming are legitimate machine settings, but they change stitch geometry or stitch choice rather than the four operating-control jobs covered here. Combining all of them into one giant settings chart makes the page look comprehensive while making the decision process less precise. The reader ends up with many numbers and no clear reason to move any of them.
This distinction matters because a desired zigzag width is not solved by changing presser-foot pressure, and a different straight-stitch length is not a reason to lower the feed dogs. Keep the question attached to the result. Once the result is about stitch shape, position, or programmed stitch behavior, it has left the scope of this page.
Use a test sample before changing the project
A setting change is easier to judge on a sample that represents the real sewing condition. Use the same fabric type, number of layers, interfacing or batting when relevant, thread, needle, presser foot, and stitch selection that the project will use. A single layer of scrap cotton is not a meaningful stand-in for a layered seam allowance in the final piece.
The sample is not a pass-or-fail test with one transferable number. It is a controlled place to compare the normal starting state with one deliberate change. Brother’s tension guidance for supported models tells users to consider fabric and thread, while its presser-foot pressure guidance notes that the appropriate pressure depends on more than fabric thickness alone. The practical takeaway is to copy the real sewing condition closely enough that the comparison means something.
| Record | Baseline | Single change | Observed result |
|---|---|---|---|
| Machine and control | Manual-listed normal state | One documented adjustment only | What visibly or operationally changed |
| Material stack | Fabric and layer count | Keep stack unchanged | Feeding, balance, or control effect |
| Needle, thread, foot, stitch | Project setup | Keep them unchanged | Difference from baseline |
This worksheet prevents a common mistake: changing tension, pressure, speed, and another part of the setup together, then guessing which change caused the result.
Route deliberate thread balance to tension adjustment
Use the tension path when the machine is threaded correctly, functioning normally, and the goal is to deliberately change upper-thread balance for the material and thread in use. Brother’s support for covered domestic models tells the user to check threading and then change upper tension according to what the threads are doing in the fabric. The point here is the control’s job, not a dial number that can be carried from one machine to another.
The detailed process belongs in adjusting sewing machine tension. This page only routes the decision: tension is the relevant control when thread balance is the defined result and the starting condition is normal. Do not move to bobbin case screws or hidden tension components simply because the upper control did not produce the expected change.

This pack contains 20 SCHMETZ Universal sewing machine needles in size 80/12. The needles use system 130/705 H and have a slightly rounded point for woven and knit fabrics. Use them only when size 80/12 and system 130/705 H match the machine manual and the material used for the representative test sample.
Check On AmazonIf you click this link and buy, we earn a commission at no additional cost to you.
Route fabric hold to adjustable presser-foot pressure
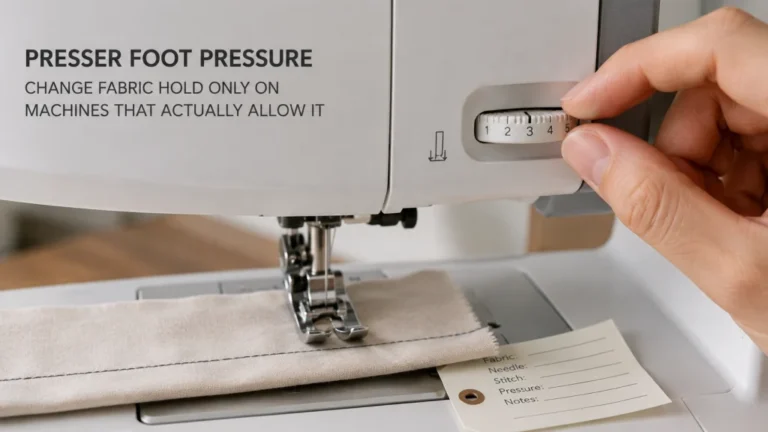
Presser-foot pressure concerns the force holding fabric against the feed system. On Brother models covered by its support article, the control has a stated range and standard position, and the company notes that the appropriate setting depends on fabric type as well as thickness. That makes the control useful for a fabric-hold decision without turning its numbers into a chart for unrelated machines.
Use the dedicated article on setting presser-foot pressure when the machine actually provides this adjustment and fabric hold is the intended variable. If the manual does not list an owner-adjustable pressure control, do not substitute a screw, spring, or hidden component that merely looks related.

This two-pack includes one black and one white Coats & Clark Dual Duty All-Purpose Thread spool, with 400 yards on each spool. The thread uses a polyester-covered polyester core and is listed for both hand and machine sewing. It provides a basic machine-sewing thread option when that thread type matches the fabric, needle, and project being evaluated.
Check On AmazonIf you click this link and buy, we earn a commission at no additional cost to you.
Route pace control to a supported sewing-speed adjustment
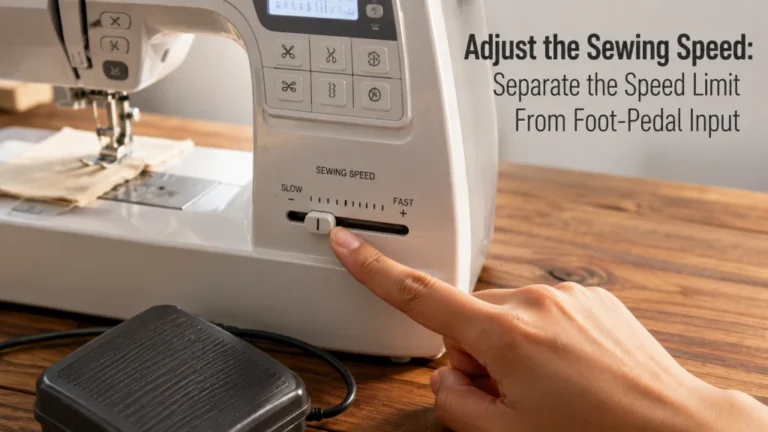
Some domestic machines provide a sewing-speed controller that sets how fast the machine can run. Brother documents this behavior on a large group of models and states that the speed chosen with the slider becomes the foot controller’s maximum sewing speed. That makes the slider a useful example of a control with a specific job: setting the operating ceiling rather than changing tension, feed pressure, or stitch geometry.
The interface still depends on the machine. Use adjusting the sewing speed for the procedure when a supported limiter is present. Do not modify a foot controller, electrical component, or internal speed system to imitate a feature the manual does not provide.
Route intentional feed disengagement to the feed-dog control
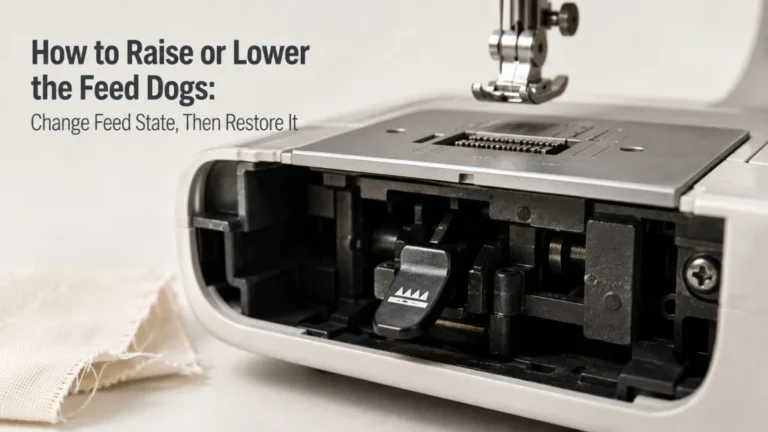
The feed-dog control changes whether the machine’s normal feed mechanism is engaged for supported tasks. On Brother ST371HD and ST531HD, for example, the current support procedure tells the user to place the needle correctly, move the drop-feed lever, and rotate the handwheel as part of raising the feed dogs. The important lesson is not the lever direction. It is that re-engagement can involve a model-documented mechanical sequence rather than an instant visual response.
Use raising or lowering feed dogs for the task procedure. Do not treat a feed-dog lever as a feed-height calibration control, and do not assume a machine with no obvious drop-feed lever should be opened or altered to create one.
Record the starting value and each single change
A small project log is more useful than memory when several sewing sessions or material combinations are involved. Record the machine, starting value or state, material stack, and the one control you changed. Then note what happened before touching anything else. This takes less time than reconstructing several simultaneous adjustments after the result becomes harder to interpret.
Name the entry by the project or material condition as well as the control. An entry such as “quilted tote, shell + batting + lining” is more useful later than a loose note that says only “pressure 2.” That context lets you reproduce a task-specific combination without mistaking it for the machine’s everyday setting.
Note: A setting record belongs to the machine and sewing condition that produced it. Do not assume the same value transfers to another model, fabric stack, thread, needle, or presser foot.
Restore normal operation after a task-specific change
A temporary adjustment should not quietly become the starting point for an unrelated project. When the manufacturer identifies a standard state, restore it after the special task unless the manual says otherwise. Brother’s presser-foot pressure support, for example, tells users of the covered models to return the control to its listed standard position after sewing.
The same principle applies to feed-dog state. After intentional drop-feed work, use the machine’s re-engagement sequence before returning to ordinary feeding. This section is about closing out a temporary setup, not repeating the earlier recordkeeping step: the goal is to avoid carrying an old task-specific state into the next job.
Stop when the starting point is already a malfunction
Normal settings guidance assumes the machine is operating normally. If the question begins with a jam, thread nesting, repeated breakage, a hard needle strike, abnormal motion, a control that no longer responds, or another unexplained failure, do not keep rotating controls in search of a magic number. The symptom may come from threading, a damaged or mismatched component, feed state, a needle problem, a jam, or a fault that settings alone cannot identify.
The same boundary applies when a user-facing control behaves differently from the manual. Stop the normal adjustment path and diagnose the symptom instead. Do not open energized areas, alter internal timing, modify a foot controller, calibrate feed-dog height, or change bobbin tension screws as an extension of ordinary settings work.
A control should solve a defined normal-use problem. It should not be used to hide a malfunction.
See More in This Section
Once you know which result you want, move to the article that owns that control. Each one stays narrower than this overview so the procedure can stay focused on the control instead of collapsing into a fabric-by-fabric settings chart.
| Topic | What you’ll find |
|---|---|
| Sewing Machine Tension Adjustment | How to make an intentional upper-thread balance change from a known starting state. |
| Adjust Presser-Foot Pressure | How adjustable foot pressure changes fabric hold and what to verify before changing it. |
| Adjust the Sewing Speed | How to use an existing speed-control feature without treating it as an electrical modification. |
| Raise or Lower Feed Dogs | How to change feed-dog state and confirm the model-specific re-engagement sequence. |
For most readers, the next step is tension, presser-foot pressure, or speed. Use the feed-dog path only when the sewing task intentionally calls for changing feed engagement.
Final Thoughts: Change the control that owns the result
The most useful control change begins with a defined result and one supported adjustment. Thread balance, fabric pressure, feed engagement, and maximum speed can all affect the same sewing project without doing the same job, so changing them as a bundle only hides cause and effect.
Use a representative test sample, keep a short project record, and return temporary controls to their normal operating state when the task is finished. If the machine is already behaving abnormally, stop treating the problem as a settings exercise. Normal controls are useful for deliberate changes, not for covering up a fault.
FAQs
🎛️ What sewing machine setting should I change first?
Start by defining the result you want, then choose the control responsible for that result. Do not begin by copying a number from another machine or changing several controls together.
🧵 Is thread tension the first setting to change when a stitch looks wrong?
No. First confirm that the machine is threaded correctly and operating normally. If the question begins with an unexplained failure, diagnose that condition before treating tension as a normal adjustment.
🦶 Does every sewing machine have adjustable presser-foot pressure?
No. Control availability varies by model, so check the exact manual or manufacturer support documentation before looking for a dial, menu setting, or adjustment point.
🐢 Does a speed slider change how hard I press the foot controller?
On some Brother models, the speed controller sets the foot controller’s maximum sewing speed. Other machines may use a different interface, so verify the behavior for the exact model.
⚙️ Why did my feed dogs not rise as soon as I moved the lever?
Some machines require an additional mechanical step, such as rotating the handwheel, before the feed dogs re-engage. Follow the exact model instructions rather than forcing the lever or attempting feed-height adjustment.
📝 Should I keep a record of settings that work?
Yes. Record the machine, project or material stack, needle, thread, foot, stitch, starting state, one control change, and the observed result. Naming the project makes the note easier to reuse without treating one successful value as a rule for every setup.
References and Sources
- Brother thread tension support: Documents upper-thread tension changes, threading checks, and the covered domestic models.
- Brother presser-foot pressure support: Documents adjustable foot pressure, model-scoped settings, fabric dependence, and return to the listed standard position.
- Brother sewing-speed support: Documents the speed controller and its relationship to maximum foot-controller sewing speed on covered models.
- Brother feed-dog support: Documents feed-dog lever use and the mechanical re-engagement step for the listed models.