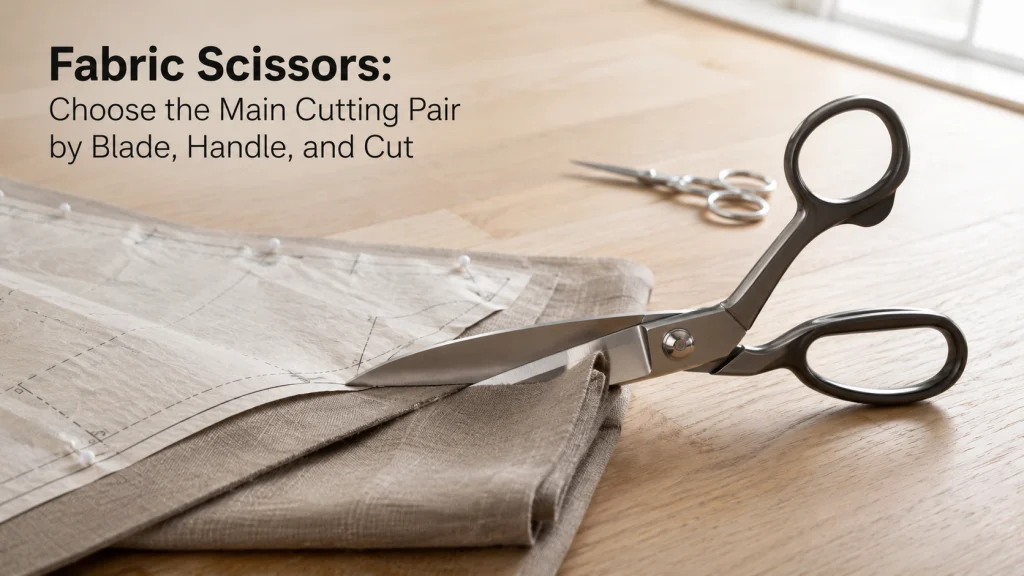
Your main fabric-cutting pair should be chosen around the cuts you make most often, not around the longest feature list on the package. For a main manual cutting pair, blade length, tip shape, handle form, handedness, and edge type matter because they change how the tool meets fabric and how easily you can follow long pattern edges or shorter detail cuts. The everyday cutting tool should stay general-purpose: if the job truly requires serration, a paddle blade, spring assistance, rag-cutting design, or a rotary system, that is a separate tool decision. Plan for safe storage and eventual sharpening as part of ownership instead of treating scissors as a disposable purchase.
Start with the main fabric-cutting job
Fabric scissors are easier to choose when the main cutting job is clear. Put a long bent-handle shear beside a shorter cutting pair and both can look like reasonable choices. The useful question is not which one appears more professional. It is which design matches the cutting you actually do: long pattern edges across a table, medium curves, notches, short trimming cuts, or a mix of those jobs. Choosing the primary scissors starts with that repeated cutting pattern, because blade and handle choices make more sense once the job is clear.
Utah State University Extension lists sharp dressmaker shears as a basic sewing supply and specifically notes that bent handles allow fabric to lie flat while cutting, that blade lengths vary, and that left-hand shears are available. Fiskars’ current scissors overview makes a similar functional distinction between larger scissors for broad cuts, smaller scissors for intricate work, general scissors, and specialty fabric-cutting designs. Those sources do not prove that one length or handle is universally best. They do establish that cutting form is a real selection factor rather than a cosmetic label.
If you are still deciding which cutting tools belong in a basic sewing setup, the broader overview of fabric cutting tools for sewing gives that context. The narrower task here is to qualify one dependable manual pair before specialty tools enter the decision. Listings may call that general tool sewing scissors for fabric, but the useful evidence is still its shape, construction, and intended cut.
Separate the sewing pair from paper and household scissors
A main sewing pair should have a clearly defined fabric-cutting role. That does not mean any scissor that can physically cut cloth becomes the right sewing tool. Paper, packaging, tape, and general household materials place different demands on an edge and can leave residue or wear that is irrelevant to a tool kept for fabric. The practical ownership rule is to decide what materials the pair is assigned to and keep that role consistent with the maker’s intended use and care guidance.
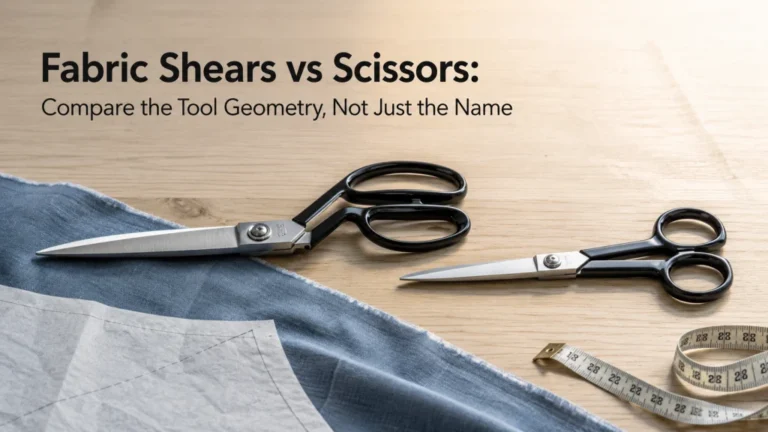
This is also where terminology can become noisy. Retail pages may use “scissors” and “shears” differently, and the words alone do not tell you blade length, handle offset, handedness, or intended cut. If that naming difference is blocking the purchase decision, compare fabric shears and fabric scissors separately. For this article, the label matters less than whether the tool is built and maintained for the general fabric-cutting job you need. Even the phrase cloth-cutting scissors tells you less than the actual blade, handle, handedness, and use description.
Key point: Reserve the sewing pair for its intended fabric-cutting role. A familiar household shape does not tell you whether the blade, handle, or edge is appropriate for repeated sewing cuts.
Once the role is fixed, length becomes easier to evaluate because you can connect it to the distance and precision of the cuts rather than to a generic “bigger is better” assumption.
Decide between long pattern cuts and shorter detail cuts
Long straight or gently curving pattern edges reward a blade that covers more distance with each closing motion. Shorter detail work asks for easier positioning around tight curves, small notches, or compact areas where a long blade may feel less direct. Manufacturer category pages explicitly separate larger tools for broad cuts from smaller scissors intended for intricate cuts, which supports using cut length as a buying criterion without inventing a universal inch measurement.
For the primary tool, think about what dominates your cutting table rather than the rarest cut you might make. Someone who usually cuts garment pattern pieces from yardage has a different repeated motion from someone trimming small fabric components. One well-chosen pair can handle more than one task, but the dominant cut should still decide where you compromise. If a project repeatedly demands very tight, specialized detail work, that is evidence that a second tool may be justified rather than evidence that the everyday scissors failed.
| Cut you make most often | Blade and handle qualities to prioritize | What to avoid assuming |
|---|---|---|
| Long straight pattern edges | Enough blade length to cover distance efficiently; a handle form that works close to the cutting surface | That the longest available blade is automatically easiest to control |
| Broad curves and mixed garment pieces | Moderate reach with a tip you can place accurately through changing curves | That one specialty tip is required for ordinary curved cutting |
| Short detail cuts and compact pieces | A shorter, easier-to-position blade profile and a controllable tip | That a tiny detail scissor should replace the primary cutting tool |
| A mix of long and short cuts | A balanced design that handles the dominant job without making the secondary job awkward | That one tool must be optimized for every possible sewing cut |
Use this worksheet as a qualification step, not a scoring system. The goal is to identify the cut pattern that deserves priority, then use the next sections to check the blade and handle details that support it.

The KAI 7250 is a 10-inch professional shear made with high-carbon hardened stainless steel. Its longer format is designed for substantial fabric-cutting work and can handle thicker or more difficult fabrics. The blade construction provides a fine cutting edge, while the handle and pivot system are designed for smooth cutting action.
Check On AmazonIf you click this link and buy, we earn a commission at no additional cost to you.
Read blade length and tip shape together
Overall tool length is easy to notice, but the useful measurement is how much cutting edge and tip control the design gives you for the intended task. Longer blades can reduce the number of closures needed across a broad edge, while shorter blades can be easier to reposition for small changes in direction. The tip matters because fabric cuts often finish at a corner, notch, curve, or marked endpoint where placement is more important than maximum reach.
A product page that states only a total length gives less decision information than one that also shows the blade profile, tip, intended cut, and handle shape. Do not infer that a pointed tip is automatically “more precise” for every sewist or that a blunt-looking profile is poor for general cutting. Instead, ask whether you can see how the blade would enter, continue, and finish the cuts you identified in the previous section. That keeps the judgment tied to the actual tool design rather than marketing language.
| Scissor area | What to inspect | Why it matters for everyday fabric cutting |
|---|---|---|
| Blade length | Usable cutting reach relative to the overall tool | Changes how much fabric is covered per closing motion |
| Blade profile | Straightness, curve, thickness, and visible edge form | Helps match the tool to broad cuts versus more compact positioning |
| Tip | How narrow or broad the working end is | Affects placement at corners, notches, and the end of a cut |
| Pivot | Whether movement is smooth and the tool closes normally | Connects the two blades and affects normal opening and closing |
| Handle | Offset, loop shape, size, and stated handedness | Controls how the blades meet the cutting surface and how the tool is operated |
This anatomy card deliberately stops short of claiming that one profile feels better in every hand. Shape and construction can be verified from the tool; comfort is a user-specific result that should not be fabricated from a photograph or feature list.
Compare bent and straight handle forms
A bent handle changes how your hand, the blades, and the table line up during a cut. Utah State University Extension describes bent-handle dressmaker shears as allowing the fabric to lie flat while cutting, and current manufacturer descriptions use the same functional idea. That makes table contact a legitimate reason to consider bent dressmaking scissors for pattern cutting. It does not mean a bent handle is automatically more comfortable for every user or superior for every short cut.
A straighter handle can make sense when the work is lifted, compact, or approached from angles where continuous table contact is not the main requirement. The decision therefore returns to the way the cut is made: are you trying to keep a broad fabric layer undisturbed on a flat surface, or are you making shorter cuts where the material and tool move more freely? If terminology between “shears” and “scissors” is still creating confusion, return to the actual handle offset and blade proportions instead of relying on the name printed on the listing.
Note: Handle shape can change operating position, but a listing’s “ergonomic” or “comfort” language is not proof that the tool will suit a particular hand, disability, or medical condition.
That boundary becomes even more important when handedness enters the decision, because a left-handed label can refer to more than the color or shape of the handle.

These 8-inch scissors use precision-ground steel blades for clean cuts through fabric and other craft materials. The bent handle helps keep material flat on the work surface while cutting. The classic orange handle provides an ergonomic grip for everyday sewing and craft work.
Check On AmazonIf you click this link and buy, we earn a commission at no additional cost to you.
Check handedness before making comfort claims
Left-handed cutting is not a detail to postpone until after purchase. Manufacturer documentation for current left-handed scissors describes reversed blade and handle arrangements, which means handedness can change blade visibility and how the cutting edges meet under normal use. A pair that is merely symmetric at the handle should not automatically be described as a true left-handed design. Read the maker’s handedness statement and blade orientation rather than guessing from appearance.
If left-handed use is the primary requirement, treat it as its own qualification path instead of accepting a standard pair that only happens to fit both hands. The dedicated article on choosing left-handed fabric scissors goes deeper into that decision. This page only needs one hard rule: verify whether the tool is right-handed, left-handed, or genuinely ambidextrous before making any claim about suitability.
Safety: Scissors are sharp cutting tools. Use and store them according to the maker’s instructions, keep fingers clear of the blade path, and do not modify the handle or blade mechanism to compensate for an unsuitable handedness.
Once handedness is settled, the next buying trap is assuming that a more specialized edge is automatically an upgrade for ordinary pattern cutting.
Check edge type before buying a specialty pair
A conventional smooth cutting edge is the baseline for a general fabric pair. Specialty edges exist because some cutting problems ask for a different interaction with the material, not because every sewist benefits from the most unusual blade profile available. Current manufacturer categories separate general sewing scissors from pinking, serrated, spring-action, detail, and other specialized designs. That separation is useful evidence that edge type should follow the task rather than become a feature-collecting exercise.
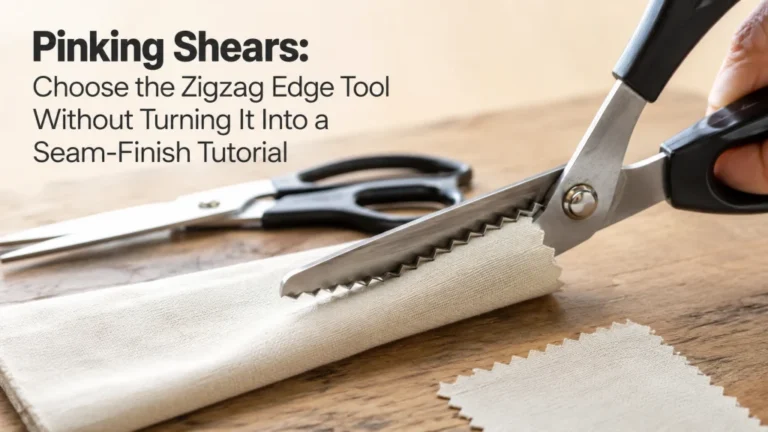
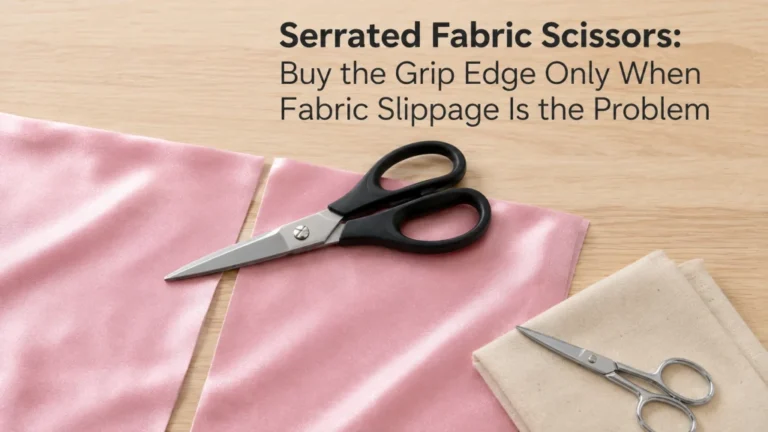
If fabric repeatedly slips away from a smooth edge, a serrated design may become a separate question. If the edge itself needs to create a zigzag profile, pinking shears are a different tool family. Neither requirement should silently redefine the everyday cutting tool. For the specific grip behavior of a toothed edge, see when serrated fabric scissors make sense rather than treating serration as a universal upgrade.
That same logic applies beyond edge texture. A specialty paddle, spring mechanism, or rag-cutting design should enter only after the unresolved requirement has been named.
Recognize when the unresolved need is a specialty tool
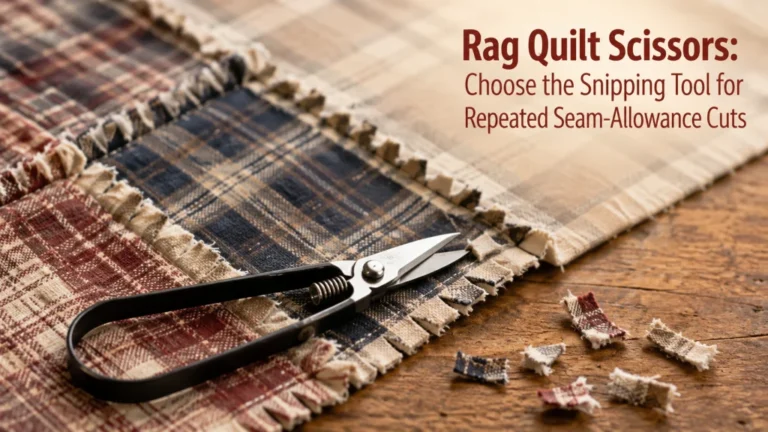
The general-purpose tool reaches its boundary when the cutting job itself changes. Applique work may require a blade shape that protects the fabric layer beneath; repetitive rag cutting may prioritize a different handle mechanism and edge design; spring-assisted designs solve a different operating problem from ordinary dressmaking shears. Those are not reasons to make the primary cutting tool more complicated. They are reasons to identify a second, narrower requirement.
The fastest way to stay inside scope is to name what the ordinary pair cannot do. If you need a paddle blade that rides under applique work, compare duckbill scissors for applique cutting. If the repeated job is clipping rag-quilt allowances, use the separate decision path for scissors designed for rag quilts. The general cutting pair should not be judged against specialty jobs it was never meant to own.
| If the unresolved requirement is… | The decision has moved beyond the general-purpose tool |
|---|---|
| A toothed edge to hold material differently | Evaluate a serrated cutting tool for that specific material behavior |
| A paddle blade under applique work | Evaluate a duckbill-style tool for that layered cutting task |
| Repeated rag clipping | Evaluate a tool built around that repetitive cutting motion |
| Spring-assisted opening or another special handle mechanism | Evaluate that mechanism for the specific operating requirement |
| A rolling blade and ruler-based cutting workflow | Compare the cutting system itself rather than another scissor feature |
This boundary prevents a common shopping mistake: asking one pair of scissors to represent every cutting system in the sewing room.
Compare with rotary cutting only when the system itself is unresolved
A rotary cutter is not simply a round version of scissors. It changes the cutting system by adding a rolling exposed blade, a compatible cutting mat, and often a ruler-guided workflow. Utah State University Extension lists a rotary cutter, mat, ruler, and safety glove separately from basic dressmaker shears, which is a useful reminder that the tools ask for different setup and safety decisions. If you already know you want manual scissors for pattern pieces, there is no need to reopen the entire cutting-system question.
If the real uncertainty is whether scissors or a rotary setup better fits the work, compare fabric scissors and rotary cutting before buying either system. Do not choose a rotary cutter merely because repeated long cuts sound faster, and do not reject it merely because scissors are more familiar. The relevant differences include work surface, ruler use, blade exposure, material control, and the kind of cuts you repeat.
Safety: Rotary blades are outside this article’s operating instructions. Follow the exact cutter manufacturer’s guard, blade-change, storage, and disposal directions rather than transferring scissor-handling habits to an exposed rotary blade.
For readers who have already chosen scissors as the main system, the last major buying factor is ownership over time rather than another cutting feature.
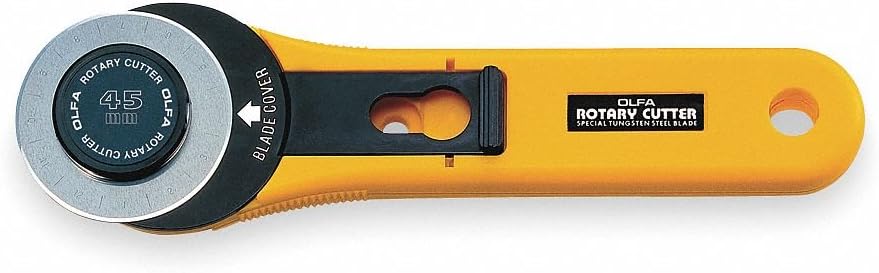
The OLFA RTY-2/G is a 45mm rotary cutter designed for sewing, quilting, and craft cutting workflows. Its rolling blade can be used for cutting fabric into strips, shapes, and pieces, including multiple layers where the material allows. The cutter includes a blade cover and can be configured for either right-handed or left-handed use.
Check On AmazonIf you click this link and buy, we earn a commission at no additional cost to you.
Plan sharpening and storage as ownership costs
Scissors are reusable cutting tools, so the purchase price is not the whole ownership decision. Edges eventually need attention, and storage can affect both safety and condition. Fiskars’ current US warranty information explicitly separates normal wear, sharpening, improper maintenance, and improper storage from manufacturing defects. That does not tell you when every pair will become dull, but it does show why sharpening and care belong in the ownership plan rather than being treated as unexpected failures.
Before buying, check whether the maker provides care guidance, whether the edge type is intended to be sharpened, and whether the tool comes with or calls for a protective storage method. Do not assume every specialty edge should be sharpened with the same device or technique. When the primary scissors no longer cut cleanly, the separate article on sharpening fabric scissors safely can handle the maintenance decision without turning this buying article into a sharpening tutorial.
- Confirm the tool is intended for fabric and note any care restrictions.
- Check whether the manufacturer addresses sharpening for that blade or edge type.
- Plan a storage location that protects the blades and keeps the tool from being handled casually.
- Keep the pair assigned to its intended cutting materials.
- Replace or service a tool that is damaged rather than forcing a poor cut through fabric.
Those ownership checks are deliberately modest. They help protect the value of the cutting tool without inventing a blade-life number or promising that one maintenance routine will keep every scissor sharp indefinitely.
Final Thoughts: buy the main pair for the cuts you make
The strongest choice begins with a simple inventory of your normal cuts. Decide whether long pattern edges, mixed curves, or compact detail work dominates, then check blade reach, tip shape, handle offset, and handedness against that job. Your primary scissors should cover the recurring work without pretending to replace every specialty edge or cutting system.
Keep the decision practical after purchase too. Reserve the tool for its intended materials, store it safely, and expect sharpening or service to become part of long-term ownership when the maker allows it. The wider overview of essential sewing tools and equipment can place that pair alongside the rest of a machine-sewing workspace without turning every tool into a specialty purchase.
Frequently Asked Questions
These questions focus on the buying decisions that remain after you know you want a manual fabric-cutting pair. They do not replace manufacturer safety or care instructions for the exact tool.
✂️ What size should my main fabric-cutting pair be?
Choose length from the cuts you make most often. Longer blades can suit broad pattern edges, while shorter blades can be easier to position for compact details, but there is no universal best inch measurement for every sewist.
🧵 Are fabric cutting scissors different from regular household scissors?
The useful difference is intended use, blade and handle design, and how the tool is maintained. Keep a main sewing pair assigned to fabric rather than assuming any household scissor is equivalent because it can cut cloth.
📐 Are bent-handle scissors better for cutting fabric?
Bent handles can help keep fabric flatter on the cutting surface during broad pattern cuts. That form can be useful, but it does not prove universal comfort or make a bent handle best for every short or lifted cut.
🖐️ Do left-handed sewists need left-handed fabric scissors?
Check the exact handedness and blade orientation before buying. A true left-handed design can reverse the blade relationship, while a symmetric handle alone does not prove the scissors are genuinely left-handed.
🦷 Should my main fabric-cutting pair have a serrated edge?
Not automatically. A smooth general edge is the baseline for ordinary pattern cutting; consider serration only when a recurring material or cut creates a specific need for that edge behavior.
🔄 Should I buy fabric scissors or a rotary cutter first?
That depends on the cutting system you want. Scissors are a direct manual pair, while rotary cutting adds a mat, exposed rolling blade, and often ruler-guided work, so compare the systems if that choice is still unresolved.
If none of those questions changes the basic decision, stay with the main-job test: choose the blade and handle design that matches the cuts you repeat, then add specialty tools only when a separate requirement appears.
References and Sources
The selection factors in this article were checked against current sewing-tool guidance and manufacturer information covering fabric-cutting tools, blade and handle forms, handedness, sharpening, and storage-related ownership considerations.
- Utah State University sewing supplies: Identifies sharp dressmaker shears as a basic sewing tool and notes bent handles, available blade lengths, and left-handed options.
- Fiskars scissors and shears overview: Documents current general, broad-cut, detail, left-handed, and specialty scissor categories used to verify the tool-family distinctions in this article.
- Fiskars care and warranty terms: Confirms that sharpening, normal wear, maintenance, and storage are separate ownership considerations rather than manufacturing-performance guarantees.
Manufacturer marketing language about comfort, precision, or durability was not treated as proof of universal hand fit, cutting performance, or blade life. The sources support the design and ownership boundaries used here, not a recommendation for a particular product.