Feed dogs that appear to be failing can actually be in several different states: disengaged, not fully re-engaged, moving without advancing fabric, obstructed by accessible lint or thread, or genuinely outside normal user-level correction. The safest diagnostic path is to confirm the exact model’s feed control, watch what the teeth do during a permitted manual cycle, and test a simple woven scrap before naming an internal failure. A visible feed dog is not proof that it is traveling correctly, and fabric that stays still is not proof that the mechanism is broken. This process keeps the checks at owner level and gives you a clear point to stop for service.
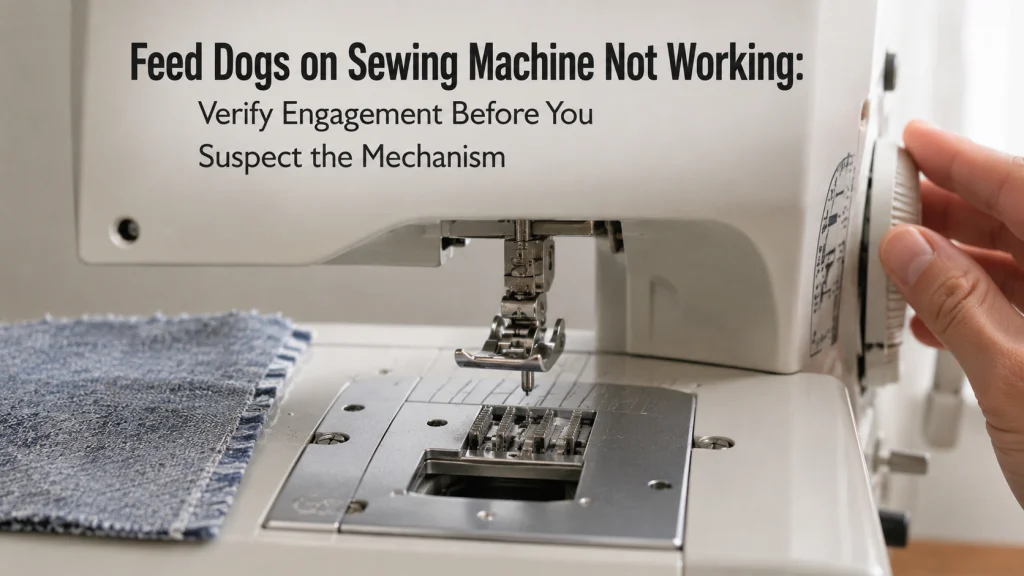
Prove what the feed dogs are doing before naming the failure
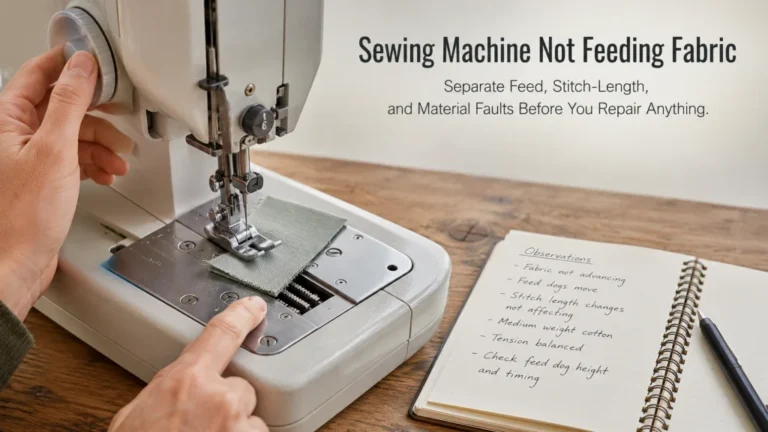
A no-feed symptom needs to be split into observations before it is split into causes. You may see the teeth above the needle plate but no front-to-back travel, see them cycle while the fabric still stays in place, or see them remain below the plate when regular sewing is expected. Those three observations do not point to the same next step.
The main keyword may sound like a component diagnosis, but feed dogs on sewing machine not working is too broad to treat as a confirmed mechanical failure. Current manufacturer troubleshooting includes disengaged feed dogs, incomplete re-engagement, very short stitch settings, thread obstruction, and other external conditions among no-feed causes. Start by recording what moves and what does not.
| What you observe | What it proves | Next check |
|---|---|---|
| Teeth remain below the plate | The normal feed surface is not available | Check the exact feed control and re-engagement procedure |
| Teeth rise but show no clear fore-aft travel | Vertical position alone does not prove a normal feed cycle | Observe a permitted slow handwheel cycle and stop if movement is abnormal |
| Teeth rise and travel, but fabric stays still | The dogs are moving, so the problem is not simply “no feed-dog motion” | Test baseline fabric, presser-foot state, stitch length, and accessible obstruction |
This observation-first approach prevents a stationary fabric sample from being translated immediately into “broken feed dogs.” It also separates this article from general explanations of how the feed mechanism works.
Confirm regular sewing should have the feed dogs engaged
Before troubleshooting a failure, confirm that the selected operation is supposed to feed fabric normally. Drop-feed, free-motion, button-sewing, darning, or a machine-specific special mode can intentionally disable automatic fabric advance. Some machines lower the dogs mechanically, while other models cover them with a darning plate instead of providing a drop-feed control.
Return the machine to an ordinary straight-stitch baseline using the exact manual, with the normal presser foot and a nonzero stitch length where the model requires it. Do not use a free-motion or special-purpose setup as the diagnostic baseline. For broader no-feed symptoms that are not clearly centered on the dogs, use the sewing machine fabric-feed troubleshooting path instead.
Find the exact model’s feed-dog control
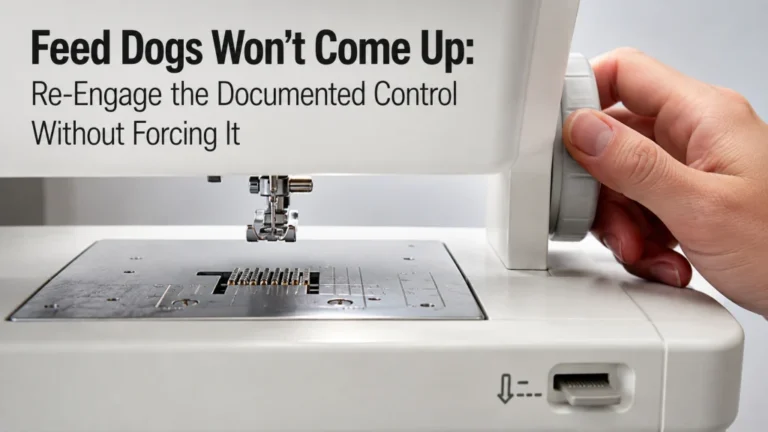
The control may be a lever, switch, on-screen mode, or a different arrangement entirely. Do not copy the lever direction from another machine because even closely related models can place the control differently. Manufacturer support pages also show that some machines cannot lower the dogs at all and use a plate to block their contact with the fabric.
Locate the exact manual or official support page and note three things: where the control is, which position means normal feeding, and whether another step is required after changing that position. If the documentation does not match the machine in front of you, stop and confirm the model number rather than experimenting with nearby switches.
Key point: “Lever moved to up” and “feed dogs re-engaged” are not always the same state. The manual may require a handwheel rotation, a needle-position command, or another model-specific cycle before the teeth return to normal operation.
That distinction matters because an incomplete return to sewing mode can look exactly like a mechanical fault from above the needle plate.
Complete any documented re-engagement cycle
Current SINGER troubleshooting tells owners with drop feed to move the control back to regular sewing mode and then turn the handwheel one full revolution to re-engage the dogs. Brother support pages likewise show models where sliding the control is not enough by itself, and the teeth rise only after a handwheel rotation or needle-position action. The exact sequence still belongs to the exact model.
Other current manufacturer manuals reinforce that model dependence. A Janome 1522 manual requires moving the feed lever to the raised position and turning the handwheel toward you, while the 2026 BERNINA 495 LE manual uses a dedicated Feed Dog Up/Down button and instructs the operator to press that button again to raise the dogs. These examples are not interchangeable instructions; they show why the control sequence must come from the machine in front of you.
| Manufacturer example | Published return behavior | What the example proves |
|---|---|---|
| SINGER | Covered drop-feed troubleshooting includes returning the control to regular sewing and completing a handwheel revolution | A lever position alone may not finish re-engagement on the covered machine |
| Brother | Covered models use the feed control plus a handwheel rotation or needle-position action | The return step can vary even within one brand |
| Janome 1522 | Move the lever to the raised position, then turn the handwheel toward you | A mechanical lever can require a separate motion before the dogs return |
| BERNINA 495 LE | Press the Feed Dog Up/Down button again to raise the dogs | A current electronic control can use a different return sequence from lever-based machines |
Use the table as a reminder to find the right instruction, not as a shortcut around the manual. Follow the exact sequence once, without forcing the lever, button, or handwheel, then return to the observation matrix rather than assuming the problem is solved. If the teeth stay below the plate after a known lowering event and the documented return sequence has already been completed, the symptom belongs in the separate feed dogs that will not come up diagnostic path.
Observe rise and fore-aft travel with a safe manual cycle
With the machine prepared exactly as its manual permits for a handwheel check, turn the handwheel only in the documented direction and watch the teeth through a slow cycle. You are looking for more than whether they appear above the plate. Normal feeding requires a repeating motion that presents the teeth to the fabric and moves them through the feed path before they drop and return.
Do not measure feed height, loosen screws, or compare tooth height with an internet specification. The owner-level observation is simply whether the dogs rise and whether there is visible front-to-back travel without hard contact, binding, or a mechanical lock. Brother service guidance for certain user-accessible procedures specifically uses slow handwheel movement to confirm that the feed dogs move smoothly and do not contact the needle-plate slots.
| State | Owner-level meaning | Action |
|---|---|---|
| Engaged | The model’s control is set for normal feed and any required return cycle is complete | Continue to motion observation |
| Moving | The teeth visibly rise and travel during the permitted manual cycle | Continue to a baseline fabric test |
| Feeding | A normal woven scrap advances under the lowered presser foot at a normal stitch setting | The basic feed function is present; route any remaining symptom more narrowly |
These are three different claims. A dog can be engaged without visibly completing a normal travel pattern, and it can visibly move while a different condition still prevents the fabric from advancing.
Test whether a stable woven scrap advances
Use a simple, stable woven cotton scrap rather than a slippery, stretchy, very thin, very thick, or heavily layered project. The purpose is not to prove performance on every material. It is to remove unusual material handling from the first feed check and see whether the machine advances an ordinary baseline sample during regular sewing.
Set the presser foot down, use a normal straight stitch with a nonzero stitch length as directed by the machine manual, and guide rather than pull the fabric. SINGER explicitly warns that pushing or pulling fabric can deflect the needle because the feed system is intended to draw the fabric under the foot. If the baseline sample advances but the original project does not, you no longer have a simple “dogs do not move” case.
Warning: Do not pull the fabric through to compensate for failed feeding. Stop if the needle strikes, the handwheel becomes hard to turn, the machine locks, or the fabric is trapped under the plate.
A successful baseline test narrows the problem toward project conditions, stitch settings, or another feed interaction. A failed baseline test keeps the investigation focused on feed state, obstruction, and the service boundary below.

PEASUG Muslin Fabric is made from 100 percent cotton with a plain weave. The unbleached fabric measures 63 inches wide by 2 yards long and has a medium-weight construction. It provides a simple cotton material that can be cut into test pieces for general sewing and fabric-handling checks.
Check On AmazonIf you click this link and buy, we earn a commission at no additional cost to you.
Clear only accessible lint or thread as documented
Lint and loose thread around the feed area can interfere with movement, and current manufacturer support includes cleaning around the feed dogs among owner-level checks on covered models. The important boundary is access. Remove only the covers or needle-plate parts that the exact manual identifies as user-removable, and power off or unplug the machine whenever those instructions require it.
Use the cleaning method the manufacturer specifies, such as the supplied brush or another approved method. Do not add oil merely because lint is present, probe into inaccessible mechanisms, sharpen the teeth, or remove parts beyond the documented cleaning area. Cleaning is a bounded check for debris, not permission to inspect or adjust the feed mechanism internally.
- Power off or unplug before access when the manual requires it.
- Remove only user-serviceable covers or plates named in the instructions.
- Clear loose lint and thread from the accessible feed and bobbin area.
- Reassemble the exact parts in the documented order before testing.
- Stop if a part is damaged, will not seat normally, or the machine binds after reassembly.
After cleaning, repeat the same baseline observation rather than changing several settings at once. One controlled change makes it easier to tell whether the accessible obstruction mattered.

This set includes 20 reusable sewing machine cleaning brushes. The brushes use dense silicone bristles and are designed for cleaning narrow internal and spool-area spaces. Their small nook-and-cranny format provides a dedicated tool for collecting loose lint and debris from accessible sewing machine areas.
Check On AmazonIf you click this link and buy, we earn a commission at no additional cost to you.
Separate teeth that do not move from teeth that move but do not feed
If the feed dogs show no fore-aft travel during a permitted manual cycle, the symptom is now more specific than “fabric does not move.” Recheck the documented engagement state once. If the control and re-engagement sequence are correct and the movement still is not present, do not jump to a gear, cam, or linkage diagnosis from outside the machine.
If the teeth clearly travel but a baseline scrap does not advance, keep the cause list outside the feed mechanism first. Manufacturer troubleshooting can include the presser foot not being lowered, stitch length at or near zero, a wrong foot for the selected stitch, thread entanglement, or material conditions. Those checks explain why visible feed-dog movement and actual fabric advance are separate observations.
| Confirmed observation | User checks still reasonable | Do not infer |
|---|---|---|
| No visible fore-aft feed motion | Exact engagement state, required return cycle, accessible debris | Broken gear, worn cam, incorrect feed height, or failed linkage |
| Feed motion present, baseline fabric does not advance | Presser-foot state, stitch length, correct regular-sewing setup, accessible thread obstruction | That the feed teeth themselves are broken |
| Baseline fabric advances, original project does not | Route to material, layer, foot, or stitch-condition troubleshooting | That the machine has a general no-feed failure |
This separation is the core diagnostic gain. You end with a narrower symptom that can either be corrected at user level or described accurately to a technician.
Route a known stuck-down history to the dedicated check
If the sequence is clear that the feed dogs were intentionally lowered for darning, button sewing, or free-motion work and then failed to return, the history matters more than a generic no-feed label. That case starts with a known state change and a failed return, so it should not be mixed with dogs that are already above the plate but do not travel.
Use the feed-dog re-engagement troubleshooting steps for that narrower symptom. Keep this page for the broader case where the teeth may be visible, may move partly, or may appear normal while the fabric still does not advance.
Route variable stitch spacing to the stitch-length checks
A machine that advances fabric but produces unexpectedly short, long, or changing stitch spacing is not showing the same symptom as a machine with no effective feed. A stitch-length setting at zero can stop advance on some machines, but once the fabric is moving and the problem is spacing consistency, the diagnostic question has changed.
If changing the selected stitch length produces no meaningful change, use the stitch length not changing checks. If spacing varies unpredictably during otherwise normal feed, move to the inconsistent stitch length diagnosis. Those routes keep this article from turning every feed-related symptom into a feed-dog failure.
Stop before feed height, gears, cams, or linkage adjustment
Once the exact control is in normal mode, the required re-engagement cycle is complete, accessible debris has been cleared as documented, and the dogs still fail the motion or baseline-feed check, the remaining possibilities can move beyond normal owner service. This is the point to describe the observation accurately and stop, not to open the machine until a plausible internal part appears.
Feed height, gear condition, cam position, linkage travel, internal timing, and motor-driven feed faults are service-level territory unless the exact manufacturer manual explicitly makes a particular adjustment user-serviceable. A community answer that names a worn gear from the same symptom is not proof that your machine has that failure.
| User-level check | Service boundary |
|---|---|
| Confirm normal sewing mode and exact feed control | Do not bypass or modify the control mechanism |
| Complete the manual’s re-engagement cycle | Do not force a lever or handwheel that resists |
| Observe permitted handwheel movement | Do not measure or adjust internal feed geometry |
| Clean documented accessible lint or thread | Do not dismantle gears, cams, shafts, or linkages |
| Test a stable woven scrap | Do not pull fabric through to overcome failed feeding |
Seek qualified service immediately for smoke, burning odor, overheating, exposed wiring, uncontrolled motion, repeated hard needle strikes, a hard mechanical lock, or visible broken internal parts. For the broader troubleshooting framework around symptoms that do not fit this page, use the sewing machine troubleshooting decision process.
Final Thoughts: observe the feed motion before assuming a broken part
The most useful result is not a guessed component name. It is a clean observation record: regular sewing mode confirmed, exact feed control checked, required re-engagement completed, rise and fore-aft travel observed, baseline fabric tested, and only documented accessible debris removed. That record tells you whether the dogs are down, not traveling, traveling without feeding, or working normally on a baseline sample.
If those owner-level checks still leave a failed motion or failed baseline-feed result, stop before internal adjustment. A technician can work from a precise symptom much more effectively than from “the feed dogs are broken,” and you avoid turning a bounded troubleshooting problem into a second mechanical fault.
Frequently Asked Questions
These questions stay focused on feed-dog movement during normal domestic sewing. They do not replace the exact manual for control location, cleaning access, or re-engagement behavior.
If the symptom changes while checking, follow the narrower route rather than continuing down a checklist that no longer matches what the machine is doing.
⚙️ Why are my feed dogs not moving on my sewing machine?
First confirm that the exact model is in normal sewing mode and that any drop-feed control has completed its required re-engagement cycle. If the teeth still show no fore-aft travel during a manual check permitted by the manual, stop before internal feed adjustments.
🧵 Why is my fabric not moving even though the feed dogs are up?
“Up” proves only vertical position. Check whether the teeth also travel, then test a stable woven scrap with the presser foot lowered and a normal nonzero stitch length for the model.
🔄 Do feed dogs need a handwheel turn after I raise them?
Some machines do, while others use a different return sequence. Current SINGER and Brother instructions include models that require handwheel or needle-position movement after the control is changed, so follow the exact model procedure.
🧹 Can lint stop the feed dogs from working properly?
Accessible lint or thread can contribute to feed problems, and manufacturers include cleaning around the feed area in troubleshooting for some models. Remove only the parts the exact manual makes user-accessible and use the specified cleaning method.
📏 Can stitch length make the fabric stop moving?
Yes on machines where a zero or extremely short setting produces little or no advance. If the dogs move and changing stitch length does not change the result, route the symptom to the dedicated stitch-length checks instead of adjusting the feed mechanism.
🛠️ Should I adjust feed-dog height if the fabric will not move?
Not as a generic owner-level fix. Confirm control state, re-engagement, visible motion, baseline feeding, and documented cleaning first, then use qualified service if the problem persists beyond the manual’s user procedures.
A failed feed check becomes more useful when you can describe exactly which stage failed. That is the information to carry into the next troubleshooting route or a service conversation.
References and Sources
The manufacturer sources below support the control-state, re-engagement, no-feed, accessible-cleaning, and service-boundary claims used in this article. The community page is included only because it documents the recurring way owners describe feed dogs that appear not to work; its repair suggestions are not treated as technical proof.
Feed controls and access procedures vary by machine. Recheck the exact current manual or manufacturer support page for the model in front of you before removing parts or following a re-engagement procedure.
- SINGER troubleshooting guidance: identifies disengaged feed dogs, re-engagement after drop feed, presser-foot state, and zero stitch length among current no-feed checks.
- Brother feed-dog control guidance: provides a current example where a full handwheel rotation is part of re-engaging the feed dogs.
- Brother feed-dog re-engagement support: shows another model group using feed-control position plus handwheel or needle-position movement to raise the dogs.
- Janome 1522 instruction manual: shows a lever-based return sequence that requires moving the feed control to the raised position and turning the handwheel toward the operator.
- BERNINA 495 LE user manual: shows a current electronic feed-dog control where pressing the Feed Dog Up/Down button again raises the dogs.
- Brother no-feed troubleshooting: lists lowered feed dogs alongside stitch length, presser-foot, needle, thread, and thick-seam conditions that can affect fabric advance.
- Brother accessible cleaning guidance: includes checking and cleaning lint or dirt around the feed dogs on covered machines.
- Brother darning-plate example: shows that some machines do not lower the feed dogs and instead use a plate, reinforcing the need for exact-model instructions.
- Community feed-dog questions: documents owner wording such as teeth that stay stationary, remain down, or move without advancing fabric, without serving as proof of the underlying cause.
Together, the sources support an observation-first diagnosis rather than an internal repair conclusion. Exact model documentation remains the controlling source for what you may safely access, clean, cycle, or reset.