When a sewing machine needle keeps breaking, replacing it again is only useful if the repeatable cause is removed first. The safest diagnostic path is to establish one correct baseline, then separate a direct collision from sideways needle deflection caused by fabric handling, thread drag, an incompatible stitch-and-foot combination, or damage around the stitch-forming area. Keep all checks at the user-serviceable level documented for the exact machine, and stop before bending, aligning, or repositioning internal parts. If a correctly installed needle repeatedly strikes hard or the machine develops a mechanical lock, the next step is service rather than another test run.
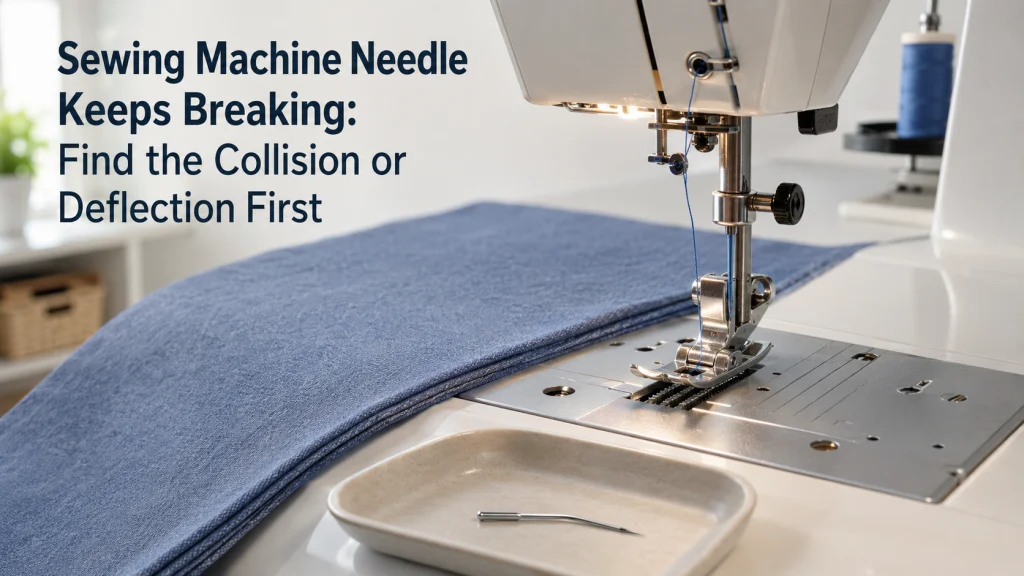
A Second Broken Needle Points to a Repeatable Condition
One damaged needle can come from a single event, but a fresh needle that bends or breaks again changes the question. The useful evidence is no longer the broken needle by itself, but what was happening immediately before the failure: the selected stitch, installed presser foot, fabric movement, thread path, needle position, and any contact mark near the needle opening. That distinction matters because a needle can fail from a direct strike or from being pushed sideways until it meets something it would normally clear. Replacing needles without checking those conditions can reproduce the same failure and can add damage to the presser foot, needle plate, or bobbin area.
Start with the machine stopped and the exact model manual available, then treat the next setup as a controlled baseline rather than a trial-and-error repair. The broader sewing machine stitch problem workflow helps separate this symptom from other stitch failures, while this article stays focused on repeated needle breakage or bending. Do not assume that the timing is wrong simply because the needle broke, and do not assume a new needle proves the machine is safe to continue using. First determine whether the evidence points to collision, deflection, setup error, or a problem that should be handed to service.
Stop and Remove Broken Needle Fragments Safely
Stop sewing as soon as the needle breaks and keep your hands away from the needle area until the machine is no longer able to start unexpectedly. Follow the exact manual for powering off or disconnecting the machine before needle, presser-foot, needle-plate, or bobbin-area access. Locate the upper and lower portions of the broken needle before installing a replacement, because a missing fragment can remain on the fabric, under the presser foot, or in an accessible lower area. Do not run the machine to see whether a fragment will work itself free.
If the manual permits owner access to the relevant area, remove only the covers, plate, bobbin, or bobbin case that the manual tells the owner how to remove. Do not reach into undocumented internal spaces with a screwdriver, magnet, or other tool in an attempt to chase a fragment. A fragment that cannot be found through documented user access is a reason to stop, not a reason to open more of the machine. Once all safely accessible pieces are accounted for, preserve the broken needle long enough to compare its shape with the next diagnostic observations.
Warning: A broken needle can leave a sharp fragment in the sewing area or project. Keep the machine stopped, follow the exact model manual for power and access instructions, and do not resume sewing while a fragment is unaccounted for.
Install One Correct Fresh Needle Fully and Securely
A diagnostic baseline needs one fresh, undamaged needle that is correct for the machine system and appropriate for the fabric and thread being used. Insert it in the orientation documented for the exact model, push it fully to the specified seated position, and secure the needle clamp exactly as instructed. Brother’s needle-breakage guidance specifically includes improper insertion and a loose needle-clamp screw among the checks that can lead to a damaged or broken needle. A partially seated or loose needle changes its position in the stitch path, so every later observation becomes unreliable until that baseline is corrected.
Do not install several different needle types in succession and treat whichever one survives longest as the answer. The purpose of this step is to remove obvious needle condition and installation errors before looking for a repeatable strike or deflection. If you are unsure which needle system or size the machine and material require, verify that separately before continuing rather than guessing inside a troubleshooting run. Once the correct needle is installed, keep it unchanged while you check the stitch, foot, thread path, and fabric handling.
| Correct-baseline check | What to confirm before sewing |
|---|---|
| Needle | Fresh, undamaged, correct system and suitable for the material and thread. |
| Installation | Correct orientation, fully seated, and clamp secured as the manual specifies. |
| Presser foot | Compatible with the selected stitch and its needle movement. |
| Thread path | Threaded through the documented path with no obvious snag or spool obstruction. |
| Fabric handling | Fabric will be guided, not pushed, pulled, or used to steer the needle sideways. |
Verify the Selected Stitch and Presser Foot Cannot Create a Collision
A needle can be installed correctly and still strike the presser foot if the selected stitch moves beyond the opening that the installed foot provides. This is especially important after changing from a straight stitch to a zigzag or decorative pattern, changing needle position, or installing a foot intended for a narrower movement range. Brother support includes an incorrect presser foot for the selected stitch among its needle-breakage checks, which makes the stitch-and-foot relationship a baseline verification rather than an optional detail. Use the exact machine documentation or stitch chart to confirm that the installed foot is allowed for the selected stitch.
With the machine stopped, inspect the foot opening and needle position using only the setup movements the manual allows for that model. If the manual describes a safe way to lower or position the needle manually for setup, follow that procedure and watch whether the needle path has adequate clearance. Do not test clearance by running the motor at speed, and do not continue if the needle visibly approaches or touches the foot. A confirmed foot or stitch mismatch should be corrected before any fabric test because fabric behavior cannot explain a collision that exists with no fabric movement at all.
Verify the Needle, Thread, and Fabric Combination Separately
Repeated breakage can also begin with a combination that overloads or deflects the needle even when the machine itself is functioning normally. A needle that is too fine for the fabric stack or thread can flex more under load, while a damaged or unsuitable needle can create its own failure before any machine collision is present. Manufacturer guidance treats needle size, thread, and fabric as a combination rather than three unrelated choices. Verify the correct combination for the exact project through the machine manual and needle compatibility information before using the test as evidence of a mechanical fault.
This article does not turn that verification into a general needle-buying discussion because the troubleshooting question is narrower. If the installed needle is wrong for the task, correct the baseline first and then repeat only the minimum test needed to see whether breakage returns. Do not jump from one material to another to make the symptom disappear, because that hides the condition you are trying to identify. The goal is to know whether a verified combination still produces the same bend or break under ordinary feeding.
Check Upper-Thread Drag and Spool Setup
A needle can be pulled off its normal path when the upper thread does not feed freely. Look for thread caught behind a spool cap, snagged on a rough spool edge, wrapped around a guide, or routed outside the documented threading path. Brother support includes spool setup and upper-thread condition among repeated needle-breakage checks, while Singer troubleshooting also directs users to look for upper-thread obstruction when thread problems occur. Rethread according to the exact machine manual instead of compensating with a random tension change.
After rethreading, check that the spool can release thread through the intended path without an obvious snag or sudden stop. Keep the needle, foot, stitch, fabric stack, and other baseline conditions unchanged so you are testing thread feed rather than several variables at once. If removing an obvious obstruction also removes the sideways pull on the needle, that is useful evidence about deflection, but it does not prove that every previous break came from thread drag. If the needle continues to strike or bend with the upper thread feeding normally, move on to the collision and fabric-handling checks instead of repeatedly changing tension.
When Upper-Thread Failure Becomes the Primary Symptom
The diagnostic path should change when the needle now survives but the upper thread becomes the repeatable failure. A thread that snaps while the needle remains straight and clears the foot and plate no longer fits a needle-breakage article as the primary symptom. Preserve the baseline you already established, including the machine, needle, foot, stitch, fabric stack, and threading path, because those details still matter to the next check. Then move to the upper thread breaking diagnostic path rather than continuing to replace needles or search for a collision that is no longer occurring.
Thread damage also needs its own distinction because a strand that frays, shreds, or is cut into fibers is not identical to a clean repeated break. If the needle survives while the thread is visibly being abraded, use the thread shredding troubleshooting workflow and carry forward any strike marks or setup observations that may still be relevant. Do not infer that an internal tension assembly is defective merely because the thread is failing, and do not use a random tension number to force the symptom away. Repeated needle breakage remains the subject here only while the needle itself continues to bend, strike, or break under a verified baseline.
Sew Without Pushing or Pulling the Fabric
Fabric handling is one of the clearest ways to create needle deflection without a fixed machine collision. Singer states that pushing or pulling fabric while sewing can deflect the needle and cause it to break, and Brother likewise warns against moving fabric faster than the machine can sew. The feed system should move the fabric while your hands guide direction and support weight. If you pull from behind or push from the front, the fabric can bend the needle sideways just as it enters the stitch-forming area.
Use a representative scrap and remove unnecessary fabric weight from the edge of the table so the test does not include extra drag. Guide the material lightly and let the machine feed at a controlled speed, watching for the point at which the needle begins to bend, sound changes, or a strike occurs. Do not hold the fabric tight to make a seam look straighter during diagnosis because that changes the force on the needle. If the needle survives under normal feeding after repeated breakage occurred only while the fabric was being forced, that observation supports a deflection route rather than proving an internal machine defect.
Inspect for Collision Marks and Separate Them From Deflection
After a break, inspect the user-accessible needle plate, presser foot, and bobbin-case area under good light without altering any internal position. A fresh nick, burr, scratch, or repeated mark near the needle path can show where contact has occurred, although the mark alone does not prove why the needle reached that surface. Brother specifically includes damaged presser feet, needle plates, and bobbin cases in its repeated-breakage checks because damage in those areas can interfere with normal movement or contribute to deflection. Record what you can actually see rather than turning every scratch into a timing diagnosis.
The most useful distinction is whether the needle appears to meet a fixed obstacle on its normal path or whether an outside force is bending it sideways into something it would normally clear. A wrong stitch-and-foot combination can create a direct collision, while fabric pulling or heavy thread drag can create deflection before contact. A damaged lower-area component may also require model-specific replacement or service, especially when the manual does not authorize owner adjustment. Use the card below to organize evidence, then stop if the machine reaches the service conditions described later.
| Evidence | More consistent with direct collision | More consistent with deflection |
|---|---|---|
| Needle path with fabric removed | Needle approaches or contacts the foot or plate at a documented setup position. | Clearance appears normal until fabric or thread force is introduced. |
| Stitch and foot | Foot is not approved for the selected stitch or needle movement. | Stitch and foot are documented as compatible. |
| Fabric handling | Break can occur without pushing or pulling the fabric. | Needle bends when the fabric is forced or dragged. |
| Thread feed | No obvious thread snag is needed to reproduce contact. | Strong upper-thread drag pulls the needle away from its normal path. |
| Visible marks | Repeated contact appears in a consistent fixed location. | Marks may vary with the direction of needle bend. |
If the Needle Survives but Stitches Skip, Change Diagnostic Paths
A test can reveal that the original breakage is gone while another symptom remains. If the fresh, correctly installed needle now clears the foot and plate but the machine consistently misses stitches, do not keep treating the problem as repeated needle breakage. Skipped stitches can involve needle condition, needle type, insertion, threading, fabric behavior, or other model-specific factors without producing another broken needle. That makes the surviving needle an important boundary between two troubleshooting questions.
Move to the sewing machine skipping stitches checks and keep the baseline information you already recorded. The same machine, fabric stack, thread, stitch, foot, and needle details can prevent you from repeating work while the symptom changes and preserve a clean comparison between the two failure states. Do not use skipped stitches by themselves as proof of incorrect timing or internal damage. A different failure pattern deserves its own documented checks before any service conclusion is made.
If Bobbin-Thread Pickup Fails Without Breakage, Follow That Symptom
Bobbin-thread pickup problems can appear close to the same stitch-forming area, but they are not the same symptom as a needle that repeatedly bends or breaks. If the needle now travels without contact yet fails to bring up the bobbin thread, preserve that distinction instead of forcing the needle-breakage checklist to explain it. Verify only the owner-level setup already required for the baseline, such as correct needle installation, threading, and bobbin placement as documented for the model. Do not reposition the hook, needle bar, or other internal parts to make the threads meet.
The next route is the bobbin-thread pickup troubleshooting process, where the failure can be evaluated on its own terms. Carry forward any strike marks or previous breakage history because they may still matter to a service technician, but do not turn them into a diagnosis you cannot verify. If the pickup failure occurs together with hard strikes or a mechanical lock, stop rather than continuing test cycles. The priority remains preventing more contact damage while preserving useful evidence about what the machine is doing.
Do Not Bend, Align, or Reposition Internal Machine Parts
Once the user-level baseline is correct, repeated contact may tempt you to bend the needle bar, shift the hook, loosen an internal screw, or change timing until the needle clears. Those are not normal owner-level troubleshooting steps unless the exact manufacturer documentation explicitly assigns a particular adjustment to the user. A clearance problem can involve relationships among the needle bar, hook, feed system, plate, presser-foot system, or other moving parts that cannot be diagnosed safely from one visible strike. Changing one internal position can also erase evidence and create a second fault.
Do not force the handwheel past a hard stop, force the needle through resistance, alter internal tension assemblies, open electrical housings, or move gears and linkages to continue testing. The sewing machine troubleshooting boundaries are useful here because a symptom-led check should end where documented owner access ends. If a normal baseline still produces repeated hard contact, keep the machine stopped and move toward qualified service. The objective is to identify the repeatable strike well enough to stop reproducing it, not to perform an undocumented internal repair.
Stop for Service After Repeated Collision on a Correct Baseline
Service becomes the sensible next step when a correctly installed and compatible needle repeatedly strikes hard after the stitch, foot, thread path, fabric handling, and user-accessible areas have been checked. Stop immediately for a hard mechanical lock, smoke, a burning odor, overheating, exposed wiring, uncontrolled motion, visible broken internal parts, or any work the manual reserves for service personnel. Brother’s support guidance directs users to authorized service when needle breakage persists after its documented checks. Continuing to sew through repeated impacts can add damage and makes the original fault harder to separate from damage caused during testing.
Before service, write down what is known rather than trying to supply a diagnosis. A useful record identifies the exact machine model, fabric and layer stack, thread, verified needle, installed foot, selected stitch, what happened immediately before the break, where any visible strike mark appears, and which user-level checks were completed. Include whether the failure happened with normal feeding or only when fabric or thread force was present. This evidence gives the technician a reproducible starting point without claiming that timing, hook position, or another internal mechanism is definitely at fault.
| Service evidence field | What to record |
|---|---|
| Machine | Exact model and any relevant manual or support document used. |
| Project setup | Fabric, layer stack, thread, verified needle, presser foot, and selected stitch. |
| Failure event | Whether the needle bent or broke, what the machine was doing, and whether a hard strike was heard or felt. |
| Visible evidence | Location of accessible marks, scratches, burrs, or damaged parts without guessing at the cause. |
| User-level checks | Needle installation, foot-and-stitch compatibility, thread path, fabric handling, and accessible inspection already completed. |
| Stop condition | Repeated collision, lock, abnormal heat or odor, wiring concern, uncontrolled motion, or another manual-defined service threshold. |
Final Thoughts: Find the Repeatable Strike Before Installing Another Needle
When the needle keeps breaking, the useful goal is not to find a needle that survives by chance. Establish one correct baseline, verify that the stitch and foot clear each other, confirm the needle-thread-fabric combination, remove thread drag, and let the feed system move the fabric without outside force. Then inspect only the user-accessible areas for evidence that separates a fixed collision from sideways deflection. Each check removes one variable without turning ordinary troubleshooting into internal machine adjustment.
If the needle survives and the symptom changes to skipped stitches, thread failure, or bobbin-thread pickup, follow that new symptom instead of continuing the breakage checklist. If a correct baseline still produces repeated hard strikes, a lock, or another service-level warning, stop testing and preserve the evidence for qualified service. That boundary is more useful than repeatedly replacing needles because it protects the machine while keeping the diagnosis tied to what can actually be observed. The next needle should be installed only after the condition that broke the last one has been addressed or handed off appropriately.
FAQs
Repeated needle breakage usually raises several setup questions at once, but the fastest route is to keep each question tied to observable evidence. Start with a fresh correct needle, a documented stitch-and-foot combination, normal thread feed, and fabric that is being guided rather than forced. Do not interpret every break as proof of an internal timing fault. If the machine still hits hard after the baseline is correct, stop before making undocumented mechanical adjustments.
The answers below stay within normal user-level checks for a domestic sewing machine. Exact needle orientation, bobbin access, plate removal, threading, control positions, and service boundaries can vary by model, so the machine manual remains the controlling instruction. A symptom that changes should also change the diagnostic path. Safety warnings such as a hard lock, smoke, burning odor, overheating, exposed wiring, or uncontrolled motion are reasons to stop using the machine rather than continue experimenting.
🪡 Why does my sewing machine needle keep breaking?
Repeated breakage can come from incorrect needle installation, a loose clamp, an unsuitable needle-thread-fabric combination, a stitch-and-foot collision, fabric pulling, thread drag, or damage around the needle path. Establish one correct baseline and identify whether the needle is striking directly or being deflected sideways before replacing another one.
🦶 Can the wrong presser foot break a sewing machine needle?
Yes, if the selected stitch moves the needle outside the opening provided by the installed foot. Verify the exact machine’s stitch-and-foot compatibility before running the motor, especially after changing stitch type or needle position.
🧵 Can pulling the fabric make the needle break?
Yes. Pushing or pulling fabric can deflect the needle sideways, so let the feed system move the material and use your hands only to guide and support it.
🔍 What should I inspect after a needle breaks?
After following the model’s power and access instructions, account for broken fragments and inspect the user-accessible presser foot, needle plate, and bobbin area for fresh contact damage. Record what you see without loosening or repositioning internal parts.
⚙️ Does a broken needle mean the timing is wrong?
No. Needle breakage alone does not prove a timing fault because setup errors, collisions, fabric force, thread drag, and damaged user-accessible parts can also produce breakage or deflection.
🛑 When should I stop troubleshooting and get the machine serviced?
Stop after repeated hard collision on a verified baseline, or immediately for a hard mechanical lock, smoke, burning odor, overheating, exposed wiring, uncontrolled motion, visible broken internal parts, or work the manual reserves for service. Preserve the setup details and visible evidence for the technician instead of continuing test cycles.
References and Sources
This article needs a small source section because repeated needle strikes involve both injury risk and model-dependent service boundaries. Manufacturer support is used here for the specific checks around needle installation, clamp security, presser-foot and stitch mismatch, fabric forcing, upper-thread drag, accessible strike damage, and escalation when breakage persists. The sources are not used to claim that any single cause applies to every machine. Exact instructions for power, needle orientation, bobbin access, plate removal, controls, and owner-serviceable work still come from the manual for the machine being diagnosed.
Community discussions are intentionally excluded from the technical evidence in this article. Repeated breakage can sound similar across machines while the actual clearances, foot systems, needle systems, bobbin arrangements, and service instructions differ. The two manufacturer sources below are enough to support the general diagnostic boundaries used here without turning the references section into a collection of loosely related links. If the exact model manual gives a different user procedure, follow that model-specific documentation.
- Brother needle-breakage troubleshooting: Supports checks for needle installation and clamp security, fabric forcing, damaged strike surfaces, correct bobbin-case use, and service escalation when breakage persists.
- Singer troubleshooting tips: Supports the warning that pushing or pulling fabric can deflect the needle and lead to breakage, along with upper-thread obstruction checks.