Sewing machine thread shredding is different from a clean upper-thread snap because the thread usually shows progressive abrasion before it finally fails. The useful diagnostic question is where the first fuzz, split filament, or roughened section appears along the upper thread path. Start with a fresh correctly installed needle, verify that the thread moves freely through the needle eye and guides, then inspect the spool path and user-visible contact surfaces for drag or damage. If abrasion persists at a scratched or burred machine surface, stop short of sanding or modifying the part and move to replacement guidance or qualified service.
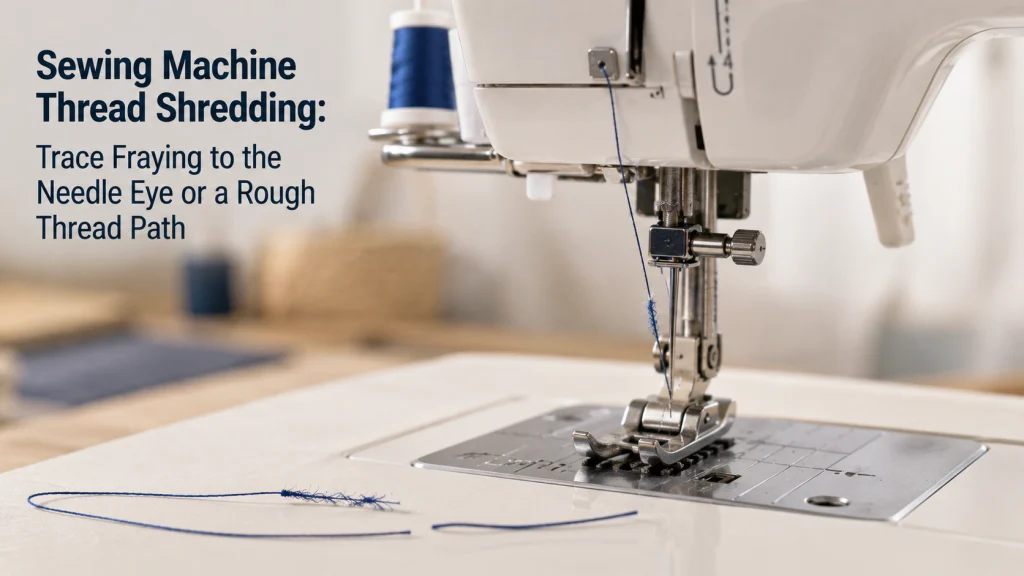
Confirm the Thread Is Fraying Rather Than Simply Snapping
Thread that shreds usually leaves evidence before the final break. Look for fuzz, separated filaments, a roughened patch, or a section that becomes visibly thinner as it approaches the failure point. A clean-looking break with little progressive damage can belong to a different troubleshooting path, so do not treat every broken upper thread as the same symptom. The distinction matters because abrasion sends you looking for a physical contact point, while a clean snap can involve a different set of checks.
Remove the failed thread and inspect several inches on both sides of the damaged area under good light. Run the thread gently between your fingers without pulling it against the machine, and compare an untouched section from the spool with the section that traveled through the machine. If the damage becomes more obvious as the thread approaches one guide, the needle eye, or the needle area, that location becomes your next inspection point. If there is no visible fraying and the thread simply breaks, use the separate process for diagnosing upper thread that keeps breaking instead of forcing an abrasion diagnosis.
| What you see | What it suggests | Next move |
|---|---|---|
| Fuzzy fibers or split filaments develop before failure | Progressive abrasion | Trace where damage first appears |
| Thread looks normal until a relatively clean break | Not enough evidence for shredding | Use the clean-break troubleshooting path |
| Damage appears repeatedly near the needle | Needle eye, needle condition, or nearby contact deserves inspection | Replace and verify the needle before deeper checks |
The table sorts symptoms but does not diagnose them. Damage can begin at one contact point and end in a break somewhere else. Keep a short sample of the frayed thread while you trace the path. That evidence is more useful than changing several controls at once.

The YOCTOSUN LED Head Magnifier includes five interchangeable lenses with magnification from 1.0X to 3.5X. Its rechargeable LED lighting provides two brightness levels for illuminating small details. The frame can be worn as glasses or secured with the included head strap for hands-free close inspection.
Check On AmazonIf you click this link and buy, we earn a commission at no additional cost to you.
Replace the Needle and Verify Correct Installation
A fresh needle is an efficient first check because a dull, bent, damaged, or incorrectly installed needle can abrade thread near the eye. Brother lists needle condition and correct insertion among its thread-shredding checks, and SINGER also identifies a dull or damaged needle as a possible cause on its Heavy Duty 6800C support page. Replace the needle rather than trying to judge a questionable point by eye alone. Then install it in the exact orientation and seating position required by the machine manual.
Do not assume the needle is correct just because the clamp holds it. Confirm full seating, the documented orientation, and permitted clearance around the foot and needle plate. Power the machine off before needle access whenever the manual requires it. If seating is abnormal, the handwheel meets hard resistance, or repeated strikes occur, stop instead of forcing the mechanism.

The Dritz 253 combines a sewing machine needle inserter and threader in one handheld tool. The inserter holds the needle steady during machine installation and removal. Its threading function is designed to reduce eye strain and can also be used with specialty sewing threads.
Check On AmazonIf you click this link and buy, we earn a commission at no additional cost to you.
Make Sure the Thread Passes Freely Through the Needle Eye
The needle eye has to give the thread enough room to move without being scraped at sewing speed. SINGER’s model-specific troubleshooting guidance states that the thread should pass freely through the needle eye and directs owners to the manual for needle sizes suited to common thread and fabric combinations. That does not mean the answer is always to install a larger needle. The needle still has to suit the fabric, the machine’s supported needle system, and the thread being used.
With a fresh compatible needle installed, inspect how the thread sits in the eye without pulling it sideways. If it looks crowded or repeatedly fuzzes just below the eye, verify the needle-thread relationship before changing size. Do not keep upsizing until shredding stops because a larger needle can create a different fabric or stitch problem. If the needle also bends or breaks, use the checks for why sewing machine needles keep breaking instead.

This SCHMETZ assortment contains 10 Universal 130/705 H sewing machine needles. The pack includes needle sizes from 70/10 through 100/16 for use across different common sewing applications. The needles are packaged together in a compact storage case and are intended for domestic sewing machines that use the 130/705 H system.
Check On AmazonIf you click this link and buy, we earn a commission at no additional cost to you.
Rethread the Complete Upper Thread Path
Remove the upper thread completely and rethread from the spool forward rather than correcting only the last guide you can see. Follow the exact model’s sequence through the spool guide, tension system, take-up area, needle-bar guide, and needle eye. Brother lists incorrect upper threading, knots, tangles, and thread coming out of the needle-bar guide among causes associated with shredding on covered machines. A missed guide can change the thread angle enough to create drag or repeated contact elsewhere in the path.
Use the threading position specified by the manual, including foot and take-up-lever positions when they matter. Do not pull thread backward or force it into a guide against the documented procedure. After rethreading, check permitted thread movement for obvious catching. If it repeatedly hangs at one guide, inspect that point instead of compensating with more tension.
Key point: Rethreading is useful only when it resets the entire documented path. Moving one visible strand while leaving a missed guide or hidden snag unchanged does not test the threading hypothesis.

This Coats & Clark pack contains two spools of white all-purpose sewing thread. Each spool provides 400 yards of 100 percent polyester thread for general sewing applications. The thread is machine washable, and the two-spool package provides 800 yards in total.
Check On AmazonIf you click this link and buy, we earn a commission at no additional cost to you.
Inspect the Spool and Spool Cap for Drag
The thread can start accumulating damage before it reaches the first major guide. Check whether the spool turns or unreels in the orientation specified by the manual, whether the thread is trapped behind the spool or cap, and whether a notch or rough edge on the spool catches the strand. Brother specifically tells owners to check for knots and tangles, install the spool correctly, and use a spool cap that fits the spool size on covered machines. SINGER likewise notes that upper thread can be obstructed by the spool cap, the spool itself, or a rough spot on the spool.
Watch the spool during a slow controlled test and look for sudden jerks in delivery. A periodic snag can create abrasion farther down the path even when the drag began at the spool. Correct only the documented spool orientation or cap arrangement. Do not add washers, clips, or restraints that the instructions do not call for.
Return Upper Tension to a Documented Baseline
Excessive upper tension can add load to a thread that is already rubbing against a tight eye or rough surface. Brother includes upper thread that is too tight among its shredding checks, while SINGER also connects overly tight upper tension with upper-thread problems on the referenced model. Use the exact manual’s normal starting point or documented range for the stitch, thread, and fabric in front of you. Do not copy a tension number from another machine because dial scales and automatic tension behavior are not universal.
Change tension only after correct threading and a fresh needle are confirmed. Multiple simultaneous changes can hide which condition actually affected the abrasion. Return to the documented baseline, sew a short test, and inspect for fresh fuzz. If damage returns at the same location, keep tracing that contact point instead of turning the tension control again.
Inspect User-Visible Plate, Foot, and Bobbin-Case Surfaces
A scratch or burr can act like a tiny abrasive edge each time the upper thread passes or is pulled around the needle area. Brother’s shredding guidance tells owners to inspect the needle-plate hole and bobbin case for scratches or burrs, with service or replacement indicated in the covered instructions rather than surface modification. Inspect only areas the exact machine manual makes user-accessible. Use bright light and visual inspection first instead of scraping a fingernail, needle, or tool across a critical surface.
Inspect the plate opening, the safely removable foot, and the user-accessible bobbin case or holder. An earlier needle strike can leave a mark even when the current needle no longer hits. Compare any suspicious scratch with the point where the thread first becomes fuzzy. A defect directly on the working path is stronger evidence than an unrelated mark elsewhere.
Do not disassemble hook, tension, timing, or needle-bar components to chase a suspected burr. Those areas can require alignment beyond normal owner work. If accessible parts look clean but fraying repeatedly starts lower in the machine, preserve that observation for service. The goal is to locate evidence without creating another fault.

The GearLight S100 set contains two compact LED pen lights designed for close inspection and tight spaces. Each aluminum light has a slim pocket-size body with an integrated clip for carrying or positioning it nearby. The lights use AAA batteries and provide a focused white LED light for examining small surfaces and components.
Check On AmazonIf you click this link and buy, we earn a commission at no additional cost to you.
Identify Where the First Fuzz Appears
Once the obvious setup checks are complete, trace the path in sections instead of staring only at the final break. Place small paper labels beside, not on, several safe checkpoints such as the spool area, upper guides, take-up area, needle-bar guide, and needle area. Sew only a short controlled line on scrap, stop the machine, and inspect the thread segment associated with each checkpoint. The first place where clean thread becomes fuzzy or split is more useful than the point where the strand eventually gives way.
Repeat the observation only if the first pass is unclear and the machine otherwise operates normally. Keep the thread, needle, fabric, stitch, and documented tension baseline unchanged. If thread stays clean above one checkpoint and becomes damaged below it, inspect that interval. This point-of-origin method fits sewing machine troubleshooting by symptom because it replaces random changes with one bounded question.
| Checkpoint | What to observe | If damage first appears here |
|---|---|---|
| Spool and cap | Snags, jerky unwinding, trapped thread, rough spool edge | Correct documented spool setup |
| Upper guides and take-up path | Thread outside a guide, catching, unusual angle | Rethread the full path and inspect the accessible guide |
| Needle-bar guide and needle eye | New fuzz, split filaments, crowding at the eye | Verify fresh needle, installation, and needle-thread fit |
| Needle plate or bobbin area | Damage appears only after the thread enters the stitch-forming area | Inspect user-visible surfaces and stop for service when required |
Paper labels are only location markers and must stay clear of moving parts and ventilation openings. Never tape anything to the thread or feed paper through the machine. Keep the test to a short normal sewing run on scrap, then inspect after stopping. If a checkpoint cannot be observed safely, skip it and use the manual or service route.
Before moving to the next checkpoint, record what you actually observed at the current one. A clear photo of the frayed section, or a short note describing whether the damage looks fuzzy, flattened, split, or nicked, can preserve details that are easy to forget after several tests. Keep the record tied to the checkpoint rather than turning it into a diagnosis before the pattern is clear. If service is eventually needed, that small trail of observations can show where clean thread first became damaged and what user-level checks were already completed.

This Post-it Flags pack contains 100 removable markers measuring 0.47 by 1.7 inches. The dispenser contains five pastel colors with 20 flags of each color for separating or identifying different locations. The adhesive markers can be repositioned and are designed to remove cleanly from paper surfaces.
Check On AmazonIf you click this link and buy, we earn a commission at no additional cost to you.
Use a Different Path for a Clean Upper-Thread Break
Shredding and clean breakage can end with the same visible result, which is a loose upper thread and interrupted stitching. The difference is the evidence leading up to that break. Progressive fuzz, split fibers, or repeated roughening points toward abrasion, while a clean-looking snap without those signs does not prove that a surface is cutting the thread. Keeping those symptoms separate prevents unnecessary inspection of parts that may have nothing to do with the failure.
If a fresh thread sample runs through the machine without visible fraying and then breaks abruptly, stop using this article as the primary diagnostic path. Move to the upper-thread breakage troubleshooting process, which can evaluate the broader causes of a clean snap without assuming abrasion. If the symptom changes from clean snapping to visible shredding after a new needle or different setup, return here and trace where the new damage begins. The visible condition of the thread decides which path fits better, not the fact that the thread eventually broke.
Separate Shredding From a Skipped-Stitch Problem
Skipped stitches can occur alongside thread damage, but the two symptoms should not automatically be treated as one fault. A damaged or unsuitable needle can contribute to both, which is why replacing and correctly installing the needle belongs early in the process. SINGER’s model-specific support separately identifies incorrect needle insertion, unsuitable needle style, and worn or damaged needles in its skipped-stitch guidance. That overlap makes the needle a shared checkpoint, not proof that every skipped stitch comes from shredding.
If the thread stays smooth while stitches are missing, use diagnosing why sewing machines skip stitches. If skipping occurs with progressive fuzz, document both symptoms and complete the safe needle, threading, and abrasion checks. Do not adjust hook timing or needle-bar height as an owner response. A persistent combined fault after documented checks belongs with qualified service.
Do Not Sand or Modify a Damaged Machine Surface
A visible burr can make a do-it-yourself polishing fix feel obvious, but the shape and finish of sewing-machine parts affect needle clearance, thread travel, and stitch formation. Removing material from a needle plate, presser foot, bobbin case, or nearby hook-area part can change that geometry even when the surface feels smoother afterward. Brother’s support guidance for covered machines directs owners toward service for a scratched or burred needle-plate hole and replacement when the bobbin case is damaged. That is a safer boundary than improvising abrasive repair on a precision contact surface.
Record the damaged location if that will help explain the fault to a service provider, but do not file, sand, bend, drill, or reshape the part. If the manual permits owner replacement and the exact compatible part is verified, follow that documented process. If compatibility or procedure is uncertain, stop before buying or modifying anything. Preserving the rough surface can make the service decision clearer.
Warning: Do not alter hook timing, needle-bar height, internal tension assemblies, gears, electrical housings, or undocumented screws while tracing thread abrasion. Those adjustments are outside this owner-level troubleshooting path.
Stop for Replacement or Qualified Service When Abrasion Remains
Owner-level troubleshooting has a clear endpoint. If a fresh correctly installed needle, verified needle-thread fit, complete rethreading, correct spool setup, documented tension baseline, and inspection of permitted user-visible surfaces do not remove the same repeatable abrasion point, more random adjustments are unlikely to make the diagnosis cleaner. Brother’s shredding support tells owners that continued problems may require service. Bring the damaged thread sample and a concise record of where fuzz first appears so the service conversation starts with observable evidence.
Stop immediately for smoke, a burning odor, overheating, exposed wiring, sparks, a hard mechanical lock, repeated hard needle strikes, or visible broken internal parts. Do not force the handwheel, needle, tension control, threader, or bobbin winder to get through a test. If the machine is safe but the symptom is still unclear, the broader sewing machine stitch problem checks can help separate thread damage from other stitch symptoms without opening the machine. The best stopping point is the one that preserves both the evidence and the machine.
Final Thoughts: Find the Abrasion Point Before the Thread Fails
Thread shredding becomes easier to diagnose when you stop treating the final break as the only clue. Confirm that the thread is actually fraying, install a fresh needle correctly, verify that the thread has enough clearance through the needle eye, and rethread the entire documented upper path. Then check spool drag, return tension to a documented baseline, and inspect only the user-visible surfaces the manual allows you to access. A short controlled test can show where clean thread first becomes fuzzy, which is far more useful than changing several settings at once.
If the abrasion traces to a rough or damaged machine surface, preserve that evidence instead of sanding it away. Replace a user-replaceable part only when the exact manual and compatibility information support that action, and use qualified service when the problem sits beyond owner-level access. If the thread is snapping cleanly or the main symptom is skipped stitches, move to the troubleshooting path that matches the evidence rather than stretching the shredding diagnosis to fit. The objective is not to keep sewing at any cost, but to identify the first damaging contact before the thread fails again.
FAQs
Several faults can end with thread broken near the needle, so the final break alone is not enough. Focus on what the strand looked like before failure and where new damage first appeared. Needle condition, threading, spool drag, tension, and accessible rough surfaces are reasonable checks for progressive abrasion. Internal adjustment is outside this process.
The answers below stay at normal owner level and assume the machine can still be tested safely. Use the exact manual whenever needle installation, threading order, spool setup, or access procedures differ by model. If a test involves hard resistance, repeated needle strikes, heat, smoke, electrical damage, or a visible broken internal part, stop testing. Those conditions need a service decision rather than another sewing trial.
🧵 Why is my upper thread getting fuzzy before it breaks?
Progressive fuzz usually means the thread is being abraded somewhere along its path. Start with a fresh correctly installed needle, rethread completely, and inspect where the first visible damage appears.
🪡 Can the needle eye shred sewing thread?
Yes, a damaged needle or a needle-thread combination with inadequate eye clearance can contribute to abrasion. Verify the correct needle system, size, style, installation, and thread relationship for the machine and fabric.
🧶 Can a spool cap cause thread fraying?
It can create drag if the spool or cap arrangement obstructs smooth thread delivery. Follow the machine manual for spool orientation and cap fit, then watch for snags during a short controlled test.
🎛️ Should I loosen tension when the thread shreds?
Return the upper tension to the documented baseline rather than turning it down blindly. Correct threading, needle condition, needle-eye clearance, and spool delivery should be checked before using tension as the main explanation.
🔎 How do I find where the thread starts fraying?
Inspect the thread at several safe checkpoints after a short test and look for the first place where clean fibers become fuzzy or split. Keep paper labels beside the checkpoints only, never attached to moving thread or machine parts.
⚙️ Can a scratched needle plate shred thread?
Yes, manufacturer support identifies scratches or burrs around the needle-plate opening as a possible cause on covered machines. Do not sand the surface; follow documented replacement guidance or use qualified service.
✂️ Should I polish a burr on the bobbin case myself?
Do not reshape or polish a precision part unless the exact manufacturer documentation explicitly authorizes that procedure. A damaged user-replaceable bobbin case may call for the correct replacement, while uncertain or internal damage belongs with qualified service.
🚫 When should I stop troubleshooting thread shredding?
Stop when abrasion persists after documented user checks or when testing produces hard resistance, repeated needle strikes, heat, smoke, sparks, exposed wiring, or visible internal damage. Preserve the damaged thread and note where the first fuzz appeared for service.
References and Sources
Manufacturer sources are necessary because needle installation, threading paths, spool setup, tension controls, and service boundaries vary by machine. Brother identifies damaged surfaces, needle condition, incorrect threading, spool problems, and excessive upper tension in its shredding checks. SINGER’s model-specific guidance adds the requirement that thread pass freely through the needle eye. These details support the diagnostic sequence without turning one machine’s settings into universal instructions.
The sources below are used only for technical claims that benefit from direct manufacturer documentation. They do not prove that every model from the same brand shares the same threading path, needle orientation, tension scale, spool arrangement, or replaceable parts. The exact manual for the machine in front of you remains the controlling source when procedures differ. No community discussion is used here as proof of a mechanical cause.
- Brother thread shredding support: Identifies needle-plate burrs, needle condition, bobbin-case damage, threading, spool setup, tension, and service escalation for covered models.
- Brother top thread shredding support: Documents upper-path, spool, cap, guide, tension, and damaged-surface checks across the listed machines.
- SINGER 6800C troubleshooting tips: Supports the needle condition, needle-eye clearance, spool obstruction, threading, tension, and symptom-separation points used in this article.
Use the manufacturer pages to confirm the reasoning behind the checks, then use the exact machine manual for the procedure itself. Model coverage matters because a support page may apply to a defined group of machines rather than an entire brand. If the manual reserves a damaged part or internal area for service, that boundary should take priority over a generic repair suggestion found elsewhere. The purpose of these references is to keep the diagnosis specific enough to be useful without encouraging unsupported repair work.