A sewing machine not feeding fabric can come from several different states that look similar at first: the presser foot is not in its normal sewing position, the feed dogs are disengaged, the feed system has not completed its re-engagement cycle, stitch length is set to no-feed, the material stack changes how the machine advances, or a deeper fault remains after normal checks. Start by reproducing the symptom on a safe representative stack and recording what the machine actually does. Verify only the exact model’s documented user-level states, then separate zero movement, inconsistent spacing, fabric capture, thick-stack failure, and crooked feed before deciding what to check next. Stop before internal feed-height, linkage, timing, or gear adjustment.
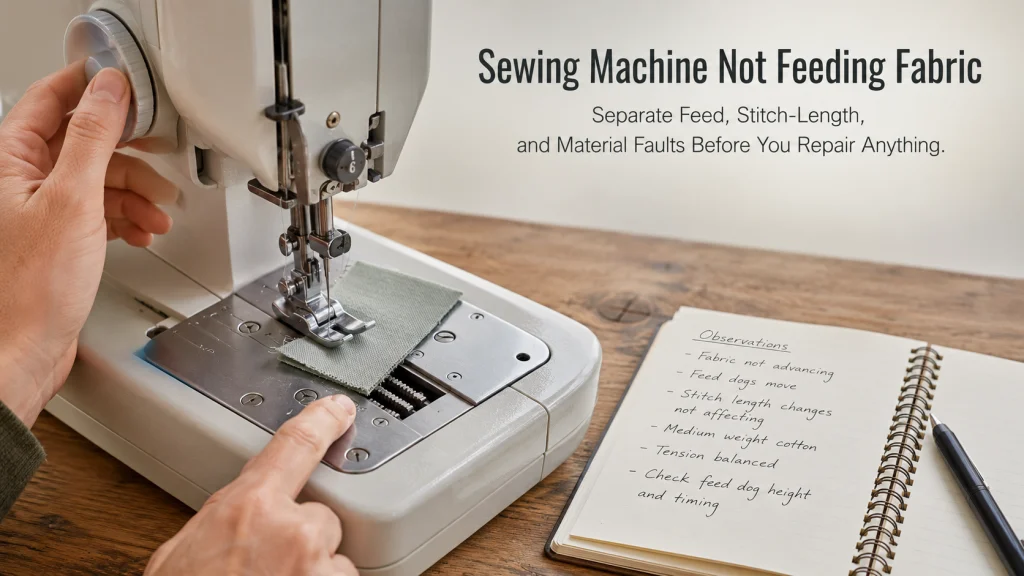
No fabric movement is a symptom, not a failed-part diagnosis
If your sewing machine is not feeding fabric, begin with what you can observe before naming a cause. Put a small stable fabric square under the presser foot and note four states: whether the presser foot is lowered, whether the feed dogs are intended to be engaged, what stitch length is selected, and whether the material advances at all when the needle cycles. Those four observations separate several ordinary machine states from a persistent feed fault.
Current manufacturer guidance supports that separation. SINGER lists an unlowered presser foot, disengaged feed dogs, and stitch length set to 0 as distinct reasons fabric may not feed. Brother likewise lists lowered feed dogs, stitch-length state, threading, needle, presser-foot choice, and other conditions as separate causes rather than treating a no-feed complaint as proof of a broken feed mechanism.
Key point: Do not adjust tension, force the fabric, raise feed-dog height, open the machine, or buy a replacement part just because the fabric is stationary. First prove which feed symptom is present on the exact model.
No-feed decision tree:
- If nothing advances on a stable straight-stitch test, verify presser-foot position, feed engagement, re-engagement, and stitch length first.
- If those states are normal but the feed dogs remain down, route the problem by feed-dog position.
- If fabric moves but spacing does not follow the stitch-length command, route by command versus result.
- If ordinary fabric feeds but a bulky stack does not, isolate the material-stack condition.
- If fabric is caught in the needle plate or the mechanism hard-locks, stop normal feed testing and route the jam separately.
Reproduce the symptom on a safe representative test stack
Move away from the actual project when normal sewing is safe enough to test. Use a stable scrap that represents the project, but avoid a complicated seam intersection for the first baseline. Two layers of ordinary woven fabric can show whether the machine has zero feed on a basic straight-stitch setup before you reintroduce stretch, bulk, stabilizer, or multiple seam allowances.
Keep the setup controlled. Record the exact machine model, selected stitch, stitch-length command, presser foot, needle and thread already verified, feed-dog state, fabric type, number of layers, and the result after a short line of sewing. If the machine feeds the stable baseline normally but fails only on the original thick or difficult stack, you have already narrowed the problem without changing an internal adjustment.
| Baseline item | Record before testing | Why it matters |
|---|---|---|
| Machine identity | Exact model and the manual or support page being followed | Feed controls and re-engagement steps vary by model |
| Fabric stack | Material type and number of layers | Separates universal no-feed from material-specific failure |
| Selected stitch | Straight-stitch baseline and displayed or dialed stitch length | Separates command state from physical feed behavior |
| Presser foot | Correct foot installed and lowered to the documented sewing position | The feed system needs the normal foot state to control the fabric |
| Feed state | Feed dogs intended to be engaged and any darning plate removed where applicable | Prevents a deliberate no-feed mode from being mistaken for a fault |
This test is diagnostic, not a new sewing technique. If the baseline works, preserve that result and change only the material condition that originally triggered the problem. If the baseline does not move at all, stay with the feed-state checks below.

This unbleached muslin is made from 100% cotton and comes in a 63-inch by 2-yard piece. The fabric is described as medium weight and suitable for sewing, embroidery, garments, and craft projects. It provides plenty of material for controlled sewing samples when you want to test machine behavior away from the finished project.
Check On AmazonIf you click this link and buy, we earn a commission at no additional cost to you.
Confirm the presser foot is in the documented sewing position
A raised presser foot changes the relationship between the material and feed system. SINGER’s current troubleshooting guidance specifically tells users to lower the presser foot before resuming sewing when fabric is not feeding. That is a normal-state check, not proof that presser-foot pressure needs adjustment.
Confirm the foot is the correct one for the selected stitch and that it is lowered in the normal sewing position described by the exact manual. Do not jump from “the foot is down” to changing presser-foot pressure unless the model actually provides that user control and the symptom has been narrowed to a condition where its manual makes that adjustment relevant. Normal material-handling adjustments on a functioning machine belong to a different decision than diagnosing a feed failure.
Keep those two situations separate. A technique adjustment can improve a functioning setup, but it should not be used to disguise a machine that cannot reproduce its documented normal feed state.
Confirm the feed dogs are intended to be engaged for this test
Feed dogs may be deliberately lowered or covered for operations such as free-motion work, darning, or button sewing, depending on the machine. Some domestic models use a drop-feed lever, while others use a darning plate instead of a user-lowerable feed-dog system. That difference alone is enough to make a generic “raise the feed dogs” instruction unreliable across machines.
Use the exact model documentation to identify what normal feed looks like. If the machine uses a drop-feed control, place it in the documented regular-sewing position. If the model uses a darning plate, confirm that the plate is not still covering the feed dogs when ordinary fabric advance is expected. Do not pull on the teeth or try to lift them manually.
Note: Brother currently documents both designs: some machines use a feed-dog position switch, while other listed models cannot lower the feed dogs and instead use a darning plate. The model determines the correct check.
Check whether feed-dog re-engagement requires a handwheel or needle-position cycle
A lever can be in the “up” position while the feed dogs have not yet returned above the needle plate. Brother documents model families that require turning the handwheel or pressing the Needle Position control once or twice after moving the feed switch, while SINGER documents machines that require one full handwheel revolution. Do not use “mechanical” versus “computerized” as a shortcut for this step; follow the exact model procedure.
Confirm the result physically, not just from the lever or display. After the required cycle, the feed dogs should return above the needle plate in the documented normal sewing state. Brother specifically uses that above-plate position as the check before escalating a persistent failure to service. If the cycle is complete and the teeth still remain down, the symptom is now “feed dogs will not rise,” not merely “fabric will not feed.”
Confirm stitch length is not intentionally set to no-feed
A sewing machine can appear to sew in one place because the stitch-length command is at or near a no-feed state. SINGER specifically identifies a stitch length of 0 as a reason fabric may not advance, and Brother’s multi-model feed support also calls out an incorrectly set stitch length. That makes the selected command worth recording before assuming the feed dogs themselves have failed.
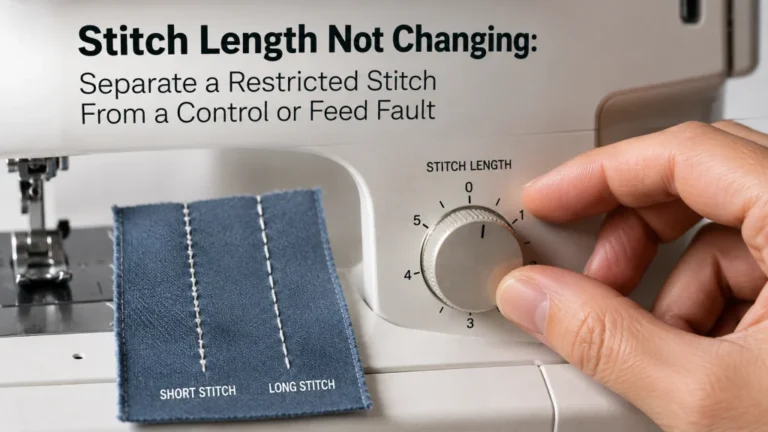
Return the control only to a normal straight-stitch length documented for the exact machine or to the manual’s standard test setting. The important evidence is not a universal number, but whether changing the user-level stitch-length command from no-feed to a normal value produces corresponding fabric movement. If the command changes but the sewn result does not, the symptom belongs to a more specific stitch-length fault.
Separate feed dogs that do not work from feed dogs that remain stuck down
These phrases sound similar but describe different observations. “Feed dogs not working” can mean the teeth are visible yet fail to advance fabric, move without producing the expected travel, or remain stationary during a normal stitch cycle. “Feed dogs stuck down” means the machine has been commanded back to regular feed, the documented re-engagement step has been completed, and the teeth still do not return to their normal position.
Use the feed-dog movement troubleshooting path when the teeth are present but their motion or grip does not produce normal fabric advance. Use the feed dogs that will not rise path when the drop-feed system itself fails to return after the model-specific cycle. Neither path should begin with feed-height screws, linkage adjustment, or internal gear work.
Separate a stitch-length command fault from inconsistent physical spacing
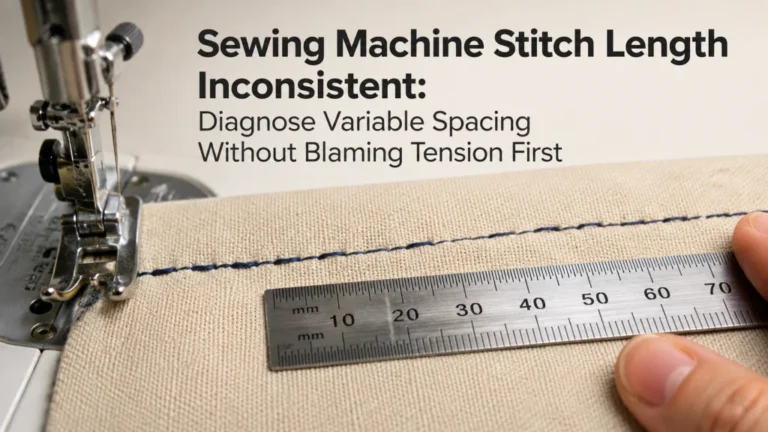
There are two different questions hiding inside “the stitch length is wrong.” In the first, you deliberately change the stitch-length control but the physical result stays essentially unchanged. In the second, the selected command is stable but the sewn spacing varies along the line. The first is a command-versus-result problem; the second is an inconsistent-feed result.
If changing the control does not change the sewn result on a stable baseline, continue to the stitch-length command checks. If the machine produces uneven spacing despite a fixed command and controlled test stack, use the inconsistent stitch-spacing diagnosis. Keep thread loops, skipped stitches, and tension appearance separate unless those defects become the dominant symptom.
| Movement pattern | What you observe | Where to route it |
|---|---|---|
| Zero advance | Needle cycles while the fabric remains in essentially one place | Presser-foot state, feed engagement, re-engagement cycle, and stitch-length command |
| Command does not change result | Different stitch-length selections produce essentially the same physical spacing | Stitch-length command fault |
| Variable spacing | One fixed command produces visibly inconsistent stitch travel | Inconsistent feed or spacing diagnosis |
| Thick-stack-only failure | Ordinary baseline feeds, but a bulky transition stalls or shortens the feed | Material-stack-specific feed diagnosis |
| Persistent crooked travel | A straight-stitch baseline veers despite ordinary guiding and a verified setup | Crooked-feed diagnosis |
This matrix keeps one symptom from swallowing all the others. A sewing machine not moving fabric at all is not the same diagnosis as a machine that moves fabric unevenly or only fails at a bulky seam.
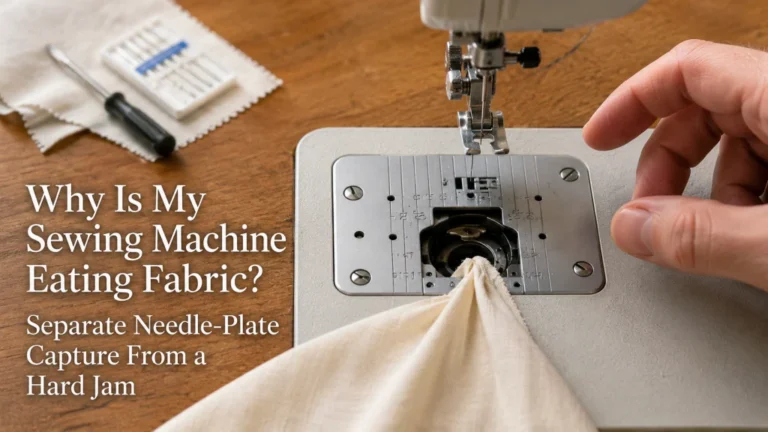
Identify fabric being pulled into the needle plate as a different fault
Fabric that is pushed or drawn into the needle-plate opening is not just “poor feed.” The material may stop advancing because it has been captured at the stitch-forming area, and thread can also become tangled below the plate. Brother’s jam guidance tells users to stop the machine, power it off, and avoid force when fabric is caught and cannot be removed normally.
Do not keep sewing to see whether the fabric will pull free. Follow only the exact powered-off user procedure the manual provides for accessible thread or fabric removal. If the machine repeatedly pulls material into the plate after a normal baseline is restored, continue to the needle-plate fabric-capture diagnosis rather than treating it as an ordinary stitch-length problem.
Isolate thick-stack-only feed failure
A machine that feeds two flat layers normally but stalls where several seam allowances meet is giving you useful evidence: the feed system works on the baseline and the failure appears only when the geometry or thickness changes. Brother documents a model-specific example where a presser foot can tilt at a thick seam and a built-in locking feature on the specified foot is used to keep the foot level. That does not create a universal thick-fabric fix, but it shows why the stack should be isolated before blaming the feed mechanism.
Reproduce the difference with safe scrap that matches the bulky transition, without pushing or pulling the fabric. If ordinary material feeds and only the thick stack fails, use the thick-fabric feed diagnosis for the model, presser-foot state, stack geometry, needle and thread conditions, and documented material limits. Do not use force to make a domestic machine cross a stack it cannot advance normally.

The Madam Sew Bulky Seam Jumper is designed to keep the presser foot level while sewing across bulky seams and raised transitions. It provides two thickness options, with one side measuring 1/8 inch and the other 3/16 inch. It is useful when a machine feeds an ordinary baseline normally but needs an external leveling aid for an appropriate thick-seam sewing task.
Check On AmazonIf you click this link and buy, we earn a commission at no additional cost to you.
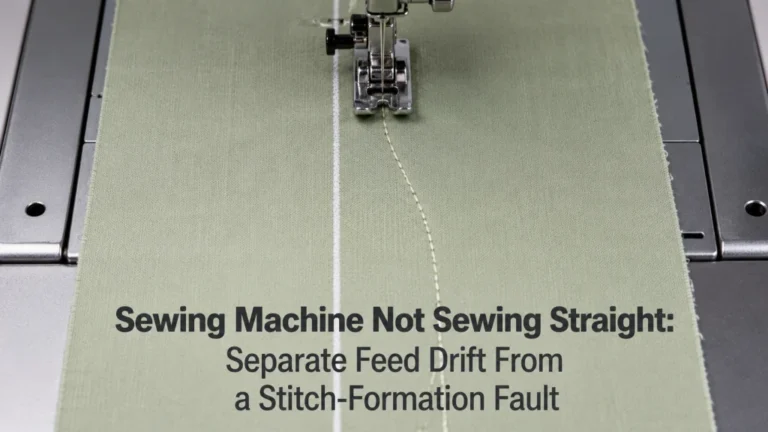
Isolate persistent crooked feed from ordinary guiding technique
A line that veers is not automatically a mechanical feed defect. Brother’s current support for irregular or crooked stitching includes checking the correct presser foot, stabilizer where relevant, tension, tangled thread, and whether the user is pushing, pulling, or feeding the material at an angle. That means guiding behavior and stitch formation have to be ruled out before the symptom is described as persistent crooked feed.
Use a stable straight-stitch baseline and guide the fabric without steering against the feed. If the machine repeatedly pulls the same baseline off line after the documented setup is verified, continue to the persistent crooked-feed checks. If the crooked appearance comes from skipped stitches, loops, or another stitch defect rather than material travel, route the problem by the stitch instead.
Route thread nests, skipped stitches, and tension defects by the stitch
A feed complaint can arrive together with a thread nest or irregular stitch, but the dominant evidence matters. If the material advances and the main failure is looping, skipped stitches, thread breakage, or tension appearance, the diagnostic center of gravity has moved away from fabric feed. Changing feed controls in response can add a second problem without solving the first.
Use the stitch-formation troubleshooting route when the failed stitch is the primary symptom. Return to the feed path only if abnormal material movement remains after the threading, needle, bobbin, and stitch-formation state has been separated.

This set contains 20 spools of Gütermann Sew-All polyester thread, with 100 meters on each spool. The thread is designed for both machine and hand sewing and can be used for seams, quilting, and decorative stitching. Fresh general-purpose thread provides a controlled option when the troubleshooting process has specifically narrowed the problem to thread or stitch formation.
Check On AmazonIf you click this link and buy, we earn a commission at no additional cost to you.
Route hard jams and locked motion by mechanical resistance
A hard handwheel lock, jammed mechanism, repeated hard needle strike, or motion that stops abruptly is not a normal no-feed test. Stop pressing the control and do not force the handwheel or fabric. Manufacturer jam guidance directs users to power the machine off and follow bounded removal steps, with service when the obstruction cannot be cleared by the documented procedure.
Use the jam and locked-motion troubleshooting path when mechanical resistance is the defining symptom. A machine can fail to move fabric because the whole mechanism is locked, but that condition should not be diagnosed through feed-dog or stitch-length adjustments.
Stop before internal feed-height, linkage, timing, or gear adjustment
Once the presser foot, feed state, re-engagement cycle, stitch-length command, baseline stack, and accessible cleaning steps allowed by the exact manual have been checked, a persistent feed fault may require service. The symptom still does not prove which internal component is responsible. Feed height, linkage, timing relationships, gears, shafts, or internal adjustments are service-level questions unless the manufacturer explicitly documents them as owner procedures for that model.
End user troubleshooting sooner for smoke, burning odor, overheating, exposed wiring, uncontrolled motion, repeated hard needle strikes, a hard mechanical lock, or visible broken internal parts. Do not bypass guards, operate with exposed electrical parts, force the feed dogs, or continue running the machine simply to collect more evidence.
- The exact manual documents the control or access step.
- The machine moves freely without a hard lock or repeated strike.
- The test can be reproduced on safe scrap without forcing the material.
- You are changing one external state at a time and recording the result.
- The feed dogs remain abnormal after the documented engagement procedure.
- A hard jam, uncontrolled motion, burning odor, smoke, overheating, or exposed wiring appears.
- The next proposed step involves internal feed height, linkage, timing, gears, motor, or electrical housings.
- The symptom persists after the model’s documented owner checks.
The boundary is deliberately conservative. The purpose of diagnosis is to hand off a well-defined symptom when owner checks end, not to keep disassembling until an internal cause is found.
See more fabric-feed fault paths
Once the broad symptom is narrowed, use the page that matches the remaining evidence. Keep the same model, test stack, stitch command, and recorded feed state so the next diagnosis begins from a known baseline.
| Fault path | Use it when |
|---|---|
| Feed dogs not working | The feed dogs are present but their motion or grip does not produce normal fabric advance. |
| Feed dogs will not rise | The documented drop-feed control is returned to normal and the required cycle still does not raise them. |
| Stitch length not changing | Different stitch-length commands fail to produce corresponding changes in physical travel. |
| Inconsistent stitch spacing | A fixed command produces varying physical stitch spacing on a controlled baseline. |
| Fabric pulled into needle plate | The material is captured at the needle-plate area rather than simply failing to advance. |
| Thick fabric not feeding | The machine feeds a normal baseline but fails at a bulky or thick stack. |
| Persistent crooked fabric feed | A verified straight-stitch baseline repeatedly veers after ordinary guiding variables are ruled out. |
For the broader symptom-first framework, return to sewing machine troubleshooting by symptom. The useful next page is the one that preserves the evidence you already collected instead of restarting with a new list of fixes.
Final Thoughts: classify the feed failure before changing the machine
A sewing machine not pulling fabric normally does not identify one failed part. Presser-foot state, feed engagement, the re-engagement cycle, stitch-length command, material stack, fabric capture, and crooked movement create different diagnostic paths. A short controlled test can separate those paths before you change anything that obscures the original symptom.
Keep the process model-specific and reversible. Verify documented normal states, change one user-level variable at a time, record the result, and stop when the next step would require internal adjustment or when a safety threshold appears. The goal is not to make every feed problem an owner repair, but to reach the correct next step with the least guesswork.
Frequently Asked Questions
🧵 Why is my sewing machine not moving fabric?
Start by checking the exact model’s normal presser-foot position, feed-dog engagement, any required feed-dog re-engagement cycle, and stitch-length command. If those states are correct, reproduce the symptom on a stable test stack and route it by what the fabric actually does.
⚙️ Why are my feed dogs up but the fabric still does not move?
Visible feed dogs do not prove that every part of the feed state is normal. Check stitch length, presser-foot state, the selected stitch, and the exact model procedure, then distinguish teeth that move without advancing fabric from a deeper fault that persists after documented checks.
🔄 Why will my feed dogs not come back up?
Some machines require more than moving the drop-feed lever. The manual may require turning the handwheel or cycling the needle position before the teeth rise, so complete the exact model procedure before treating the condition as a fault.
📏 Can stitch length make a sewing machine stop feeding?
Yes, on machines where a 0 stitch-length setting is a no-feed state. Verify the control in the exact manual and test whether returning to a normal straight-stitch length restores physical fabric movement.
🧱 Why does my sewing machine feed normal fabric but stop at thick seams?
That pattern points to a material-stack-specific problem rather than universal no-feed. Reproduce the bulky transition on safe scrap and check the model’s presser-foot, needle, thread, stack, and material guidance without forcing the fabric.
🪡 What should I do if the fabric gets pulled into the needle plate?
Stop sewing rather than pulling the fabric free under power. Follow only the exact model’s powered-off user procedure for accessible tangled thread or fabric, and use qualified service if the material cannot be removed by the documented steps.
🧰 When does a fabric-feed problem need professional service?
Use service when the symptom persists after the exact model’s documented user checks or when the next step would involve internal feed height, linkage, timing, gears, motor, or electrical work. Stop sooner for a hard lock, repeated hard needle strikes, uncontrolled motion, smoke, burning odor, overheating, exposed wiring, or visible broken internal parts.
References and Sources
- SINGER troubleshooting tips: Supports separate checks for presser-foot position, feed-dog engagement, stitch length, fabric guiding, and other distinct sewing symptoms.
- Brother fabric-feed support: Supports the multi-cause feed diagnosis and the need to consult model-specific documentation.
- Brother feed-dog position support: Documents model families where returning the feed dogs requires a handwheel or needle-position cycle after moving the feed control.
- Brother irregular-stitch support: Supports separating crooked guiding, presser-foot state, thread conditions, and persistent service-level problems.
- Brother thick-seam feed guidance: Provides a model-specific example of feed changing when the presser foot is tilted at a bulky seam.
- Brother jam removal guidance: Supports stopping, powering off, avoiding force, and moving to service when caught fabric cannot be removed by the documented procedure.