A bobbin not winding is first a state-and-thread-path problem to diagnose, not proof that the machine has a failed internal winder. The key distinction is whether the winding shaft stays stationary or the shaft spins while the bobbin fails to take up thread. Verify the exact model procedure, correct bobbin, winder engagement, and winding path before changing anything inside the machine. If those documented user checks are correct and the winder still will not operate, the next step is service rather than disassembly.
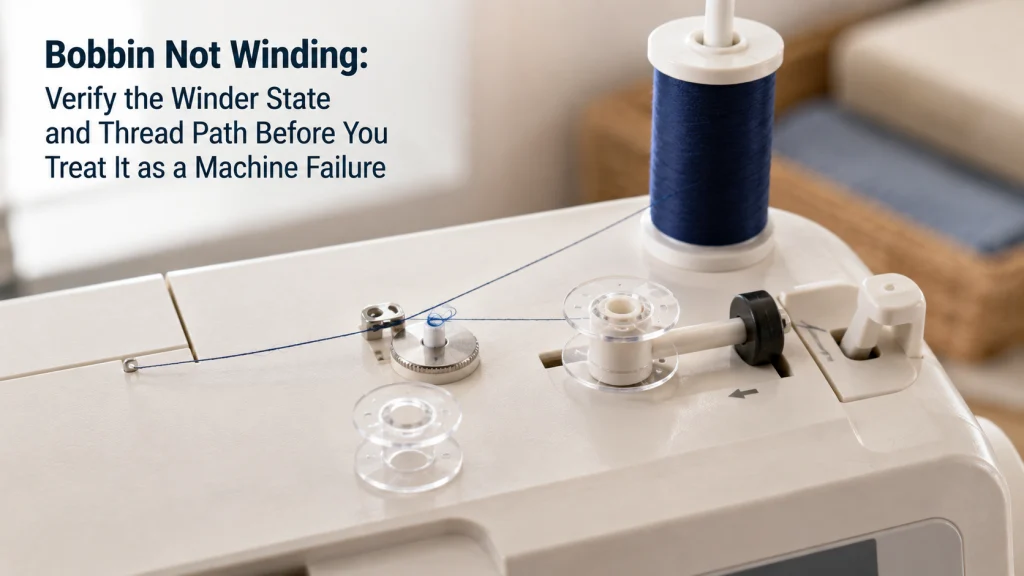
Confirm the Exact Model Bobbin-Winding Procedure
A bobbin not winding at all needs one simple distinction before you repeat the setup. Watch whether the bobbin-winding shaft turns when the machine is placed in winding mode, and separately watch whether thread begins accumulating on the bobbin. A stationary shaft points to a different branch from a shaft that spins normally while an empty bobbin remains empty. That first observation prevents a thread-path problem from being mistaken for a failed winding mechanism.
The exact procedure matters because domestic machines do not all enter bobbin-winding mode the same way. SINGER’s winding guidance explicitly notes that winding varies by model and directs owners back to the machine manual, while Brother’s no-wind support likewise tells readers to consult model documentation for additional information. Use the diagrams for the exact machine instead of copying the position of a spindle, guide, or control from a similar-looking model. Once the correct sequence is known, repeat it from the beginning without adding undocumented steps or forcing any control.
| What you observe | First diagnostic branch | What not to assume |
|---|---|---|
| Winder shaft stays stationary | Verify winding mode and engagement exactly as documented | Do not assume the thread path is the only problem |
| Shaft spins but bobbin stays empty | Verify bobbin fit, starting thread, guide, and winding tension path | Do not assume the internal winder has failed |
| Thread winds but distributes badly | Move to uneven-winding diagnosis | Do not treat it as a no-wind symptom |
This distinction also separates normal operation from troubleshooting. If the winder works and you only need the ordinary winding sequence, follow the machine’s normal setup instructions rather than escalating through fault checks. If the documented sequence is correct but winding does not begin or continue, the symptom belongs in diagnosing sewing machine stitch problems with the exact failure state recorded. Keep that state visible as you work through the next checks so each step answers a specific question.
Verify the Correct Bobbin Type and Physical Fit on the Winder Shaft
A bobbin can look close enough to fit and still be wrong for the machine. Brother lists the wrong bobbin type or size as a cause of a no-wind symptom, and SINGER warns against substituting a different bobbin style for the one specified for the machine. Verify the bobbin class, style, or exact part information from the manual or current manufacturer documentation before judging the winder itself. Visual similarity is not compatibility evidence, especially when two bobbins share a similar diameter but differ in height, center opening, material, or profile.
Place only the verified bobbin on the winding shaft and check that it seats in the orientation shown for the exact model. The bobbin should sit as the manual illustrates without being forced down, held at an angle, or improvised with an adapter that is not documented for the machine. If more than one bobbin is available, compare the suspect bobbin with a known correct one before changing any machine setting. A fit problem discovered here is a compatibility issue, not evidence that the winder gear, motor, or electrical system has failed.
Engage the Bobbin-Winding Mode Fully
Many machines require a positive change of state before the winder will operate, but the control and direction vary by model. Brother’s current no-wind support includes a bobbin winder that has not been moved fully into its winding position among the documented causes it checks. On another machine, the engagement may use a different spindle movement, lever, screen command, or control sequence. Follow the exact manual until the machine clearly reaches the state it identifies for winding.
Do not judge engagement only by whether the bobbin appears close to the expected position. Repeat the documented movement and confirm any model-specific indicator, physical stop, or control response the manual tells the owner to use. If the control feels blocked, unusually loose, or requires force beyond normal operation, do not push harder to make winding begin. A winding mode that cannot be engaged normally after the documented checks is a service boundary, not an invitation to open the top cover and adjust the mechanism.
Rethread the Winding Guide and Tension Path
A spinning bobbin that does not collect thread often deserves a fresh look at the winding path before the machine is blamed. Brother specifically identifies incorrect routing through the bobbin-winding guide or threading path as a cause of winding failure. SINGER also tells owners to seat the thread correctly in the bobbin-winding tension disk and to use the model manual for the exact path. Rethread from the spool instead of trying to correct only the last guide while leaving the earlier route unchanged.
Follow each guide in the documented order and pay particular attention to the winding tension device, because merely laying thread near it is not the same as seating the thread as shown. Check how the starting tail is secured to or through the bobbin, since that step also varies by machine and bobbin design. Keep the spool feeding freely and avoid adding extra wraps around guides unless the exact documentation calls for them. After rethreading, run only the normal winding test and observe whether thread begins taking up before changing another variable.
- Use the exact model’s winding diagram or manual sequence.
- Start again at the spool rather than correcting only one visible guide.
- Seat the thread in the winding tension path exactly as illustrated.
- Secure the starting tail by the method documented for that bobbin and machine.
- Keep the supply spool free of snags while the winding test begins.
This checklist is intentionally limited to the winding path. It does not ask you to alter sewing tension, bobbin-case tension, needle settings, or internal screws because those controls do not establish whether the bobbin winder has been threaded correctly. If the path was wrong and the bobbin now begins filling, the diagnostic has already found a useful cause. If the bobbin remains empty while the shaft spins, continue with supply-thread and bobbin-condition checks instead of jumping to internal repair.
Remove Knots or Tangles From the Supply Thread
The winder cannot take up thread normally if the supply thread is caught before it reaches the bobbin. Brother includes knots or tangles in the spool thread among its documented no-wind checks, which makes the supply path worth inspecting separately from winder engagement. Look at the spool, spool cap or holder arrangement used by the exact machine, and every visible guide in the winding route. The goal is to confirm that thread can leave the spool and travel through the documented path without snagging, looping around a pin, or tightening into a knot.
Unthread the winding path before freeing a significant tangle so you are not pulling the knot harder into a guide or tension device. Replace damaged thread rather than winding a section that has been severely abraded, flattened, or knotted during the failed attempt. If the same spool repeatedly snags or arrives with damaged sections, it is reasonable to replace that supply rather than keep troubleshooting around compromised thread. Once the supply runs freely, rebuild the normal winding path and test the same verified bobbin again.
Check the Bobbin for Damage or Burrs
A correct bobbin can still be a poor test bobbin if it is cracked, warped, scratched, or burred. Brother specifically includes scratches and burrs in its no-wind troubleshooting and directs owners to replace a damaged bobbin rather than continue using it. Inspect the flanges, center opening, and surfaces that contact the winding shaft or thread, using good light and the manufacturer description of the correct bobbin as the reference. Do not sand, drill, reshape, or enlarge a bobbin to make it fit the winding shaft.
Damage matters because the winder test depends on the bobbin seating and rotating as designed. A rough edge can also catch the starting thread or create resistance that makes a thread-path problem harder to interpret. Compare a suspect bobbin with another verified undamaged bobbin of the same specified type if one is available. If several bobbins in the sewing kit are damaged, worn, or of uncertain type, replacing them with correctly specified bobbins is a more sensible ownership decision than continuing to test questionable pieces one at a time.
Distinguish a Spinning Empty Bobbin From a Stationary Winder
The most important diagnostic split in a bobbin winder not working is movement versus thread take-up. If the shaft and bobbin rotate at normal winding speed but the bobbin stays empty, the machine has already demonstrated that the winder can produce rotation under that test. That observation sends attention back toward the starting tail, bobbin fit, supply path, and winding guide rather than proving an internal drive failure. Record exactly what moves because “it will not wind” is too broad to preserve that distinction.
A stationary shaft is different because there is no winding rotation to evaluate. Recheck the model-specific winding state and engagement once, then confirm that the machine otherwise matches the documented conditions for winding without forcing controls or opening covers. If the shaft remains stationary after those user-level checks, do not infer whether a switch, gear, tire, motor, sensor, or electrical part is at fault. The correct next move is the broader sewing machine troubleshooting process or qualified service based on the exact machine and its manual.
| Observed state | What it establishes | Next user-level check |
|---|---|---|
| Shaft turns, thread does not accumulate | Winding rotation is present in this test | Starting tail, bobbin fit, winding path, supply thread |
| Shaft does not turn | No winding rotation is present | Exact winding mode and engagement procedure |
| Shaft turns and thread accumulates | Winding begins | Judge distribution separately if the fill is poor |
The table is a routing tool, not an internal diagnosis. It deliberately stops short of naming a failed component because the same visible symptom can come from different mechanisms across machine models. Use it to decide which documented owner checks still make sense, not to decide which cover to remove. That boundary keeps a simple setup fault from becoming an unnecessary repair attempt.
Use a Different Diagnostic When the Bobbin Winds Unevenly
A bobbin that accepts thread but builds it mainly on one side is not the same symptom as a bobbin that will not wind. The winder has already started, thread is reaching the bobbin, and the problem has shifted to how that thread is being distributed or tensioned during winding. Repeating no-wind checks can therefore waste time and blur the evidence you already have. Keep the symptom description precise: no winding, intermittent take-up, or uneven fill are different observations.
If thread accumulates but the shape is lopsided, loose, or otherwise uneven, move to diagnosing an unevenly wound bobbin. That route can examine winding-path placement and distribution without pretending the shaft failed to rotate. Do not add extra tension wraps or manually guide the thread across the bobbin unless the exact model documentation instructs you to do so. Preserving the distinction makes later stitch problems easier to trace because you know whether the bobbin failed to wind at all or wound badly.
Separate Winding Failure From Bobbin Thread That Breaks Later
A wound bobbin that later breaks thread during sewing has moved beyond the no-wind symptom. At that point the bobbin completed the winding operation, so the diagnostic must consider the sewing setup, thread condition, bobbin insertion, machine path, and other factors that affect stitch formation. Going back to winder engagement does not explain a break that occurs only after the bobbin is installed for sewing. The useful evidence is when and where the thread breaks, not merely that the bobbin was involved.
Use troubleshooting repeated bobbin thread breakage when the thread has already been wound and the failure appears during sewing. If the machine instead cannot pick up the bobbin thread after installation, follow the separate process for diagnosing bobbin thread pickup problems. Those symptoms can share components and terminology, but they do not prove the same cause. Keeping them separate prevents winding advice from expanding into unrelated tension, hook, needle, or timing claims.
Return the Machine to Sewing Mode Only as the Manual Directs
After a winding test, the machine must be returned to its normal sewing state by the method documented for that model. On some designs, winding mode changes the relationship between the spindle and the sewing mechanism, while other machines use different controls or automated sequences. Do not assume that the position used on another machine applies to yours. Follow the exact manual through the end of the winding procedure, including any step that restores normal sewing operation.
This matters because a machine left in the winding state can create a second symptom that looks unrelated to the original problem. Before testing a stitch, remove or secure the wound bobbin as the manual directs, restore the documented sewing state, and rethread or insert the bobbin using the normal procedure for that machine. Do not force the handwheel or another control if the machine does not return to normal operation. If sewing mode cannot be restored through the owner steps in the manual, stop there and move to service-level diagnosis rather than experimenting with the winding mechanism.
Stop Before Winder-Gear or Electrical Repair
User-level troubleshooting ends once the correct bobbin, documented winding path, normal thread supply, and full winding engagement have been verified without restoring operation. Brother’s support page sends unresolved no-wind cases to authorized service rather than instructing owners to open the mechanism and replace internal parts. That is the appropriate boundary for an article about a sewing machine bobbin not winding. A stationary winder does not provide enough evidence to name an internal gear, switch, sensor, wiring fault, or motor fault without model-specific service diagnosis.
Do not remove electrical housings, adjust undocumented screws, alter internal gears, or bypass a winder interlock to make the machine run. Seek qualified service immediately for smoke, a burning odor, overheating, exposed wiring, a hard mechanical lock, visible broken internal parts, or another condition the manual reserves for service. For a simple no-wind symptom without those hazards, bring the technician the exact model, correct bobbin information, and the checks already completed. That record is more useful than a speculative part diagnosis because it shows whether the shaft was stationary, whether it spun empty, and which documented setup states were verified.
Final Thoughts: Verify Winding Mode Before Diagnosing the Winder
A bobbin not winding becomes much easier to assess when you preserve the evidence from the first failed attempt. Confirm the exact model procedure, use the correct bobbin, rebuild the winding path, and note whether the shaft moves and whether thread actually begins accumulating. Those observations are more useful than changing several controls at once because they show which part of the winding sequence has already been verified. A careful setup check can solve a simple state or thread-path problem without turning the machine into a repair project.
If the supported checks do not restore winding, keep the result simple and documented rather than naming an internal part without evidence. Record the machine model, bobbin type, whether the shaft moved, whether thread took up, and which owner-level steps were completed. That information gives a technician a cleaner starting point and keeps you from buying random replacement parts to test a guess. The next decision should come from the verified symptom, not from how dramatic the failure feels.
FAQs
🧵 Why is my bobbin not winding even though the machine runs?
Watch whether the winding shaft actually turns and whether thread begins accumulating on the bobbin. If the shaft spins but the bobbin stays empty, recheck the correct bobbin, starting tail, and documented winding path before assuming an internal failure.
⚙️ Why is my bobbin winder not spinning?
Confirm that the exact machine has been placed fully into its documented bobbin-winding mode. If the winder remains stationary after the supported engagement checks, do not open the mechanism to diagnose gears or electrical parts.
🪡 Can the wrong bobbin keep the winder from working correctly?
Yes, the bobbin type and physical fit are part of the winding system, and manufacturers warn against substituting visually similar bobbins. Verify the exact bobbin specified for the machine rather than judging compatibility by diameter or appearance alone.
🧶 Why does the bobbin spin without taking up thread?
That observation shows winding rotation is present, so check how the starting tail is secured and whether the thread follows the exact winding guide and tension path. Also confirm that the supply thread is not snagged or tangled before it reaches the bobbin.
📏 What if the bobbin winds but the thread piles up on one side?
That is an uneven-winding symptom rather than a no-wind symptom. Keep the bobbin and model information the same, then diagnose thread distribution and winding-path placement separately.
🛠️ Should I open the machine if the bobbin winder still will not turn?
No internal disassembly is justified by the no-wind symptom alone. After the documented owner checks are exhausted, use qualified service for internal winder, gear, sensor, or electrical diagnosis.
References and Sources
- Brother bobbin does not wind support: Verifies bobbin type, bobbin damage, winding-path errors, thread tangles, winder engagement, and the service boundary used in this diagnostic.
- SINGER bobbin winding guidance: Supports the model-specific winding procedure, correct bobbin style, and proper seating of thread in the winding tension path.