A bobbin can rotate and collect thread yet still be badly wound, so inspect the wind before it reaches the bobbin case. Loose, lopsided, uneven, or overfilled winding calls for checks of the exact bobbin type, documented winding-tension path, starting method, and shaft seating. Rewind from an empty, undamaged bobbin when the existing wind is questionable, then judge the new result before sewing. If correct owner-level setup repeatedly produces a poor wind, move to model-specific support or qualified service instead of adjusting undocumented internal parts.
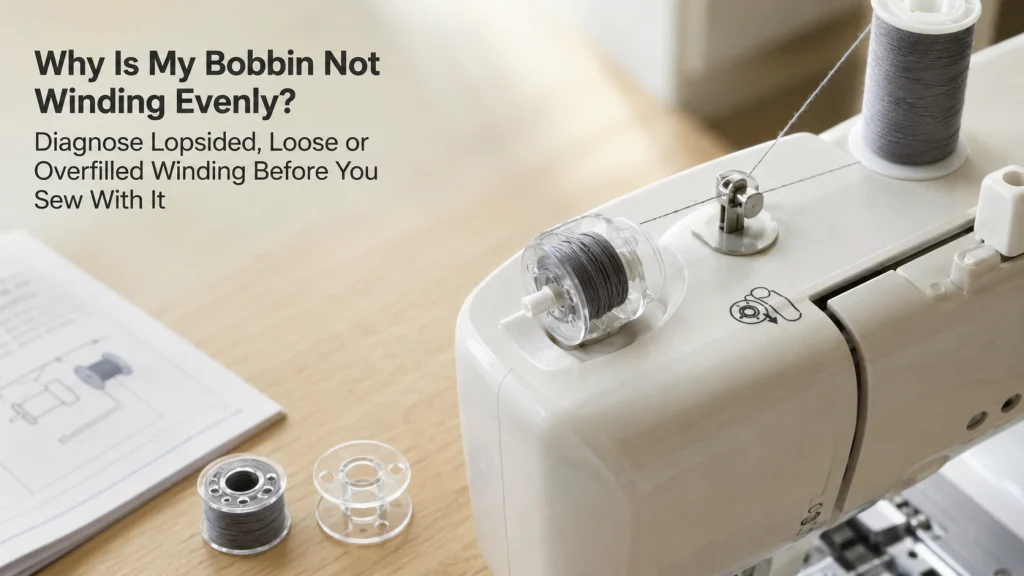
Inspect the Wound Bobbin Before It Becomes a Stitch Problem
The useful diagnostic moment is before sewing, while the bobbin is still in your hand and the winding result is easy to see. This page applies when the winder actually turns and thread collects on the bobbin, but the finished shape looks loose, one-sided, bulged, or excessively full. That is different from a winder that never starts or a bobbin that stays empty, because those symptoms begin with a different failure state. A visibly poor wind is evidence by itself, so there is little value in installing it and creating a second problem at the stitch line.
Set the questionable bobbin beside one that was wound normally on the same machine if you have a known-good example. Compare the thread pack across the full width, look for soft loops or a mound on one side, and check whether thread rises beyond the normal bobbin profile. Do not assume every machine produces the same cosmetic pattern, because winding geometry and automatic distribution differ by model. The goal is to decide whether this bobbin is fit for a controlled sewing test, then use the broader diagnose sewing machine stitch problems path only after the bobbin itself passes that quality check.
Define What Uneven, Loose, Lopsided, and Overfilled Look Like
Uneven winding is easier to diagnose when the visible shape is described precisely instead of calling every bad result a tension problem. A lopsided bobbin builds noticeably more thread toward one flange, while a loose bobbin has soft layers that can shift or compress under light finger pressure. An overfilled bobbin carries thread beyond the level the machine or bobbin case is designed to accommodate, which can interfere with free movement after installation. An even wind does not need to look factory-perfect, but its layers should be controlled, stable, and distributed in the pattern the exact machine is designed to produce.
| Bobbin condition | What to inspect | Decision before sewing |
|---|---|---|
| Even | Stable across the intended width | Continue after type and setup are verified |
| Lopsided | Thread piles toward one side | Check seating and path, then rewind |
| Loose | Layers feel soft or visibly open | Check tension path, then rewind |
| Overfilled | Thread exceeds the intended profile | Rewind before stitch testing |
These labels can overlap, so do not force a bobbin into one category. A bobbin may be both lopsided and loose, with soft layers concentrated near a flange. Record both traits and treat it as a failed quality check. Then return to bobbin condition, shaft seating, winding path, starting method, and a rewind from empty.
The four-way comparison prevents one common beginner mistake: trying to fix a malformed bobbin with upper-thread tension after it has already been installed. Upper tension cannot correct a bobbin that was wound with unstable layers or a visibly distorted thread pack. It also keeps the diagnosis tied to what you can observe rather than to a universal numeric setting that may not exist on the winding system. Once the shape is named accurately, the next checks become much narrower and easier to perform in the correct order.
Start With an Empty, Undamaged Bobbin of the Exact Required Type
Before changing the winding path, verify that the bobbin itself belongs in the machine. Bobbins that look nearly identical can differ in class, dimensions, curvature, material, or the way they seat on the winding shaft and later in the bobbin area. Manufacturer documentation should be the deciding evidence, not color, diameter by eye, or the fact that another bobbin appears to fit. A first-time owner can easily miss this because two clear plastic bobbins may look interchangeable while the machine documentation lists only one specific type.
Begin the diagnostic rewind with an empty bobbin that has no chips, cracks, bent flanges, or visible distortion. Singer’s support information illustrates why this matters by warning that visually similar bobbin classes are not automatically interchangeable and by directing owners to use the specified class or style for the machine. That does not make Singer’s class rules universal to other brands, but it demonstrates the level of compatibility evidence you should look for in your own manual or support page. Starting with the verified bobbin removes a major variable before you spend time tracing tension, shaft position, or thread distribution.
Thread the Exact Winding-Tension Path
A bobbin-winding path is not simply the upper-threading path with the needle skipped. The thread usually passes through a dedicated guide, pre-tension device, winding disk, or tension spring before it reaches the bobbin, and the exact route varies by machine. If the thread merely touches the edge of that device instead of seating where the manual shows, the bobbin can still rotate while the thread pack forms loosely or unevenly. That makes the path a high-value check because the machine may appear to be functioning normally even though the winding tension is not being applied as designed.
- Confirm the spool orientation shown for the model.
- Trace each winding guide to the bobbin shaft.
- Seat the thread in the tension device exactly as documented.
- Check that thread has not jumped from a guide.
- Do not add wraps or bypass a disk unless the manufacturer documents it.
Singer’s general support specifically identifies incorrect placement around the bobbin-winding tension spring as one cause of uneven winding, and some Singer instructions describe an additional wrap as a troubleshooting step. Treat that as manufacturer-specific evidence rather than permission to double-wrap every machine, because other winding systems use different tension devices and thread paths. Rethread from the spool with the manual open, then inspect the entire route before starting the motor again. A clean rewind after correct routing tells you far more than turning an unrelated sewing tension dial and hoping the bobbin shape changes.
Secure the Starting Tail Only as the Model Directs
The first few wraps matter because they establish how the thread begins building on the bobbin core. Some machines direct the thread through a bobbin hole or slot before winding, while others use a different starting method, so the manual should settle the question. A loose starting tail, an incorrectly routed tail, or excess thread left where it can catch may disturb the first layers even though winding continues afterward. Avoid copying a starting technique from another machine simply because its bobbin looks similar.
Watch the first turns closely enough to confirm that the thread catches cleanly and begins laying where the machine expects it to lay. Keep fingers clear of moving parts and use only the owner procedure shown for the model rather than trying to hand-guide a fast-moving bobbin. If the first layers immediately bunch to one side, stop the wind and correct the setup instead of allowing the machine to bury that bad start under more thread. A good diagnostic rewind should begin cleanly because later layers cannot turn a visibly unstable foundation into a reliable test bobbin.
Confirm the Bobbin Sits Squarely on the Shaft
A correct bobbin can still wind poorly if it is not seated on the shaft in the position the machine requires. Check that it is pushed fully into place, oriented correctly if the design is directional, and engaged with any locating feature described in the manual. From the side, the bobbin should not appear obviously tilted, wobbling, or riding above the normal seated position. Do not force a bobbin down the shaft, because resistance can be evidence that the type, orientation, or shaft condition needs another look.
During a slow initial wind, observe the bobbin rather than only the moving thread. A squarely seated bobbin should rotate without a visible side-to-side wobble that changes the distance between the flanges and the incoming thread path. If a verified undamaged bobbin repeatedly sits crooked or visibly oscillates on the shaft, stop treating the issue as a simple thread-routing mistake. Record that seating behavior separately from the thread pattern so the next controlled rewind shows whether the same clue repeats.
Rewind and Observe How Thread Distributes Across the Bobbin
Once bobbin type, condition, thread path, starting method, and shaft seating are verified, perform a fresh rewind from empty. Watch where the thread begins, whether it travels across the usable width, and whether the layers remain firm without becoming visibly distorted. The exact side-to-side motion may be automatic on one machine and handled differently on another, so judge the result against the manual and a known-good bobbin from that machine when available. Do not introduce a manual finger-guiding technique unless the documentation explicitly calls for owner guidance during winding.
Stop early if the same defect is obvious after only a modest amount of thread has accumulated. A lopsided mound that begins immediately provides more useful diagnostic evidence than a completely filled bobbin that hides when the problem started. If the second wind is even after rethreading the winding path, the original poor bobbin should stay out of the stitch test and the corrected bobbin becomes the better baseline. If the defect repeats under the same verified setup, record what you observed and continue through the remaining owner-level checks instead of changing several unrelated controls at once.
Reject Chipped, Warped, or Distorted Bobbins
A damaged bobbin is not a useful diagnostic tool because its shape can affect both winding and later movement in the bobbin area. Look at both flanges, the center opening, and the bobbin body for chips, cracks, bending, or a shape that no longer matches an undamaged example of the same specified type. Thread that has been wound excessively tight can also leave some bobbins visibly distorted, which means the bobbin should not be reused to determine whether another machine setting is correct. Once visible damage is present, replace that test piece with a verified undamaged bobbin before drawing conclusions about the winding system.
Singer’s bobbin support advises discarding chipped, bent, warped, or otherwise damaged bobbins, which is a sensible evidence anchor for the broader principle of removing a visibly compromised part from the test. The important point is not the brand name but the diagnostic logic: you need a dimensionally sound bobbin before you can judge the winding system fairly. Do not straighten a plastic flange, sand a chipped edge, or force a distorted bobbin onto the shaft as an owner-level shortcut. Replacing the bad test piece with a verified undamaged bobbin keeps the next observation about the machine rather than about damage you already know is present.
Do Not Add New Thread Over a Problematic Partial Wind Unless the Manual Permits It
A partially wound bobbin with loose, crossed, or badly lopsided layers should not become the foundation for a diagnostic rewind. Adding a neat upper layer can hide the original defect without removing the unstable thread underneath it, which makes the finished bobbin harder to evaluate. Singer’s bobbin guidance specifically recommends winding onto empty bobbins rather than adding thread to partially wound ones, and that is a useful conservative rule when diagnosing poor winding. If another manufacturer documents a different procedure for your exact machine, follow that model-specific instruction instead of treating one brand’s rule as universal.
This decision card matters because a bobbin can contain good thread and still be a bad test object. Removing the questionable wind may feel wasteful, but it prevents one known variable from carrying into later tension or stitch diagnosis. The cleanest troubleshooting sequence changes one thing at a time and preserves observations that can actually distinguish setup from a recurring machine fault. Once an empty-bobbin rewind produces a stable result, you can move forward without wondering whether an earlier bad layer is still influencing the test.
Use a Different Diagnostic Path When the Winder Does Not Operate
This article stops owning the problem when the bobbin does not rotate or does not collect thread at all. A stationary bobbin, a winder that will not engage, or a motor response with no winding action starts with a no-wind diagnosis rather than a thread-distribution diagnosis. The visual checks here assume that winding is physically happening and that the defect appears in the way thread builds on the bobbin. Mixing those two symptom states wastes time because a tension-path correction cannot explain every failure to start the winder.
If your bobbin remains empty or the winder mechanism never enters its normal operating state, use the separate steps to diagnose a bobbin that will not wind. That path can focus on engagement, winding mode, and other checks appropriate to a non-operating winder without making assumptions about a lopsided thread pack that never formed. Keep the symptom boundary strict even if both problems involve the same shaft and spool of thread. Troubleshooting becomes more reliable when the first question is what the machine actually did, not which nearby bobbin article sounds familiar.
Change Direction If the Lower Thread Later Breaks While Sewing
A bobbin that winds normally can still be involved in a later sewing problem, but that later symptom needs its own starting point. If the bobbin is correctly wound and installed, then the lower thread repeatedly breaks during stitching, inspect the conditions that apply while sewing rather than reopening every winding step by default. The relevant variables can include the installed bobbin path, thread condition, needle interaction, stitch setup, or model-specific bobbin-area requirements. Those questions begin after the winding quality gate has already been passed.
Use the separate process to diagnose bobbin thread breakage when the failure is actual thread breakage during sewing. Do not call every broken lower thread proof that the bobbin was wound unevenly, especially when the wound shape is stable and the correct bobbin type has been verified. Conversely, do not use a visibly loose or lopsided bobbin to investigate breakage because it contaminates the later test with a known setup defect. A clean symptom handoff keeps winding quality, thread breakage, and machine adjustments from becoming one large guess.
Change Direction If Bobbin Thread Appears on Top of the Fabric
Visible bobbin thread on the fabric’s top side is a stitch-balance symptom, not a visual definition of uneven winding. Before chasing tension settings, confirm that the bobbin used for the test was wound evenly, matches the machine, and was installed according to the manual. If those conditions pass, the next checks belong to the threaded sewing system rather than to the winding shaft. Keeping that sequence prevents a first-time owner from turning several tension controls merely because the bobbin thread is visible where it should not be.
Move to the focused steps to diagnose bobbin thread showing on top once the wound bobbin has passed inspection. That article can address the upper and lower thread paths in the context of an actual stitch result instead of assuming the wind shape is the cause. If you discover during that process that the bobbin itself is loose, lopsided, or overfilled, return here and correct the known winding defect first. The order matters because stitch-balance conclusions are only as trustworthy as the bobbin you put into the machine.
Stop for Service When Correct Setup Still Produces Repeatably Bad Winding
Owner-level troubleshooting should end when the same poor winding pattern repeats after the documented setup has been verified. Use the exact required bobbin, start from an undamaged empty bobbin, follow the winding-tension path, secure the tail as directed, seat the bobbin correctly, and repeat the test without forcing any control. If the machine still produces the same pronounced lopsided or loose wind, you have useful evidence that the problem persists beyond the obvious setup variables. That is a better service description than saying only that the bobbin “looks wrong” after several undocumented adjustments.
Do not alter internal tension assemblies, winding gears, electrical housings, undocumented screws, or other mechanisms that the owner manual does not assign to the user. Stop immediately for smoke, a burning odor, overheating, exposed wiring, a hard mechanical lock, visible broken internal parts, or other abnormal operation that moves the problem beyond a simple winding-quality check. Singer’s uneven-winding support similarly routes an unresolved winding-tension problem to service rather than instructing owners to dismantle the mechanism. For broader symptom-led decisions, work through sewing machine troubleshooting while keeping the exact model manual and the repeatable winding observation in front of you.
Final Thoughts: A Bad Wind Is Evidence Before It Reaches the Bobbin Case
An uneven bobbin is easiest to solve before it becomes part of a sewing test. Name the visible defect, verify the exact bobbin, trace the dedicated winding path, confirm the starting method and shaft seating, then rewind from empty and watch what changes. That sequence gives each observation a job and avoids turning a simple winding problem into a vague tension problem. If the fresh bobbin winds normally, set the malformed one aside instead of using it to judge stitch quality.
If the same poor wind repeats after every documented owner check passes, stop changing unrelated controls and treat that pattern as a failed quality gate. Note whether the defect is loose, lopsided, overfilled, combined, or accompanied by wobble, and record which verified bobbin and winding path produced it. That description makes the next step more specific without pretending to diagnose an internal failure from the outside. The most useful bobbin troubleshooting habit is simple: do not let a visibly bad wind enter the bobbin case and confuse everything that happens afterward.
Frequently Asked Questions
Uneven winding questions can sound alike because the same bobbin and shaft are involved in several symptoms. First identify whether the bobbin rotates, how the thread pack looks, and whether the problem occurs before or during sewing. The exact manual controls winding paths, bobbin type, starting method, and special procedures. The answers below keep those symptom boundaries separate.
Use these answers as a symptom check, not permission to change undocumented screws or internal mechanisms. A useful rewind starts with a verified bobbin and documented path. If the symptom shifts to no winding, thread breakage, or stitch balance, use the matching diagnostic path. That separation preserves a clean baseline for the next test.
🧵 Why does my bobbin wind more thread on one side?
Verify the exact bobbin type, square shaft seating, and documented winding-tension path. If the one-sided build repeats with an empty undamaged bobbin, use model-specific support rather than forcing the shaft or altering internal parts.
🌀 Why is the thread loose on my wound bobbin?
Loose layers can mean the thread is not seated correctly in the winding tension device, but paths vary by machine. Rethread according to the manual and rewind an empty verified bobbin before sewing.
📏 How full should I wind a sewing machine bobbin?
Use the manual or manufacturer support for the stopping point because winding systems differ. Do not add thread beyond the normal profile or documented full-bobbin condition.
🧰 Can I use a bobbin that is slightly warped?
Do not use a warped, bent, chipped, or damaged bobbin as a diagnostic baseline. Replace it with the exact specified type before testing winding or stitches.
🪡 Should I adjust sewing tension when the bobbin winds unevenly?
Do not change ordinary sewing tension unless the manual connects that control to bobbin winding. Verify the dedicated winding-tension path and bobbin setup first.
⚙️ What if the bobbin winder turns but every bobbin still winds badly?
Repeat the test with an empty, undamaged, verified bobbin and the documented winding path. If the defect persists, contact model-specific support or qualified service.
References and Sources
The technical claims here are limited to manufacturer-supported owner checks and observable winding behavior. Singer support directly addresses uneven winding, the winding-tension path, correct bobbin type, empty-bobbin rewinding, overfilling, and damaged bobbins. Those instructions are evidence for Singer machines, not permission to copy a brand-specific method onto another model. For any machine-specific step, the exact manual takes priority.
- Singer Machine FAQs: supports the winding-tension-spring check for uneven winding and the service boundary when the documented troubleshooting does not resolve it.
- Singer Bobbin Tips: supports using the specified bobbin type, winding from empty, avoiding overfilling, and rejecting damaged or distorted bobbins.
Community posts are not used as proof of an internal mechanical cause because winding faults can be model-specific. The article does not diagnose internal tension assemblies, gears, shaft defects, or electrical faults from appearance alone. Manufacturer documentation establishes the owner procedure, while repeatable failure after that procedure supports escalation rather than a hidden diagnosis. That boundary keeps a visible bobbin shape from becoming an unsupported repair claim.