Repeated bobbin-thread breakage is best diagnosed from the lower thread path first, not by immediately changing upper tension. The useful sequence is to prove which thread snapped, inspect the installed bobbin and remaining tail, confirm winding quality and exact bobbin type, verify insertion, and clean only the areas the machine manual makes owner-accessible. A scratched, chipped, warped, incorrectly wound, overfilled, wrongly inserted, or incompatible bobbin can change how thread leaves the lower system, while persistent breakage after documented user checks can point to damage that belongs in service. The exact machine manual remains the authority for bobbin type, insertion direction, removable parts, cleaning access, and service limits.
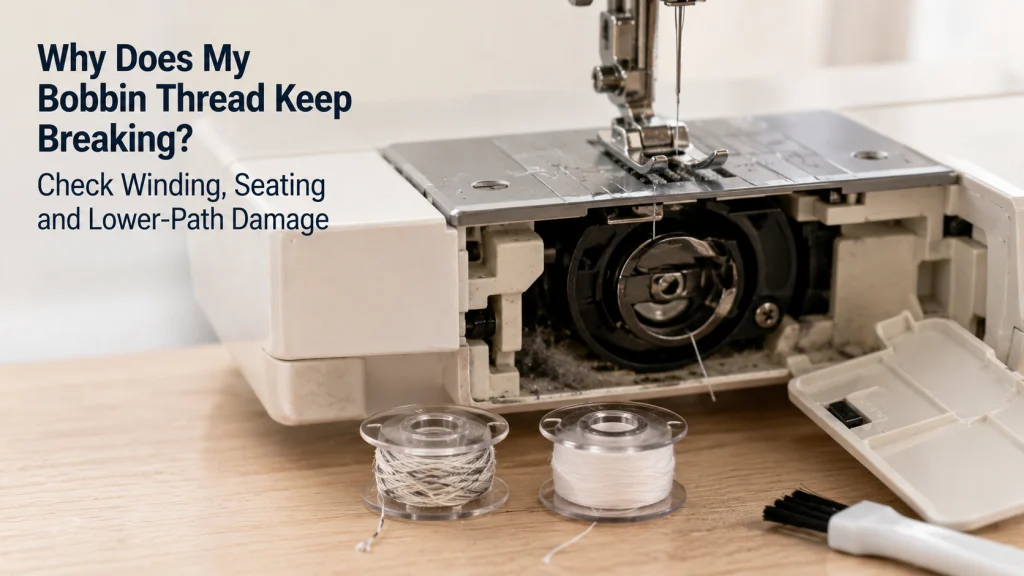
Why Does My Bobbin Thread Keep Breaking? First Prove Which Thread Snapped
The question “why does my bobbin thread keep breaking?” is easier to solve when you first prove that the lower thread actually snapped. Use contrasting thread colors if practical, then stop at the first failure instead of sewing through a larger tangle. Check the thread still connected to the needle, the tail beneath the fabric, and the thread remaining in the bobbin area. That separation keeps an upper-thread problem from being misdiagnosed as a bobbin problem.
A first-time machine owner can easily be fooled by where the loose thread appears after a jam. Upper thread can be pulled downward around the hook area, so a nest under the fabric does not automatically prove the bobbin thread broke. If the needle thread is frayed or severed while the bobbin thread still pulls from the bobbin, follow the machine’s upper-thread path instead. The broader sewing machine stitch problems overview helps separate these symptom families before you change settings.
Key point: An upper-thread break usually leaves the failure connected to the needle-side path, while true lower-thread breakage leaves the bobbin supply interrupted. Thread can move during a jam, so inspect both ends before assuming the location of the loose thread identifies the cause. If the evidence is unclear, remove the fabric carefully, rethread according to the exact manual, and make a short controlled test with contrasting colors. Diagnose the thread that actually failed, not the side of the fabric where the mess happened to collect.
Once you have confirmed lower-thread breakage, leave unrelated controls alone. A random upper-tension change can create a second problem and blur the original evidence. Stay close to the bobbin: inspect the tail, winding shape, bobbin type, seating, and thread-contact surfaces. That lower-path-first order is the core of a useful sewing machine troubleshooting process.

This Coats & Clark collection contains Dual Duty XP general-purpose sewing thread in multiple colors. The medium-weight thread is made for both hand and machine sewing and can be used with woven and knit fabrics. The assortment provides contrasting colors that can also make separate upper and bobbin thread paths easier to distinguish during a controlled sewing test.
Check On AmazonIf you click this link and buy, we earn a commission at no additional cost to you.
When the Bobbin Thread Keeps Breaking, Inspect the Remaining Tail
Remove the bobbin only after putting the machine in the safe access state described by its manual. Before pulling away loose fibers, look at where the remaining bobbin thread ends and whether it appears cleanly snapped, frayed, pinched, or trapped under another wrap. A short fuzzy tail can suggest abrasion somewhere along the path, while a sharply trapped tail may point back to winding or seating. The tail alone does not identify a damaged part, but it gives you a better starting point than changing tension by guesswork.
Also inspect how freely the thread leaves the bobbin before you disturb its winding. If several wraps have loosened, crossed, or collapsed toward one flange, note that condition before rewinding anything. If the bobbin is jammed, do not force the handwheel or pull hard enough to bend the bobbin, case, or surrounding parts. A controlled inspection should preserve evidence and keep the owner-level check from turning into a repair problem.
- Confirm the lower thread, not the needle thread, is the broken thread.
- Check whether the remaining tail is frayed, pinched, trapped, or sharply cut.
- Look for loose, crossed, or collapsed wraps on the bobbin.
- Check for a short thread fragment caught in an owner-accessible slot or channel.
- Note any visible scratch, chip, distortion, or rough edge before cleaning.
The checklist is most useful when you treat it as an observation step, not a verdict. A frayed tail can be consistent with a rough surface, but it does not prove which surface caused the damage. Loose wraps can be consistent with a poor wind, but the machine-specific winding path still has to be checked before assigning a cause. Record what you see, then move to winding quality while the bobbin condition is still easy to compare.

The YOCTOSUN LED Head Magnifier uses five interchangeable lenses with magnification from 1X to 3.5X for close-detail work. Its built-in LED system provides two brightness levels to illuminate small surfaces. The frame can be worn like glasses or converted to a headband, leaving both hands available while inspecting small sewing components.
Check On AmazonIf you click this link and buy, we earn a commission at no additional cost to you.
Check Whether the Bobbin Is Wound Evenly and Not Overfull
A bobbin should carry thread in a controlled, even package that can rotate and release thread as the machine was designed to handle it. Singer’s current bobbin guidance warns against overfilling and explains that loose or excessively tight winding can create sewing problems, which is a useful evidence anchor even though the exact winding procedure varies by model. Compare the suspect bobbin with one wound correctly on the same machine, if you have one. Look for obvious bulging, loose loops, crossed layers, thread stacked heavily to one side, or a fill level that interferes with free rotation.
Do not fix a visibly poor wind by packing more thread onto the same bobbin. If the winding is suspect, remove the thread or use another correct empty bobbin and rewind from the beginning using the machine manual’s thread guides and winding-tension path. A beginner may think that a bobbin that “has thread on it” is ready to sew, but the shape and tension of that wound package affect how the lower thread feeds. Rewinding gives you a clean test variable without touching internal tension hardware.
| What you see | Next owner-level check | Why it matters |
|---|---|---|
| Loose or soft wraps | Rewind through the documented winding path | Loose winding can let layers shift or feed inconsistently. |
| Thread piled to one side | Verify the winding guides and bobbin seating on the winder | An uneven package can change how the bobbin rotates and releases thread. |
| Bobbin filled to the edge or binding | Use a correctly filled bobbin | An overfull bobbin may not rotate freely in its intended case or holder. |
| Neat, even wind | Continue to bobbin type and insertion checks | A good wind removes one major variable without proving the rest of the lower path is correct. |
This creates a simple winding-to-breakage flow: poor winding gets corrected first, while a clean wind moves the diagnosis forward instead of backward. The important part is not to treat every uneven-looking bobbin as proof of the breakage source, because seating, bobbin type, damage, and lower-path surfaces still matter. If a bobbin repeatedly winds badly before it ever reaches the machine, that is a winding problem rather than a stitch-formation problem. Keep those two failures separate so one article’s fix does not get forced onto another symptom.
Verify the Exact Bobbin Type for the Machine
Visual similarity is not compatibility evidence. Bobbins that look nearly identical can differ in class, dimensions, flange shape, center geometry, material, or the way a particular machine expects them to sit and rotate. Brother support for several covered models specifies SA156 Class 15 bobbins, while Singer tells owners to stay with the same class and style supplied for the machine rather than substituting by appearance. Those examples show why the correct answer comes from the exact model documentation, not from matching a loose bobbin to a generic store label.
Start with the machine model number, then check its manual, accessory list, or manufacturer support page for the specified bobbin. If the documentation distinguishes transparent from metal bobbins, front-loading from top drop-in systems, or one named class from another, keep that distinction intact. Do not assume that a bobbin that physically drops into the opening is safe or correct just because the cover closes. A wrong bobbin can create symptoms that resemble tension, winding, or damage and can waste time on checks that were never the real issue.

Brother SA156 bobbins are genuine clear plastic replacement bobbins supplied in a 10-pack. Each bobbin is 7/16 inch deep and includes a security notch used during bobbin winding. Brother publishes a specific machine compatibility list for SA156, so these bobbins are intended for models documented to use this bobbin type.
Check On AmazonIf you click this link and buy, we earn a commission at no additional cost to you.
Verify Bobbin Orientation and Case Threading
Correct bobbin type is only half of the installation check. The thread also has to unwind in the direction shown for that machine and enter the intended slot, channel, spring, or guide without skipping a step. Singer’s support instructions illustrate that top drop-in and front-load systems can use different insertion directions, which is exactly why a remembered rule from another machine is not reliable enough. Follow the diagram for the exact model in front of you and compare each physical step with the installed bobbin.
Do not use lower-tension screw adjustment as the first response to a bobbin that may simply be inserted or threaded incorrectly. On many home machines, the practical owner check is to reseat the correct bobbin and route the thread exactly as documented, leaving internal or case-tension work alone unless the manufacturer specifically makes it an owner procedure. If the lower thread stays intact but appears on the fabric surface, that belongs to a different diagnostic path about bobbin thread showing on top. Separating installation errors from stitch-balance symptoms keeps you from treating every lower-thread complaint as the same fault.
Clean Only the Accessible Bobbin Area the Manual Allows
Broken thread can leave a small fragment exactly where the lower thread needs to pass cleanly, and lint can make a marginal problem harder to read. Use the exact manual to determine what covers, plates, bobbin holders, or cases the owner is permitted to remove and what cleaning method is specified. Put the machine in the documented safe state before reaching into the needle or bobbin area. The goal is to remove ordinary lint and loose thread from accessible surfaces, not to disassemble the hook system or expose undocumented mechanisms.
A soft brush or other manual-specified cleaning tool may be appropriate on one machine while another model has different instructions, so avoid turning a generic cleaning habit into a universal rule. Do not loosen screws merely because a thread fragment seems to disappear behind a part. If the fragment cannot be removed through the normal owner-access path, that limitation matters as much as the debris itself. After cleaning, reinstall every removable piece exactly as shown before turning the handwheel or starting a test seam.

The SAVINA cleaning brush is designed for removing lint and fabric fibers from sewing machines and sergers. It uses a smooth hardwood handle with dense nylon bristles for reaching small areas around the machine. A built-in hanging strap provides a simple way to store the brush between cleaning sessions.
Check On AmazonIf you click this link and buy, we earn a commission at no additional cost to you.
Inspect the Bobbin for Chips, Scratches, Warping or Distortion
A bobbin is a simple-looking part, but its surfaces are part of a moving thread system. Brother’s support guidance specifically tells owners to check for scratches on the bobbin in the covered models, and Singer advises replacing bobbins that are chipped, bent, warped, or otherwise damaged. Inspect the flanges, rim, center area, and any surface that could contact thread or the holder. Use good light and compare the suspect bobbin with an undamaged bobbin of the exact approved type rather than trying to judge a tiny defect in isolation.
Do not sand, file, bend, or reshape a damaged bobbin as a troubleshooting shortcut. A plastic bobbin with a chipped flange or a metal bobbin with distortion should be treated as a failed consumable if the machine documentation calls for that bobbin style and the damage is visible. The same restraint applies to a rough bobbin case or lower-thread path: identifying damage is not permission to modify it. If the defect is on a service part rather than a normal owner-replaceable bobbin, move the decision toward service or an exact documented replacement path.
After removing a bobbin from service, store it so its type and condition remain easy to identify. Keep different bobbin classes or styles separated instead of mixing visually similar parts in one container, especially when more than one machine is used in the same workspace. Protect wound bobbins from loose grit, hard metal tools, moisture, and other storage conditions that can damage the bobbin or contaminate the thread. Simple separation and clean storage make the next troubleshooting check more reliable because you are less likely to reinstall an unknown or damaged bobbin by mistake.
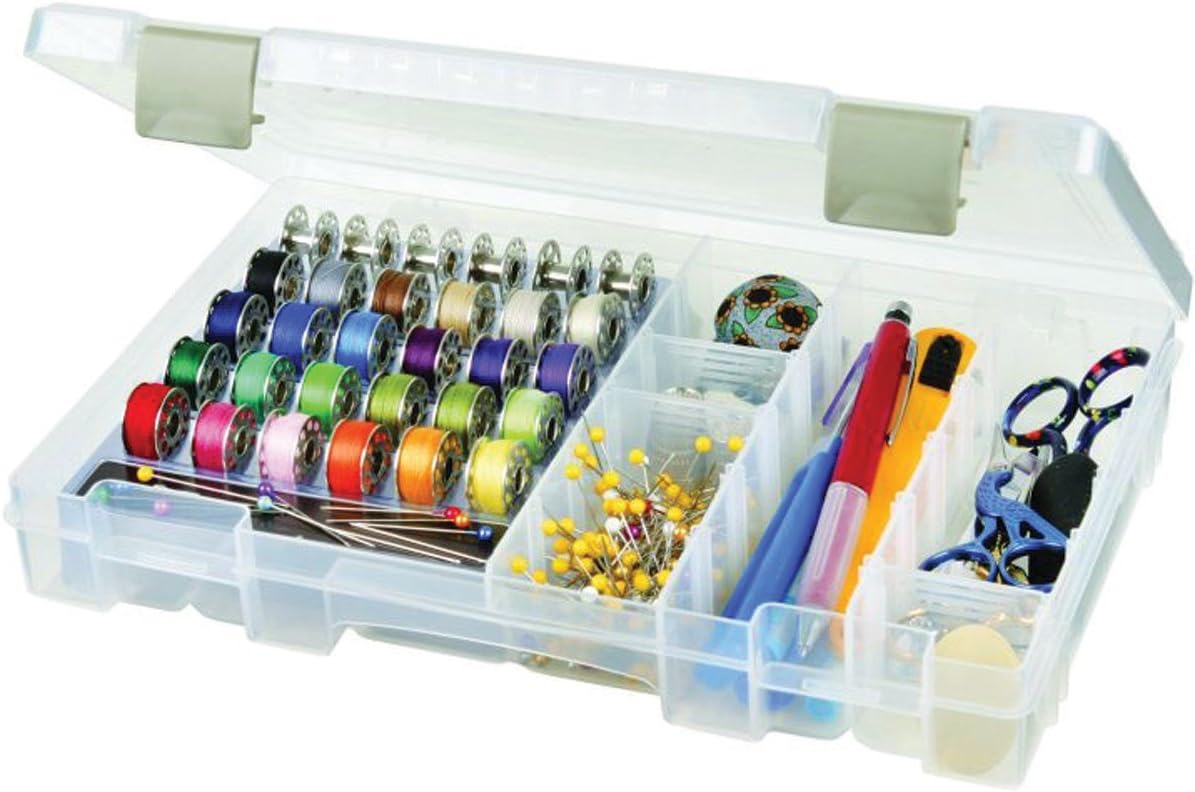
The ArtBin Sew-Lutions Bobbin and Supply Box is a clear plastic organizer made for sewing bobbins and small notions. Its removable tray holds up to 30 bobbins, while four additional compartments use removable dividers for smaller supplies. The transparent construction keeps stored bobbins visible without requiring them to be mixed loosely in a drawer or container.
Check On AmazonIf you click this link and buy, we earn a commission at no additional cost to you.
Retest With a Correctly Wound Replacement Bobbin
After you have confirmed the specified bobbin type, wound it evenly, installed it in the documented direction, and cleared accessible lint or thread fragments, make a controlled retest. Use ordinary fabric and a normal stitch that the machine previously handled, unless the original problem occurs only with a specific material or layer stack. Keep the same known-good needle thread and avoid changing several settings at once. A clean retest is useful because it tells you whether correcting the lower-thread setup changed the failure without adding new variables.
If the replacement bobbin runs normally, compare it with the failed bobbin before throwing away the evidence. The difference may be winding shape, fill level, damage, bobbin type, or installation rather than a mysterious tension number. If both correct bobbins break the lower thread in the same way, repeat only the documented setup checks that could reasonably have been missed. Persistent repeatable failure after those checks is more important evidence than a one-time break caused by a visibly bad bobbin.

This SINGER pack contains four transparent plastic Class 15 bobbins for compatible sewing machines. The clear construction makes the remaining thread visible while the bobbin is installed. SINGER instructs users to confirm the correct bobbin size in the machine manual and to begin winding with an empty bobbin rather than adding thread to a partially wound one.
Check On AmazonIf you click this link and buy, we earn a commission at no additional cost to you.
If the Upper Thread Is Breaking Instead, Change Diagnostic Paths
If your contrasting-thread test shows that the needle thread is the one snapping, stop treating the bobbin as the primary suspect. Upper-thread breakage can involve the spool path, threading sequence, needle condition, needle and thread relationship, upper tension, presser-foot or needle-plate damage, and other checks that do not belong in a lower-thread-first workflow. Rechecking the bobbin repeatedly will not make that diagnosis more precise. Move to the dedicated upper thread breakage checks and preserve the distinction between the two thread paths.
This matters because thread fragments often collect near the bobbin even when the broken strand started above the fabric. A beginner may see the mess under the needle plate and assume every problem under the fabric is a bobbin problem. Instead, trace which strand is still continuous from its supply to the failure point and use the machine manual to verify the corresponding threading path. One confirmed thread identity can save several unnecessary tension changes and part swaps.
If the Bobbin Will Not Wind, Diagnose the Winding Operation Separately
A bobbin that will not wind at all has failed before stitch formation begins, so lower-thread breakage during sewing is not the right troubleshooting frame. Check the bobbin-winder setup, winding path, engagement method, and model-specific instructions rather than trying to solve it through bobbin seating in the sewing position. The distinction is practical because the winder and the stitch-forming lower path share a bobbin but not the same operating step. Use the dedicated bobbin not winding checks when the machine cannot create a usable wound bobbin.
Do not force a winder spindle, handwheel, or control that does not engage as the manual describes. If the bobbin can be wound correctly but later breaks thread during sewing, return to the lower-path sequence in this article. If it cannot be wound in the first place, solve that failure before using the bobbin as evidence for a sewing problem. Keeping the sequence clean prevents a winding fault and a lower-thread break from being mixed into one diagnosis.
If the Bobbin Winds Unevenly, Fix the Winding Shape Before Sewing
Visibly uneven winding deserves attention before the bobbin goes back into the machine, even if the bobbin still fits in its case or holder. Thread that piles heavily at one side, crosses loosely, or forms a soft uneven package points back to the winding setup rather than immediately proving damage in the sewing path. Verify that the bobbin is the specified type, seated correctly on the winder, and threaded through the model’s winding guides and tension point. Then compare the new wind with the shape the manual or support material shows.
If the winding itself remains uneven, use the separate uneven bobbin winding diagnosis before continuing to sew. That route keeps the focus on how the thread is being laid onto the bobbin rather than on lower-path breakage after installation. Once you can produce a correctly wound bobbin, this article becomes useful again for seating, damage, cleaning, and controlled retesting. Treat the clean winding result as a prerequisite, not as proof that every lower-thread component is healthy.
When the Lower Thread Keeps Breaking After Owner Checks, Stop for Service
Persistent lower-thread breakage after a correct bobbin, correct wind, correct insertion, documented cleaning, and a controlled retest changes the decision. At that point, repeatedly turning tension controls or removing more parts is less useful than recognizing that the remaining fault may be outside normal owner access. Brother’s support guidance for the covered models routes continued breakage to service after the listed checks are completed. That is a sensible boundary for a home sewist because a rough or damaged lower path, hard mechanical interference, or another internal fault requires diagnosis beyond a generic article.
Stop sooner if the machine shows a hard mechanical lock, repeated hard needle strikes, visible broken internal parts, smoke, burning odor, overheating, sparks, exposed wiring, or uncontrolled motion. Do not alter hook timing, needle-bar height, gears, electrical housings, internal tension assemblies, or undocumented screws while chasing a broken bobbin thread. Those actions can create additional faults and erase the clean troubleshooting sequence you have already completed. Take the exact model number, the manual, the failed and replacement bobbins, and a brief description of the repeatable symptom to qualified service.
Warning: Owner-level troubleshooting ends where the exact machine documentation reserves work for service personnel. A visible rough spot or internal obstruction can be useful evidence, but it is not permission to file, bend, polish, adjust, or disassemble the lower mechanism. If the machine cannot be turned normally by the documented method, do not force it. Preserve the condition and have the machine inspected.
A good service handoff is specific. State that the lower thread was confirmed as broken, the approved bobbin type was verified, a fresh bobbin was installed correctly, accessible lint was removed, and the failure repeated. That tells a technician which owner-level variables were already controlled. It also describes a narrow repeatable symptom instead of a vague thread problem.
Final Thoughts: Diagnose the Lower Path Before Changing Unrelated Controls
Bobbin-thread breakage is easier to troubleshoot when every check stays tied to the lower path that actually failed. Prove the broken strand, inspect the tail, verify winding quality, confirm the exact bobbin type, follow the documented insertion path, clean only owner-accessible areas, and replace a visibly damaged bobbin with the correct type. Then retest without changing several other variables at the same time. That sequence gives each result a meaning instead of turning the machine into a collection of simultaneous experiments.
The final decision depends on what remains after those checks. A poor wind, wrong bobbin, installation mistake, or damaged bobbin can be corrected at owner level when the manual supports the action, but repeated breakage with a known-good setup deserves a service boundary. Do not let a lower-thread problem push you into undocumented screw adjustments or internal repair. The most useful next move is the one the evidence supports, even when that move is simply to stop.
FAQs
🧵 Why does my bobbin thread keep snapping after a few stitches?
First confirm the lower thread is actually the strand that broke, then check bobbin winding, exact bobbin type, insertion, accessible debris, and visible damage. If a correctly wound and installed approved bobbin still breaks repeatedly, stop at the service limit in the machine documentation.
🌀 Can an overfilled bobbin make the thread break?
Yes, an overfilled bobbin can interfere with free movement in a system designed for a specific fill condition. Use a correctly wound bobbin and follow the exact model’s winding instructions rather than trimming or forcing an overfilled bobbin to fit.
🧰 Should I adjust the bobbin-case tension screw?
Not as an early generic troubleshooting step. Reseat and rethread the correct bobbin first, and adjust a case-tension screw only when the exact manufacturer documentation makes that an owner procedure for your model.
🔍 How can I tell if a bobbin is damaged?
Inspect it under good light for chips, scratches, bent areas, warping, or distortion and compare it with an undamaged bobbin of the exact approved type. Replace a visibly damaged bobbin rather than sanding, bending, or reshaping it.
⚙️ Why does a new bobbin still break the lower thread?
A new bobbin removes only one variable. It still has to be the correct type, wound properly, inserted in the correct direction, threaded through the intended lower path, and used in a machine without damaging rough surfaces or an internal fault.
🪡 Is a thread nest under the fabric always a bobbin problem?
No. Upper thread can be pulled into the bobbin area and collect underneath, so identify which thread actually broke before choosing a troubleshooting path. Contrasting upper and lower thread colors can make that distinction easier during a controlled test.
References and Sources
The technical claims here rely on manufacturer support because bobbin type, insertion, winding, cleaning access, and service limits vary by machine. Brother documents lower-thread checks involving bobbin setting, winding, scratches, bobbin type, and service escalation. Singer documents winding quality, overfilling, bobbin class and style, and different insertion paths. These are evidence anchors, not universal instructions.
The exact machine manual still takes priority when its bobbin system or access instructions differ. One model’s bobbin class or insertion direction should not be copied onto another system. These references show which claims were checked and why model-specific verification matters. They do not replace the documentation for the machine in front of you.
- Brother thread breaking support: verifies lower-thread checks for bobbin setting, winding, scratches, correct bobbin type, and service escalation on the covered models.
- Singer bobbin winding support: verifies model-dependent winding guidance, loose winding concerns, and distinct insertion procedures for common bobbin-loading systems.
- Singer bobbin selection guidance: verifies same-class and same-style bobbin guidance, overfill cautions, winding-tension concerns, and replacement of damaged bobbins.