If your feed dogs won’t come up after you return the drop-feed control to regular sewing, the lever may not be the final step. Some machines require a handwheel turn or needle-position cycle before the feed dogs re-engage, while other models do not lower the feed dogs at all and use a darning plate instead. Start with the exact model manual, complete only the documented user-level sequence, and confirm the teeth rise above the needle plate before sewing again. If the control cannot restore them, stop rather than prying, oiling, or opening the linkage.
Moving the lever may not finish the re-engagement cycle
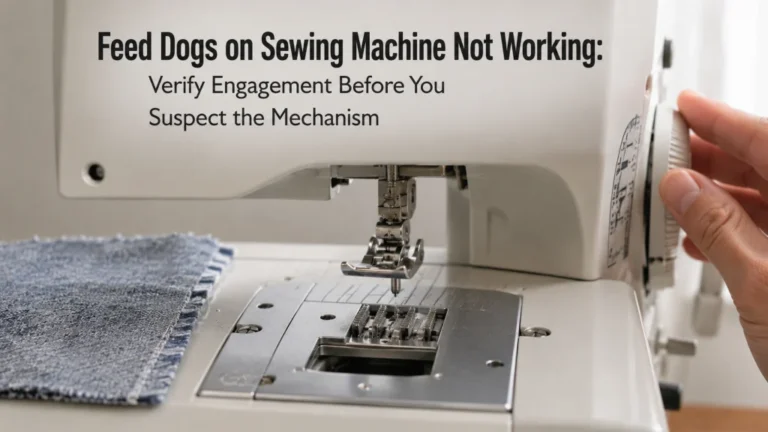
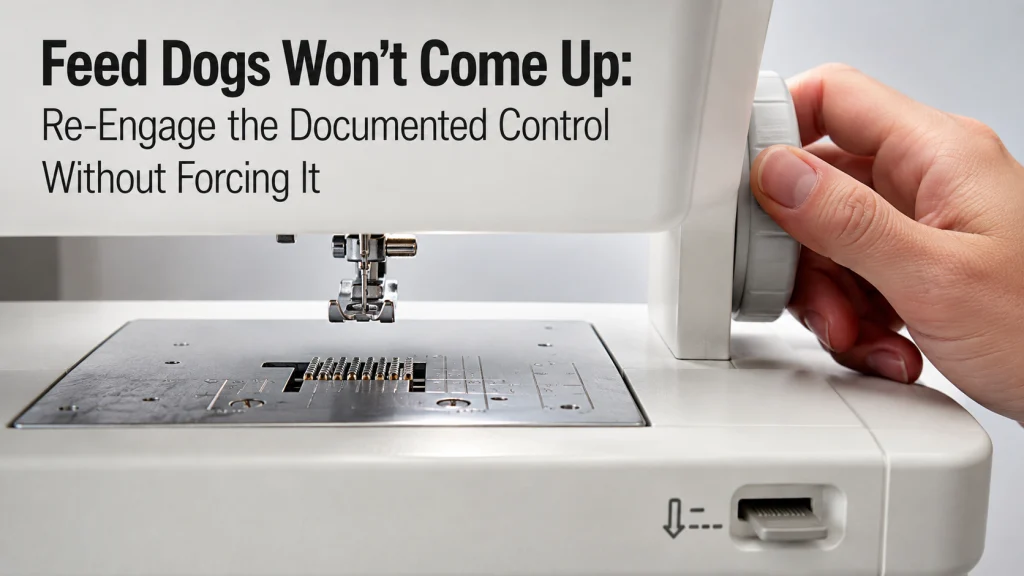
A machine can look as though the feed dogs are stuck down even after the drop-feed lever has been moved back to its normal position. On several current Brother model groups, the manufacturer says the feed dogs do not rise from the lever movement alone. The next documented action is to turn the handwheel toward you, and on some models the Needle Position button can complete the cycle instead.
That history is the key boundary for this article. It applies when the feed dogs were intentionally lowered for a documented task, or are known to be in a lowered state, and they fail to return when regular feed should resume. If the teeth are already above the plate but do not travel normally, use the separate process for feed dogs that are up but not working rather than treating the problem as a re-engagement failure.
Confirm the machine actually has user-controlled drop feed
Do not start by searching the back or base of the machine for a lever that may not exist. Feed architecture varies by model. Some domestic machines provide a user-operated drop-feed lever or switch, while others keep the feed dogs in place and use a removable darning plate to cover them for tasks where normal fabric feeding is not wanted.
Brother’s current support documentation shows both arrangements in its home-sewing range. One support path describes a rear feed-dog position switch that physically lowers and raises the teeth. Another states that the feed dogs cannot be lowered on the covered models and instructs the owner to use the supplied darning plate instead. That is why the exact model number and manual come before any attempt to move a control.
| What the exact manual shows | What that means for this symptom |
|---|---|
| Drop-feed lever or feed-dog position switch | The machine has a documented lowered state. Follow the model-specific re-engagement sequence before assuming a fault. |
| Darning plate used over fixed feed dogs | Remove the plate as the manual directs. Do not search for or force a drop-feed lever the machine does not use. |
| No clear control information available | Stop and locate the exact manual or manufacturer support page before manipulating the feed mechanism. |
This distinction prevents two different machine designs from being treated as one repair problem. It also keeps the first check at owner level, where the question is what control state the manufacturer intended, not what may be happening inside the linkage.
Verify the lever or switch position from the exact manual
Lever direction is not safe to guess from memory or from another machine. Even within one brand, support pages may describe the direction from the front or rear of the machine, and the control location can differ by model family. Match the model number first, then identify the regular-sewing position shown in that machine’s manual or current support record.
Move only the documented external control through its normal travel. If the lever feels blocked, unusually stiff, detached, or unable to reach the position shown in the manual, do not push harder. A control that will not move normally is no longer the simple “I moved it back but the teeth stayed down” case this page is designed to solve.
- Confirm the exact model number before following a diagram.
- Find the manufacturer’s stated regular-sewing feed position.
- Check whether the instruction is described from the front or rear of the machine.
- Move the external lever or switch only through its normal documented range.
- Stop if the control binds, feels loose, or cannot reach the stated position.
The position check establishes intent, but on some machines it still does not establish engagement. The next step is the part that many owners miss because the feed dogs can remain below the plate until the mechanism completes another cycle.
Complete the documented handwheel or needle-position cycle
Brother explicitly documents model groups where sliding the feed-dog control back is not enough to raise the teeth. One current support page instructs the owner to move the feed-dog position switch to the raise position, then turn the handwheel toward the operator or press the Needle Position button once or twice. Another model group calls for moving the lever to the raise position and turning the handwheel one to two complete turns.
Use that as evidence that a delayed rise can be normal on a documented design, not as a universal sequence for every machine. If the exact manual specifies a different action, the exact manual wins. The goal is to complete the machine’s intended re-engagement cycle without adding extra force or improvising an internal fix.
Lever-plus-cycle sequence: Regular-sewing feed position → documented handwheel or needle-position cycle → teeth visibly rise → stable scrap retest.
| Sequence | Owner-level action | What to observe |
|---|---|---|
| 1 | Set the documented feed control to regular sewing. | The external control reaches its normal position without force. |
| 2 | Complete the handwheel or needle-position cycle only if the exact documentation calls for it. | The mechanism cycles normally, without a hard stop or abnormal strike. |
| 3 | Look at the feed dogs through the needle-plate slots. | The teeth return above the plate at the appropriate part of the cycle. |
| 4 | Proceed to a scrap test only after normal height and motion are restored. | The fabric advances without being forced. |
This lever-plus-cycle sequence is the central check for a sewing machine whose feed dogs remain down after intentional lowering. If the documented cycle cannot be completed normally, do not turn a user-level re-engagement step into a mechanical repair attempt.
The need for a follow-up cycle is not limited to Brother, but the exact sequence still varies by model. Current SINGER troubleshooting says some drop-feed machines require returning the lever to regular sewing and turning the handwheel one full revolution, while the Janome 7318 manual tells the owner to move the lever to the raised position and turn the handwheel toward the operator. That cross-brand evidence strengthens the manual-first rule rather than creating a universal procedure.
Confirm the teeth rise above the plate for regular sewing
Do not judge the result only by where the lever sits. The feed dogs themselves must return to the working position during the feed cycle. With no fabric under the foot, observe the teeth through the needle-plate slots as you perform the manual’s normal handwheel check. They should rise above the plate during the appropriate part of the cycle on a machine that uses conventional exposed feed dogs for regular sewing.
If the lever is in the documented position but the teeth remain visibly below the plate through the prescribed cycle, you have confirmed the symptom more precisely. That is useful because it separates “the control was left in drop-feed mode” from “the documented control sequence did not restore the feed dogs.” The second condition is a service boundary, not permission to lift the teeth by hand.
Check for a darning plate or another documented feed-cover state
A darning plate can create a no-feed condition without the feed dogs being mechanically lowered. Brother currently documents model groups where the teeth cannot be dropped at all and a darning plate is placed over the needle plate to stop the fabric from being advanced by them. On those machines, removing the cover as documented is the relevant return-to-normal step.
This matters when the owner remembers “disabling the feed” but not which mechanism the machine uses. If a plate or cover is still installed, the fabric may not contact the feed dogs even though the mechanism itself is functioning. Remove only a documented removable plate or cover, and follow the manual for any power-off or presser-foot position instructions that apply to that access.
The same distinction appears in Brother’s broader no-feed support material, which lists a fitted darning plate as one possible reason fabric does not advance. That does not prove every no-feed problem is a plate issue, but it gives the owner a visible state to rule out before moving deeper into troubleshooting.
Retest on stable scrap after the feed dogs return
Once the feed dogs visibly return and the machine cycles normally by hand, use a stable scrap rather than going straight back to the project. The purpose is not to tune tension or diagnose every feeding variable. It is simply to confirm that regular transport has returned after the documented feed state was restored.
Use the normal presser foot and an ordinary stitch that the exact manual permits for the machine, then let the machine move the scrap without pushing or pulling it. If the teeth rise and travel but the material still does not advance, the symptom has changed. Continue with the broader sewing machine not feeding fabric checks instead of repeating the drop-feed cycle indefinitely.

AK TRADING CO. Muslin Fabric is made from 100 percent natural unbleached cotton. This 2-yard cut is 60 inches wide and has a medium-weight construction suitable for sewing and pattern work. It can be cut into simple test pieces when you need a stable fabric for checking normal machine feeding before returning to a project.
Check On AmazonIf you click this link and buy, we earn a commission at no additional cost to you.
Do not pry the feed dogs upward
Feed dogs that remain below the plate after the documented re-engagement sequence can tempt an owner to hook a tool under the teeth or push them upward with a finger. That does not establish why the mechanism failed to re-engage, and it can apply force to parts that are designed to move through a timed linkage rather than by direct lifting.
Keep the check external: control position, documented cycle, visible feed-dog height, and any removable feed-cover state the manual identifies. If those checks do not restore the teeth, the safe next decision is service. The owner does not need to prove which internal part is responsible before stopping.
Warning: Do not pry the feed dogs upward, force the drop-feed control, force the handwheel through a hard stop, or continue sewing through repeated needle strikes. Power off the machine before any access the exact manual requires with power off, and seek qualified service for smoke, burning odor, overheating, exposed wiring, uncontrolled motion, a hard mechanical lock, or visible broken internal parts.
The warning is intentionally broader than the original symptom because forcing the mechanism can turn a simple state check into a different problem. A stuck-down feed state is only appropriate for owner-level troubleshooting while the documented controls and normal handwheel movement remain normal.
Do not lubricate or disassemble an unknown linkage
Community discussions about feed dogs stuck down sometimes move quickly from a control check to oil, heat, removed covers, or access to linkage parts. Those anecdotes can show why the symptom confuses owners, but they do not establish that the same internal cause exists on another model. They also do not override the maintenance boundary in the exact manual.
Only oil where, when, and with what method the manufacturer specifically assigns to the owner for that model. Do not add lubricant through the feed-dog slots or remove machine covers merely because the teeth stayed down. If the documented external control cannot restore the mechanism, service can inspect the linkage without turning guesswork into a second fault.
Route feed dogs that rise but do not travel to a different check
The moment the teeth rise above the plate normally, this article has answered its central question. Feed dogs that are up but stay stationary, move abnormally, or fail to advance fabric are a different symptom because the drop-feed state is no longer the controlling distinction. Repeating the lever sequence will not clarify whether stitch length, feed motion, a cover state, debris, or another documented cause is involved.
Use the feed-dog movement troubleshooting path for that condition. Keeping the two problems separate prevents a normal re-engagement cycle from being blamed for every no-feed symptom and keeps internal timing or linkage diagnosis outside owner-level scope.
Route fabric pulled into the plate to the correct symptom
Fabric being dragged into the needle-plate opening can happen while the feed dogs are visible and moving. That is not the same as teeth that were lowered and will not return. The project may involve a different combination of starting position, fabric stability, needle-plate opening, thread state, presser foot, or other setup factors.
If the material is being pulled downward or jammed into the plate, stop forcing the fabric and move to sewing machine pulling fabric into the plate. The symptom-led route matters because an incorrect diagnosis can send the owner back to the drop-feed lever even when the feed dogs are already doing their normal cycle.
Stop for service if the documented control cannot restore feed
After the exact control position, required handwheel or needle-position cycle, feed-dog height, and any documented darning plate have been checked, there is little value in repeating the same actions with more force. Brother’s support material for fabric that will not feed directs owners to service when the listed user checks do not solve the problem. That is an appropriate boundary here as well when the documented feed control cannot restore the mechanism.
Service becomes more urgent if the machine has a hard mechanical lock, repeated hard needle strikes, uncontrolled movement, visible broken parts, smoke, a burning odor, overheating, or exposed wiring. For a broader decision tree around these limits, use the sewing machine troubleshooting process. The useful diagnosis at home is often simply: the documented re-engagement sequence was completed, but normal feed did not return.
If qualified service finds that a repair is required, compare the estimate, parts availability, and the machine’s current usefulness before approving the work. That repair-or-replace decision comes after the documented user checks, not as a shortcut around a feed state that may only need the correct re-engagement sequence.

The Brother XM2701 is a lightweight sewing machine with 27 built-in stitches and six included sewing feet. It uses a Quick-Set top drop-in bobbin system and includes automatic needle threading and an LED work area. It is a practical replacement option to consider only after an existing machine has reached the repair-or-replace stage.
Check On AmazonIf you click this link and buy, we earn a commission at no additional cost to you.
Final Thoughts: Complete the model-specific re-engagement cycle
When feed dogs will not rise after a deliberate lowered-feed task, start with the machine’s architecture rather than the teeth themselves. Confirm whether the exact model uses a drop-feed control or a darning plate, put the documented control back in its regular-sewing state, and complete any handwheel or needle-position cycle the manufacturer requires. Then verify the teeth actually return above the plate before loading the project again.
If that sequence works, a stable scrap test confirms that normal feeding has returned. If it does not, stop at the service boundary rather than prying, oiling, or opening an unknown linkage. The next correct move is determined by the observed state: still down after the documented cycle, up but not moving, or moving while the fabric has a different feeding problem.
Frequently Asked Questions
⚙️ Why won’t my feed dogs come up after I move the lever?
Some machines require an additional handwheel or needle-position cycle after the control is returned to regular sewing. Check the exact model manual because the lever position and re-engagement sequence are model-specific.
🧵 Do I need to sew a few stitches before the feed dogs rise?
Do not assume that sequence unless the exact manufacturer documentation calls for it. Some Brother models document turning the handwheel one to two turns or using the Needle Position button instead, so follow the machine-specific instruction.
🛠️ Can I pull the feed dogs up with a screwdriver?
No. Complete only the documented external re-engagement steps. If the teeth remain down, stop and use qualified service rather than prying on the feed mechanism.
🪡 What if my machine has no drop-feed lever?
Check the exact manual before searching for a hidden control. Some machines use a darning plate over feed dogs that do not lower, so removing that documented cover may be the correct return-to-normal step.
🔄 What if the feed dogs come up but still do not move?
That is a different symptom. Once the teeth rise normally, move to feed-dog movement and general no-feed checks rather than repeating the lowered-feed re-engagement sequence.
🚫 Should I oil the mechanism if the feed dogs stay down?
Only lubricate where the exact model manual specifically instructs the owner to do so. Do not add oil to an unknown linkage or remove covers as a general fix for feed dogs that remain lowered.
References and Sources
- Brother feed-dog re-engagement instructions: documents models where the lever alone does not raise the feed dogs and a handwheel or Needle Position cycle is required.
- Brother raise-or-lower procedure: documents another model group that uses the drop-feed lever followed by one to two handwheel turns.
- Brother darning-plate feed design: documents models whose feed dogs do not lower and are instead covered by a darning plate.
- Brother fabric-feed troubleshooting: supports the darning-plate check and the service boundary when documented user checks do not restore feeding.
- SINGER feed troubleshooting: documents a drop-feed design that requires one handwheel revolution after returning the lever to regular sewing.
- Janome 7318 instruction manual: documents raising the feed dogs by moving the lever to the raised position and turning the handwheel toward the operator.