A needle threader not working does not automatically mean the built-in mechanism is broken. The first checks are whether the installed needle is eligible for the threader, whether the needle is in the required threading position, whether it is fully installed, and whether the thread is placed through the threader guide exactly as the machine manual shows. Needle-size and thread restrictions vary by model, so a limit documented for one machine family should not be treated as universal. If the hook is visibly bent, the lever jams, or the mechanism will not return normally after correct owner-level setup, stop forcing it and move to model-specific service guidance.
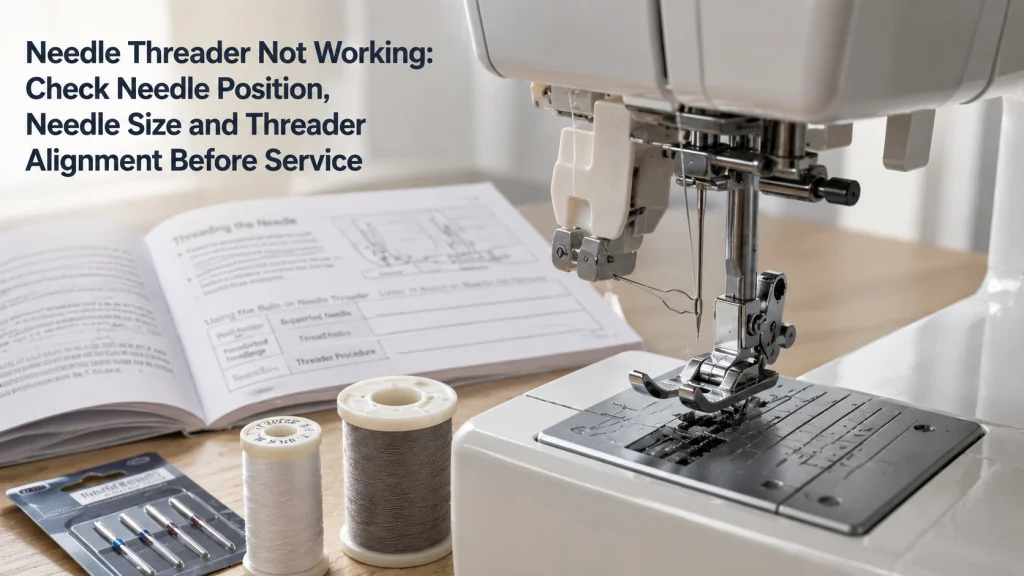
Verify Threader Eligibility Before Calling It Broken
When a sewing machine needle threader is not working, start by separating an eligibility problem from a mechanical failure. A built-in threader is designed around a particular needle position, eye location, hook path, and range of needle and thread conditions. If one of those conditions falls outside the machine’s documented limits, the hook may miss the eye or fail to capture the thread even though the mechanism itself is intact. That makes eligibility the first quality gate, not an afterthought after the lever has already been pushed repeatedly.
Watch the failure point rather than judging only by the final result. A hook that never reaches the needle eye suggests a different next check from a hook that enters the eye but misses the thread, and both differ from a lever that will not return after being lowered. Keep the machine stopped while making these observations, and follow the manual for any needle-position or needle-replacement step that requires power to be off. If the threader is only one symptom among broader operating problems, use the site section on sewing machine stitch problems to separate the failure before changing unrelated settings.
Confirm the Machine Has the Built-In Threader Described in Its Manual
Begin with the model number and the threading section of the machine manual, not with a generic video of a similar-looking sewing machine. Built-in threaders differ in how the lever moves, where the thread passes before the hook, which needle position is required, and which needle or thread combinations are excluded. Some mechanisms are manual levers, while others are integrated into more automated threading sequences. The useful question is whether the procedure in front of you belongs to the exact machine you are using.
A first-time owner can easily mistake a nearby guide, cutter, or thread-control part for part of the threader path because several small components sit close to the needle bar. Match the manual illustration to the actual lever, hook area, and thread guide before testing the feature. If the manual does not list a built-in needle threader for the model, do not force a nearby control in an attempt to reproduce another machine’s procedure. Confirming the mechanism first prevents an instruction mismatch from becoming a damaged part.
Move the Needle to the Documented Threading Position
The threader hook has to meet the needle eye at a very small target, so needle height matters before the hook ever touches the thread. On some machines the manual calls for the needle at its highest position, while others provide a specific threading-position control that places the needle where the mechanism expects it. Do not assume that stopping the machine with the needle merely somewhere near the top is equivalent. Use the documented control or handwheel procedure for that model and verify the final position before lowering the threader.
Threader hook → ○ needle eye
The hook path meets the eye after the needle reaches the threading position required by the machine.
Threader hook → │ needle shaft
○ needle eye below the hook path
Reposition the needle before another attempt. Do not push the hook sideways to make it meet the eye.
This alignment diagram is a decision aid, not a universal picture of every threader mechanism. If the hook enters the eye after the needle is placed with the machine’s documented control but misses when the needle is positioned approximately by hand, the observation points back to positioning rather than proving a broken threader. An unsupported needle size can also change where the eye sits relative to the hook, so position and eligibility should be checked together. Reposition the needle first, then observe one controlled attempt with the machine otherwise stationary.
Confirm the Needle Is Fully and Correctly Installed
A needle can be the correct nominal size and still place its eye outside the threader’s intended path if it is not seated correctly. Check the model instructions for needle orientation, how far the shank must be inserted, and how the clamp is secured. On many domestic machines the flat side has a specified direction and the needle must be pushed fully to its stop, but that orientation should come from the machine documentation rather than from visual habit. A partially seated or rotated needle changes the relationship between the eye and the threader hook.
If the threader worked normally and stopped immediately after a needle change, recheck seating and orientation before assuming the threader mechanism shifted. Inspect the needle itself at the same time, because a visibly bent, damaged, or badly worn needle is not a sound reference for alignment. Replace a damaged needle according to the manual, then repeat the positioning check with the replacement fully seated. Keep this step focused on restoring a trustworthy needle reference; repeated bending or breakage during sewing is handled separately later in the diagnostic path.
Check the Supported Needle-Size Range
Built-in threaders do not necessarily work across every needle size a sewing machine can physically use. Manufacturer support for some Brother model families, for example, lists a usable threader range of 75/11 through 100/16, while other support pages specifically tell owners to thread a 65/9 needle manually. Those numbers are evidence for the covered models, not a universal range for every domestic machine. The correct limit is the one stated for the exact machine and threader design in front of you.
| Condition to verify | Eligible state | Ineligible or uncertain state |
|---|---|---|
| Needle size | Falls within the threader range documented for the machine. | Falls outside that range or the manual gives no support for threader use. |
| Needle type | The manual permits that needle type with the built-in threader. | Twin, wing, specialty, or another type is excluded by the model documentation. |
| Thread | Thickness and construction fall within the threader guidance for the model. | Thread is too thick, highly decorative, or otherwise excluded from automatic threading. |
Use the table as a decision structure, not as a substitute for the manual. If a different needle size makes the threader work, that does not prove the first needle was defective; it may simply have been outside the permitted range for the mechanism. If every documented needle size misses the hook in the same way, continue through the alignment checks before drawing a service conclusion. Keeping those outcomes separate prevents a compatibility limit from being misread as a mechanical failure.
Check Supported Thread Thickness and Special-Thread Exclusions
The hook can pass through the needle eye correctly and still fail to pull the thread through if the thread itself is outside the threader’s supported range. Some manufacturer support pages exclude unusually thick thread and certain decorative constructions, including specific metallic or transparent threads on the covered models. That is not a reason to generalize that all decorative thread is incompatible with every built-in threader. It is a reason to check both the needle and thread rules together before blaming alignment.
Keep the observation simple: first verify that the hook enters the eye, then verify whether it actually catches the thread presented in the documented guide position. If the same mechanism captures a supported general-purpose thread but not an excluded specialty thread, the threader has demonstrated that it can still perform its basic motion. Use manual needle threading when the machine documentation says the selected thread is not eligible. Do not force a thick thread loop through the eye by pulling harder on the threader lever or on the thread itself.
Follow the Exact Thread Placement Around the Threader Guide
Once needle position and eligibility are confirmed, trace the short threader path exactly as the manual illustrates it. Built-in threaders often depend on the thread sitting under or around a small guide before the hook moves through the eye. If the thread is in front of the guide, too loose, or presented on the wrong side of the hook, the mechanism may move normally but capture nothing. That is a placement error, not evidence that the hook failed to enter the needle.
- Confirm the upper thread has reached the threader area by the normal threading path.
- Place the thread through each threader guide shown for the model.
- Keep the thread in the orientation illustrated in the manual rather than wrapping it around nearby metal parts.
- Lower or operate the threader lever only through the motion the documentation permits.
- Watch for the hook to catch the thread before pulling on any loop behind the needle.
After the checklist, return to the point where the failure actually occurs. A hook that enters the eye but leaves the thread behind calls for another look at thread placement and eligibility, while a hook that cannot line up with the eye belongs to the next alignment check. Avoid compensating for poor placement by holding the thread unusually tight or pushing the lever sideways. Extra force can hide the original setup problem and create a second problem in a delicate mechanism.
Observe Whether the Hook Actually Enters the Needle Eye
The most informative observation is whether the small threader hook passes through the needle eye without scraping the needle or stopping beside it. You do not need to dismantle anything to make that distinction. With the needle correctly installed and positioned, operate the threader only as the manual directs and watch the hook path from a safe viewing angle. Do not put fingers or tools near the moving hook to guide it into place.
| What you observe | What it suggests checking next |
|---|---|
| Hook enters the eye but misses the thread. | Recheck thread placement, thread eligibility, and guide use. |
| Hook consistently passes beside the eye. | Recheck needle height, installation, supported needle size, and visible hook alignment. |
| Hook contacts the needle or cannot complete its normal path. | Stop repeated attempts and inspect for a service-level alignment or damage issue. |
This alignment card helps keep three visually similar failures from collapsing into one diagnosis. If the hook reaches the eye correctly, the needle position is at least close enough for the mechanism to perform its capture step, so thread placement becomes more relevant. If the hook repeatedly misses the eye after documented setup, do not bend it toward the needle as a shortcut. The next decision is whether a simple eligibility condition remains unchecked or whether the visible mechanism has crossed the owner-service boundary.
Do Not Bend or Force a Misaligned Threader Hook
A threader hook is a small precision part, so a visible miss does not justify bending it by hand until it appears to line up. Manufacturer troubleshooting commonly treats a bent hook as a service condition because the correct position depends on the whole mechanism, not just the hook tip you can see. Pulling the lever sideways, pushing the hook with a tool, or repeatedly forcing it against the needle can damage a part that may only have been used with the wrong needle position. Stop once you see repeated contact, resistance, or an obviously abnormal path.
Bend the hook toward the eye, force the lever through resistance, or hold the mechanism sideways so it appears to catch the needle.
Recheck documented needle position, installation, size, thread eligibility, and guide placement, then stop for service if the hook remains bent, jammed, or unable to return normally.
The distinction protects both the threader and the needle. A setup error should improve when the setup is corrected, while visible deformation or a lever that no longer follows its normal path is evidence that owner-level adjustment has reached its limit. Do not remove covers or loosen undocumented screws to chase the mechanism farther inside the machine. The built-in threader is a convenience feature, and losing that convenience is preferable to turning a small alignment fault into broader damage.
Change Direction If the Needle Itself Is Damaged or Repeatedly Breaking
A bent needle can explain why a threader hook suddenly misses an eye that it previously reached, but repeated needle damage is a different symptom once sewing begins. Replace a visibly damaged needle according to the machine manual before using it as the reference point for threader alignment. If the replacement needle sits correctly and the threader returns to normal, the failed alignment was linked to the damaged needle rather than proof of an internal threader defect. That observation is useful, but it does not explain why the needle became damaged in the first place.
If needles continue striking, bending, or breaking, stop cycling the threader and move the investigation to the needle failure itself. The separate article on why sewing machine needles keep breaking covers that symptom without turning this threader page into a collision or feed diagnosis. Repeated hard needle strikes, a mechanical lock, or visible internal damage are also reasons to stop normal use and seek qualified service. A threader check should never require running the machine through a fault condition just to see whether the hook still lines up.
Use Manual Needle Threading When the Built-In Threader Is Not Eligible
A built-in threader is not required for the machine to form stitches, so an ineligible needle or thread does not automatically make the sewing setup unusable. If the manual permits the selected needle and thread for sewing but excludes that combination from the threader, thread the needle manually using the normal threading direction stated for the machine. This keeps two questions separate: whether the sewing setup is allowed and whether the convenience mechanism is allowed to handle it. Do not change to a different needle solely to satisfy the threader if that replacement would be a poorer match for the actual material and sewing task.
Manual threading is also a useful boundary when the threader is awaiting service. If the machine can be threaded normally and no other fault is present, you may still be able to sew within the manual’s operating guidance without using the damaged convenience feature. If manual threading succeeds but the upper thread then starts failing during sewing, switch to diagnosing repeated upper-thread breakage rather than returning to the threader. Keeping post-threading stitch symptoms separate prevents one broken convenience feature from becoming the explanation for every later thread problem.
Stop for Service If the Lever or Hook Is Bent, Jammed, or Will Not Return
The service threshold becomes much clearer after eligibility and alignment have been checked in order. A lever that cannot move through its documented range, a hook that is visibly bent and no longer enters the eye, or a mechanism that will not return to its normal position is no longer just a question of thread placement. Manufacturer support for covered models directs owners toward service for those conditions rather than toward bending the hook or adjusting the mechanism. That is the point to stop owner-level troubleshooting instead of escalating force.
Use the broader sewing machine troubleshooting process if other symptoms appear at the same time, especially abnormal noise, hard resistance, uncontrolled motion, overheating, smoke, a burning odor, sparks, exposed wiring, or repeated hard strikes. Do not remove electrical housings, alter needle-bar height, change internal timing, or turn undocumented screws in the threader mechanism. A service diagnosis may eventually identify a replaceable threader part or alignment issue, but that conclusion belongs to qualified service evidence rather than guesswork from the outside. The safest useful result from this article is knowing when the problem is still a setup check and when it is no longer one.
Final Thoughts: Test Eligibility Before Treating the Threader as Failed
A built-in needle threader works only when several small conditions line up at the same time: the correct mechanism is being used, the needle is in the required position, the needle is installed properly, the needle and thread are eligible, and the thread is presented through the correct guide. Checking those conditions in order gives each failure a meaning. A hook that reaches the eye but misses the thread is not the same problem as a hook that misses the eye entirely, and neither is the same as a lever that jams or will not return. That distinction keeps a convenience problem from turning into unnecessary machine adjustment.
Use the manual as the controlling reference whenever needle size, thread type, lever motion, or threading position varies by model. If documented setup restores normal operation, no deeper diagnosis is needed. If the visible hook is bent, the mechanism resists normal movement, or correct setup repeatedly leaves the hook unable to enter the eye, stop forcing the feature and use manual threading when appropriate until the machine can be evaluated. The goal is not to make the threader work at any cost, but to identify whether the failure is an eligibility issue, an alignment issue, or a service issue.
FAQs
🪡 Why does my needle threader miss the eye of the needle?
First check the needle’s documented threading position, installation, and supported size for your machine. If the hook still passes beside the eye after those conditions are correct, stop forcing it and inspect the service guidance for that model.
🧵 Can thread be too thick for an automatic needle threader?
Yes, on machines whose documentation sets a thread thickness or construction limit for the built-in threader. Use the exact model manual because a restriction published for one machine family is not a universal limit for every threader.
📏 Does needle size affect whether the threader works?
It can. Manufacturer support for some machines lists a specific needle-size range for the threader and requires smaller or excluded needles to be threaded manually, so verify the range for your model.
🎛️ Why is my needle threader lever not returning normally?
A lever that is jammed, unusually resistant, or unable to return after correct use may have moved beyond a simple setup problem. Do not force it or bend the hook; use the model’s service guidance.
🧰 Can I bend the threader hook back into alignment myself?
Do not treat visible misalignment as permission to bend the hook. Recheck needle position, installation, eligibility, and thread placement first, then use qualified service if the hook is bent or still cannot enter the eye normally.
These answers apply to built-in machine threaders, not separate hand-threading tools. The exact needle range, thread restrictions, lever sequence, and service boundary can differ by machine, so use the documentation for the model in front of you.
References and Sources
These manufacturer support pages are included because needle-size limits, thread exclusions, threading position, and service thresholds are model-specific claims that should not be generalized from memory.
- Brother needle threader support: documents needle position, correct needle installation, a supported needle-size range for the listed models, thread-thickness guidance, and a service outcome when the checks do not resolve the problem.
- Brother threader lever troubleshooting: identifies incorrect needle position or installation, a bent threader hook, and a lever that cannot move or return normally as separate diagnostic conditions.
- Brother automatic threader guidance: documents model-family exclusions for certain needle sizes, needle types, thick or specialty threads, and a service boundary for a bent hook.
The listed limits apply only to the models covered by those support answers. For a different machine, use its own manual or manufacturer support page before deciding that a needle, thread, or threader motion is eligible.