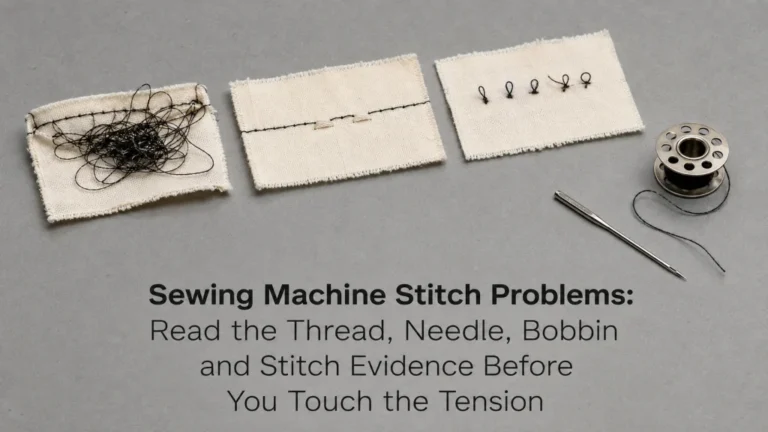
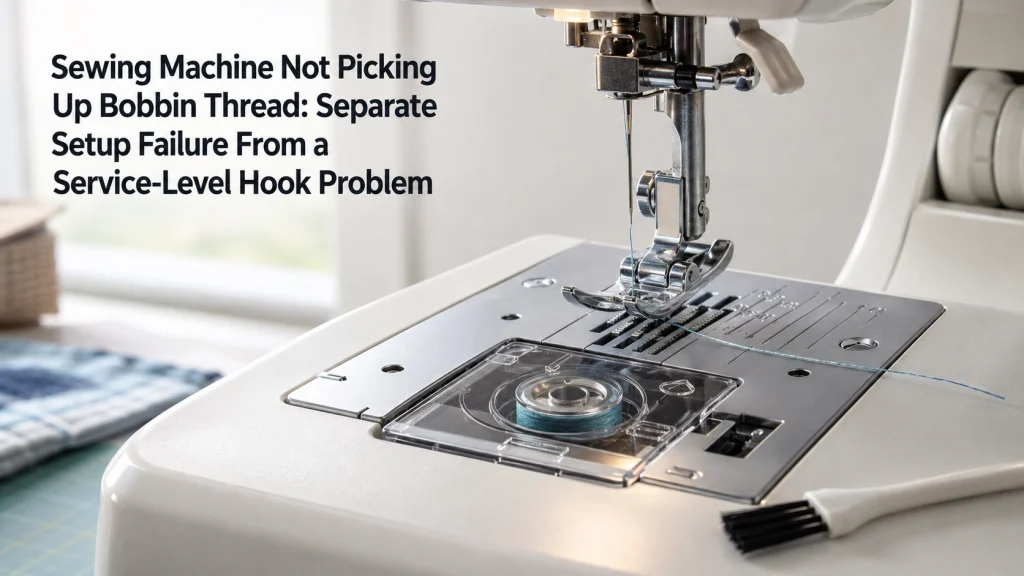
A sewing machine not picking up bobbin thread becomes a troubleshooting problem only after the exact model’s normal lower-thread procedure has been followed and no loop appears. Start by confirming that the machine actually requires manual pickup, then repeat the documented setup with the upper thread, needle, bobbin, and bobbin area in the correct state. Keep every check at normal owner level and separate a winding problem or intermittent skipped stitch from a complete pickup failure. If the machine still cannot draw up the lower thread after documented checks, stop before adjusting hook timing or needle-bar height and prepare the evidence needed for qualified service.
First Prove the Normal Bobbin-Pickup Procedure Actually Failed
A failed pickup is more specific than seeing no bobbin thread above the needle plate. First set up the exact machine according to its documented lower-thread procedure because machines do not all handle pickup the same way. Hold or position the upper thread only as instructed, complete the normal needle cycle, and watch for the lower-thread loop. If the documented motion works normally, there is no pickup fault to diagnose.
The failure begins when the correct procedure finishes and the lower thread still does not appear or interlock as expected. Do not jump from that result to hook timing because upper threading, needle installation, bobbin insertion, winding, and lint can all block normal pickup. Brother and SINGER place those user-level checks before service-level timing work. The first test should separate normal technique from a repeatable failure.
| Observed result | What it means | Next step |
|---|---|---|
| The documented motion raises a lower-thread loop | Normal pickup is working | Continue normal setup rather than troubleshooting pickup |
| The documented motion completes but no loop appears | A repeatable pickup failure is present | Begin the user-level checks below |
| The needle does not complete the documented motion | The problem is broader than lower-thread pickup | Stop and identify the machine-control or mechanical symptom first |
This boundary card prevents two different tasks from being mixed together. Normal lower-thread raising belongs with ordinary machine setup, while this article begins only when that normal action fails. It also prevents a user from declaring a timing fault before basic evidence exists. Once the failure is repeatable, change only one documented condition at a time.

The GearLight S100 set includes two compact LED pocket lights for close inspection and tight spaces. Each light has an aluminum body with an integrated clip and produces a focused white LED beam. The lights are powered by AAA batteries and have a slim shape that is easy to position around small work areas.
Check On AmazonIf you click this link and buy, we earn a commission at no additional cost to you.
Confirm Whether the Exact Machine Requires Manual Lower-Thread Raising
Open the instruction manual for the exact model before repeating the test. Look for the section covering bobbin installation, lower-thread preparation, or drawing up the bobbin thread, and follow the sequence shown there. Do not assume that a procedure from another drop-in or front-loading machine applies simply because the bobbin looks similar. Bobbin architecture and normal starting procedures vary enough that the manual must establish what a successful setup should look like.
Some machines allow sewing to begin with the lower thread left below the plate, while other procedures instruct the user to draw up a loop first. The diagnostic question is whether the owned machine completed the behavior its own documentation requires. If the manual does not require a visible pickup step, do not create a fault by insisting that one must occur before sewing. When general controls or bobbin-area terminology are unclear, the sewing machine troubleshooting framework can help separate setup state from an actual failure symptom.
Repeat the Documented Setup Without Improvising
Reset the machine to the exact starting state described in its manual. That may include presser-foot position during threading, needle position, bobbin placement, the way the upper thread is held, and the permitted handwheel direction. SINGER’s current support, for example, gives a specific handwheel direction and describes lightly holding the needle thread while drawing up the bobbin loop. Treat those details as instructions for machines covered by that guidance, not as permission to override a different model manual.
Do not add extra tension by wrapping thread around a finger, pull hard on the upper thread, reverse the handwheel against the documented direction, or force the needle through resistance. A normal pickup test should be a low-force setup action, not a test of how much manual pressure the mechanism can tolerate. If the handwheel becomes hard to turn or the needle strikes a part, stop the pickup test immediately. Mechanical resistance changes the troubleshooting path and should not be masked by continuing to turn the machine.
Verify the Upper Thread Is Fully Threaded
The upper thread forms the loop that must interact with the lower-thread system, so an incomplete upper path can look like a bobbin problem. Remove the upper thread completely and rethread from the spool according to the exact manual rather than correcting only the last guide you can see. Brother support for covered machines specifically tells owners to check for caught or overly tight upper thread and to rethread the machine when pickup fails. SINGER likewise directs users to make sure the upper tension discs are threaded correctly.
Use the presser-foot position required by the manual while seating thread into the tension path, and confirm that the take-up area and needle-bar guide are not skipped. The thread should reach the needle without being trapped around the spool, a guide, or another part of the machine. Do not compensate for a questionable thread path by loosening tension at random. A complete rethread is the cleaner test because it restores the documented path before another variable is changed.

The Dritz 253 combines a sewing machine needle inserter and needle threader in one handheld tool. Its inserter holds the needle steady during installation and removal from a home sewing machine. The threading end is designed to guide thread through the needle eye and can also be used with specialty sewing threads.
Check On AmazonIf you click this link and buy, we earn a commission at no additional cost to you.
Replace or Correctly Install the Needle
A bent, dull, damaged, or partially seated needle can prevent the upper thread from reaching the lower-thread system at the expected position. Both Brother and SINGER include needle condition and correct insertion among their pickup checks. Replace a questionable needle with one that is compatible with the exact machine and project, then seat it fully in the orientation stated by the manual. Do not rely on visual straightness alone when a fresh compatible needle provides a clearer test.
Power the machine off before needle access whenever the manual requires it, and tighten the clamp only as instructed. Confirm that the needle is not contacting the presser foot or needle plate during the safe clearance check allowed for the model. If a new correctly installed needle repeatedly strikes, bends, or cannot complete its cycle, stop the pickup diagnosis. The separate article on why sewing machine needles keep breaking is the better path when needle damage becomes the primary symptom.

This SCHMETZ assortment contains 10 Universal 130/705 H household sewing machine needles. The pack includes sizes 70/10, 80/12, 90/14, and 100/16 for a range of common sewing applications. The needles are intended for domestic sewing machines that use the 130/705 H needle system.
Check On AmazonIf you click this link and buy, we earn a commission at no additional cost to you.
Verify the Exact Bobbin Type and Insertion
Bobbins that look nearly identical can still belong to different classes or machine systems. SINGER’s current support warns that several common bobbin classes are visually similar and that using the wrong type can cause damage, while Brother pickup guidance tells owners to confirm the correct bobbin and proper insertion. Use the exact model documentation or verified compatibility information to identify the required bobbin. Visual similarity, diameter alone, or the fact that a bobbin drops into the opening is not enough evidence.
Remove and reinstall the bobbin exactly as the manual shows, including thread direction, slot or tension-path routing, and any case orientation that applies. Do not flip the bobbin simply because an online video shows the opposite direction on another machine. If a removable bobbin case is used, inspect only the fit and surfaces the manual makes user-accessible. A bobbin or case that will not seat normally should end the test until the exact part and installation are verified.
Key point: Correct bobbin type and correct bobbin insertion are separate checks. A genuine compatible bobbin can still fail to participate in pickup if it is installed or threaded incorrectly.

Brother SA156 bobbins are genuine clear replacement bobbins supplied in a pack of 10. Each bobbin is 11.5 mm deep and uses the SA156 designation for compatible Brother sewing and embroidery machines. The transparent plastic construction also makes the remaining thread level visible while the bobbin is in use.
Check On AmazonIf you click this link and buy, we earn a commission at no additional cost to you.
Check That the Bobbin Contains Usable, Correctly Wound Thread
A pickup test cannot prove much if the bobbin itself is empty, loosely wound, unevenly wound, or carrying thread that was not routed through the winding path correctly. Brother’s support for covered machines includes checking that the bobbin is wound evenly and that the correct bobbin is installed. Inspect the wound bobbin before putting it back into the machine. The thread should sit on the bobbin in the condition expected by the model instructions, without an obvious tangle that prevents normal delivery.
If the bobbin did not wind correctly, stop the pickup diagnosis and solve the winding problem first. A malformed bobbin introduces a second variable and can make a normal lower-thread system appear defective. Use the separate process for diagnosing a bobbin that will not wind when the winder, thread path, or winding result is the actual failure. Return to pickup testing only after a correctly wound, compatible bobbin is available.

This Simthread set contains 25 prewound Size A Class 15 bobbins with 15 white and 10 black bobbins. Each bobbin is wound with 60WT polyester thread and the set comes in a clear plastic storage case. The listing identifies the bobbins as the Class 15 SA156 size, so machine compatibility should be confirmed before use.
Check On AmazonIf you click this link and buy, we earn a commission at no additional cost to you.
Clean Only Documented Accessible Lint From the Bobbin Area
Lint and loose thread can interfere with the bobbin area even when the machine has been threaded correctly. Brother’s pickup guidance specifically includes removing lint from the bobbin case or area under the needle plate on models covered by its instructions. Power the machine off and open only the areas the exact manual identifies as owner-accessible. Remove debris using the method and tools allowed by that documentation rather than probing deeper into the hook mechanism.
While the area is open, look for loose thread, obvious contamination, and visible damage on user-removable parts without altering any surface. Do not sand scratches, file burrs, loosen undocumented screws, or shift the hook assembly to make the parts appear aligned. A damaged bobbin case or rough user-accessible part may require replacement or service depending on the model. Cleaning should remove debris, not turn into an internal mechanical adjustment.

The SAVINA cleaning brush is made for removing lint and fabric fibers from sewing machines and sergers. It uses a wooden handle with a compact brush head for reaching small owner-accessible areas around the machine. The tool is intended for light machine cleaning rather than heavy mechanical or internal repair work.
Check On AmazonIf you click this link and buy, we earn a commission at no additional cost to you.
Retest the Pickup Cycle With One Clean Setup
After the upper thread, fresh needle, compatible bobbin, bobbin insertion, winding, and accessible cleaning have been checked, repeat the documented pickup procedure once more. Keep the same known-good thread and bobbin so the result reflects the setup rather than another change. Watch for the lower-thread loop at the exact point where the manual says it should appear. Do not continue cycling the machine repeatedly if the same failed result is already clear.
A successful loop after one corrected condition is useful evidence, but it does not prove that every previous suspicion was correct. Note which condition changed and confirm that normal stitch formation begins before closing the troubleshooting record. If there is still no loop, preserve that failed result instead of escalating into internal adjustment. The next decision is whether the symptom belongs to another documented failure path or is ready for service handoff.
- Exact model and bobbin type confirmed.
- Upper thread completely rethreaded.
- Fresh compatible needle installed correctly.
- Bobbin inserted and threaded as documented.
- Bobbin winding result checked.
- Accessible lint removed as the manual allows.
- Normal pickup procedure repeated without force.
The checklist is useful only when every item refers to the machine in front of you. A check borrowed from another model does not establish that the owned machine is correctly set up. Keep the test bounded and stop after the result is repeatable. That leaves a cleaner record if qualified service becomes necessary.

This Coats & Clark package contains two spools of white all-purpose sewing thread. Each spool provides 400 yards of 100 percent polyester thread for general machine and hand sewing applications. The thread is machine washable, and the two-spool package provides 800 yards in total.
Check On AmazonIf you click this link and buy, we earn a commission at no additional cost to you.
Use Skipped-Stitch Diagnosis When Stitch Formation Is Intermittent
A complete pickup failure is not the same as a machine that forms stitches and then misses some of them. If the lower thread is drawn up normally and the machine begins sewing, the basic pickup event has already occurred. Intermittent missing stitches can still involve needle condition, installation, material, or another machine issue, but the evidence is different. Continuing to call that symptom a bobbin-pickup failure makes the diagnostic path less precise.
Move to diagnosing skipped sewing machine stitches when stitch formation is present but inconsistent. Keep any needle or threading checks already completed because they can remain relevant evidence. Do not use intermittent misses as permission to adjust hook timing at home. If both complete pickup failure and repeated hard needle strikes appear, stop and use qualified service rather than combining two risky repair theories.
Route a Bobbin-Winding Failure Before Testing Pickup Again
The bobbin-winding system and the stitch-forming pickup system are related through the bobbin, but they are not the same failure. If the bobbin winder does not turn, winds unevenly, stops early, or leaves thread in an unusable condition, fix that state before asking whether the needle can catch the lower thread. Testing pickup with a poorly wound bobbin adds uncertainty to every later observation. A clean diagnosis needs a correctly wound bobbin first.
Use bobbin winding troubleshooting steps when the winding process is the failed action. Once a compatible bobbin is evenly wound according to the exact manual, reinstall it and return to the normal pickup test. Do not alter the bobbin winder, internal tension parts, or undocumented screws to make a test bobbin. If the winder itself requires service, resolve that failure before continuing with lower-thread pickup diagnosis.
Do Not Adjust Hook Timing or Needle-Bar Height
A persistent failure after correct setup can make timing sound like the obvious next step, especially because SINGER notes that disrupted timing can prevent the needle thread from meeting the bobbin thread. That statement identifies a possible service-level cause, not an owner instruction for changing timing. Hook timing and needle-bar height depend on precise mechanical relationships that are not verified by looking at one failed pickup cycle. Adjusting them without the correct service procedure can add new faults and erase useful diagnostic evidence.
Do not loosen timing screws, rotate the hook on its shaft, move the needle bar, bend parts, or use an online alignment mark as a substitute for model-specific service information. The same boundary applies to internal tension assemblies, gears, electrical housings, and other undocumented adjustments. If correct user-level setup still produces no pickup, preserve the machine state for service. The broader sewing machine stitch problem guide can help classify related symptoms without opening the mechanism.
Warning: Stop immediately for smoke, burning odor, overheating, exposed wiring, repeated hard needle strikes, a hard mechanical lock, or visible broken internal parts. Do not continue a pickup test simply to collect more evidence after a safety or mechanical stop condition appears.
Prepare Model and Failed-Check Evidence for Service
A service handoff is more useful when it describes the failed action instead of saying only that the bobbin does not work. Record the machine model, verified bobbin type, test needle, and whether the upper thread path was reset from the manual. Note whether the bobbin was correctly wound and inserted, accessible lint was removed, and the normal pickup procedure still produced no loop. These observations show which owner-level conditions were already checked.
Also record secondary symptoms such as hard strikes, abnormal handwheel resistance, unusual noise, or visible damage in the accessible bobbin area. Do not label the problem as bad timing unless qualified diagnosis establishes that cause. Brother sends unresolved pickup failures on covered machines to service, and SINGER likewise routes persistent problems toward repair. Preserve facts about the failed test rather than inventing the internal repair conclusion.
| Record | What to capture |
|---|---|
| Machine identity | Exact model shown on the machine |
| Normal procedure | Manual section followed and expected pickup result |
| Upper path | Rethread completed according to the model instructions |
| Needle | Compatible fresh needle and correct installation confirmed |
| Bobbin | Correct type, winding condition, and insertion confirmed |
| Accessible cleaning | Lint or loose thread removed only where permitted |
| Failed result | No loop after the documented pickup procedure |
| Secondary symptoms | Resistance, strikes, noise, or visible damage if present |
This record also prevents the same basic checks from being repeated without purpose. It does not tell the service provider what internal repair to perform. Keep any removed user-accessible part with the machine if the manual requires it for transport or service. The useful evidence is the exact model, verified setup, and repeatable failed result.
Final Thoughts: Failed Pickup Begins Where Normal Setup Ends
A lower-thread pickup problem should be diagnosed only after the exact machine’s normal procedure has genuinely failed. Confirm whether manual pickup is required, rethread the complete upper path, install a fresh compatible needle correctly, verify the bobbin type and insertion, check the winding result, and clean only documented accessible lint. Then repeat one controlled pickup test without force or improvised adjustments. That sequence gives the failed result meaning because the normal setup conditions have been verified first.
If the machine forms stitches intermittently, follow the skipped-stitch path, and if the bobbin cannot be wound correctly, resolve that failure before returning to pickup. When a correct setup still produces no lower-thread loop, stop before moving hook timing, needle-bar height, or other internal adjustments. Preserve the machine state and the checks already completed for qualified service. The cleanest troubleshooting boundary is simple: owner-level setup ends where internal mechanical diagnosis begins.
Prevention starts with keeping routine setup predictable. Replace a worn or damaged needle when the exact machine and project call for it, keep the bobbin area clean using only the owner-accessible procedure in the manual, and continue using the verified bobbin type and threading path. If the manufacturer gives a maintenance or cleaning interval for the exact model, follow that schedule instead of inventing a universal one. These habits cannot guarantee that a pickup fault will never return, but they reduce avoidable setup variables when the machine is checked again.
FAQs
Bobbin-pickup questions often mix normal setup, winding problems, skipped stitches, and internal timing into one symptom. The first distinction is whether the exact model completed its documented lower-thread procedure and still produced no loop. From there, upper threading, needle installation, bobbin state, winding, and accessible cleaning can be checked without opening the mechanism. Internal adjustment belongs outside normal owner troubleshooting.
These answers assume the machine can be operated safely and that its exact manual is available. Stop testing if the handwheel locks, the needle repeatedly strikes, the machine overheats, or an electrical symptom appears. A setup check should never require force. When documented owner checks fail, service is the appropriate next boundary.
🧵 Why is my sewing machine not picking up bobbin thread?
First confirm that the exact model’s normal pickup procedure was followed. Then check the upper threading, needle installation, correct bobbin and insertion, winding condition, and permitted bobbin-area cleaning.
🪡 Can an incorrectly installed needle stop bobbin-thread pickup?
Yes, manufacturer support includes needle condition and installation among pickup checks. Use a fresh compatible needle seated in the exact orientation required by the model manual.
🧶 Can the wrong bobbin keep the machine from picking up thread?
Yes. Verify the exact bobbin class or part compatibility because visually similar bobbins can belong to different machine systems.
🌀 Does an unevenly wound bobbin affect the pickup test?
It can make the test unreliable and should be corrected first. Diagnose the winding problem separately, then retest pickup with a correctly wound compatible bobbin.
🧹 Should I clean under the needle plate when pickup fails?
Only when the exact manual makes that area user-accessible and gives a cleaning procedure. Remove lint or loose thread without changing hook position or undocumented screws.
🔄 Is a skipped stitch the same as failing to pick up bobbin thread?
No. If stitches form and only some are missed, the machine has already achieved basic pickup and the skipped-stitch troubleshooting path fits better.
⚙️ Should I adjust hook timing if no bobbin loop appears?
No owner-level timing adjustment is recommended here. Complete the documented setup checks, then use qualified service if pickup still fails.
🛑 When should I stop testing the machine?
Stop for repeated hard needle strikes, a mechanical lock, overheating, smoke, burning odor, exposed wiring, or visible broken internal parts. Also stop when all documented user checks are complete and the same pickup failure remains.
References and Sources
Manufacturer sources are necessary here because bobbin architecture, threading paths, needle orientation, normal pickup procedure, and service boundaries vary by machine. Brother’s pickup guidance for covered models checks upper threading, needle condition and installation, fabric-thread-needle compatibility, bobbin winding and insertion, bobbin type, accessible lint, and damaged user-visible parts before service. SINGER’s current machine FAQ likewise checks bobbin-winder state, needle installation, bobbin insertion, upper tension threading, and the normal draw-up procedure before mentioning timing as a possible repair issue. Those sources support the order of checks without turning one model’s tension value, needle size, or handwheel detail into a universal rule.
The list stays limited to manufacturer material actually needed for the published claims. Community discussions can show how readers describe this problem, but they are not used here to prove hook timing or another internal mechanical cause. The exact machine manual should override a general support page whenever the procedures differ. A persistent failure after correct user-level checks is evidence for service, not evidence that the owner should alter internal timing.
- Brother bobbin pickup troubleshooting: Supports upper-thread, needle, bobbin, winding, lint, visible-damage, and service checks for the listed machines.
- SINGER machine troubleshooting FAQ: Supports the normal draw-up procedure, bobbin and needle checks, upper-thread setup, and service-level timing boundary.
Use these pages to verify why each troubleshooting gate exists, then return to the documentation for the exact machine being tested. A support instruction that covers one group of machines does not automatically define every bobbin direction, needle orientation, or control sequence across a brand. Keep model-specific setup and general diagnostic logic separate. That distinction protects both the machine and the usefulness of the failed test.