Thread bunching under fabric usually needs an upper-thread check before a bobbin adjustment. When the top of the seam looks comparatively clean but loose loops or a bird nest collect underneath, trace which thread color forms the mass, then restore the upper threading path exactly as the machine documentation requires. Verify the bobbin type and insertion only after the upper path is known, and return tension to the documented normal baseline before making any fine adjustment. Stop if the loose nest turns into a hard jam, repeated needle strike, binding, heat, smoke, burning odor, or another service-level symptom.
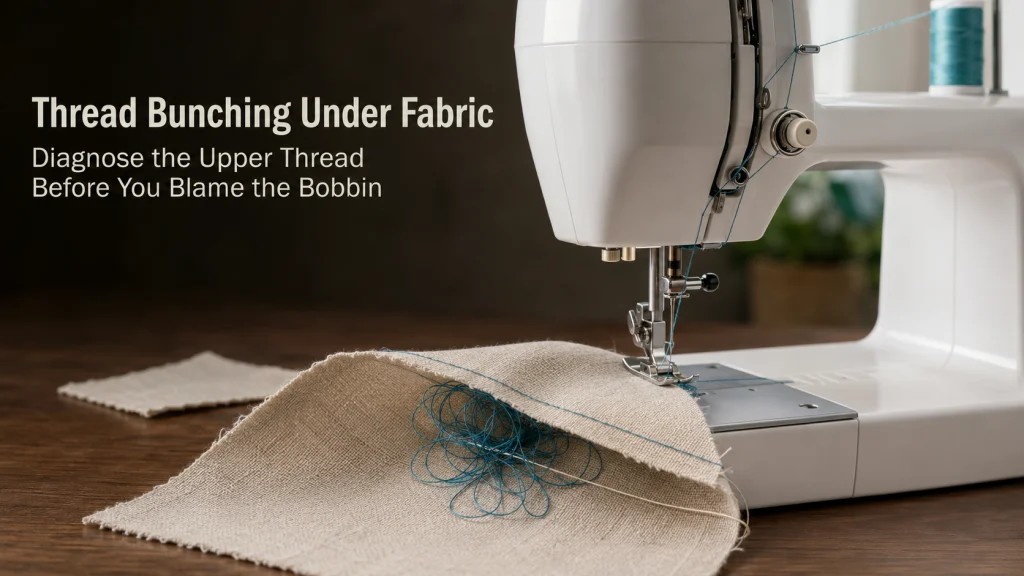
The location of the mess does not identify the guilty thread
Picture a straight-stitch sample with a clean-looking top surface and a large loose nest hanging underneath. Because the mess is below the fabric, the natural reaction is to blame the bobbin. That shortcut can send troubleshooting in the wrong direction.
Singer and Pfaff support both describe underside looping as a symptom that normally points first to the upper thread path, especially thread that is not seated correctly in the tension mechanism or has missed the take-up lever. The useful question is not simply where the loops appear. It is which thread is actually forming them and whether the upper thread was routed through the machine in the documented threading state.
This page covers loose underside loops and nests formed during ordinary lockstitch sewing. If the machine is mechanically locked, the fabric has been pulled into the needle plate, the lower thread is showing on the top surface, or no bobbin thread is being picked up at all, use the matching troubleshooting branch instead.
Stop before the nest becomes a hard jam
A loose thread nest is still a stitch-formation symptom. A hard jam is different. If the handwheel will not move normally, the needle is trapped, the fabric is pulled into the plate, thread is tightly wound around internal parts, or the machine is making hard contact, stop sewing rather than adding power or pulling harder on the fabric.
Power off before needle-plate, bobbin-case, or lower-area access whenever the exact machine manual requires it. Do not force the handwheel, needle, tension control, threader, or bobbin winder. If the machine is locked rather than merely producing loose loops, leave this path and use the broader sewing machine troubleshooting route.
| What you observe | Stay in this path? | Next action |
|---|---|---|
| Loose loops or a soft nest under fabric while the machine still cycles normally | Yes | Trace thread color and recheck the upper path |
| Thread bunches only at the first few stitches, then sewing becomes normal | Yes | Treat it as a start-of-seam subcase and restore the documented starting setup |
| Needle trapped, handwheel hard to move, fabric pulled into plate, or thread tightly bound inside | No | Stop and route as a jam or material-capture fault |
| Smoke, burning odor, overheating, exposed wiring, repeated hard strikes, or uncontrolled motion | No | Stop using the machine and seek qualified service |
The distinction matters because a loose underside nest can often be investigated with normal threading checks, while a locked machine should not be forced just to reproduce the symptom.
Identify which thread color forms the underside loops
The cleanest diagnostic is a two-color test. Use one clearly identifiable color in the needle and a contrasting color in the bobbin, then sew a short stable sample only if the machine is moving normally and there is no jam or strike. The colors make it easier to see which thread is accumulating on the underside.
If the large loose loops underneath match the upper-thread color, the visible location is misleading: the upper thread has traveled below the fabric without being controlled correctly. That finding supports an upper-path check. If the visible thread color does not match that pattern, stop and reclassify the symptom rather than forcing the same diagnosis.
| Top thread color | Bobbin thread color | What collects underneath | First branch |
|---|---|---|---|
| Blue | White | Large loose blue loops | Upper threading path and tension seating |
| Blue | White | Mostly white lower thread appearing in an unexpected pattern | Recheck symptom classification and bobbin state |
| Blue | White | Both colors tightly locked in a mechanical bind | Stop and treat as a jam, not a simple looping symptom |
This is a diagnostic color test, not a performance test. The goal is only to identify the thread forming the underside mass so the next check starts in the correct system.

This SINGER set contains 30 assorted polyester sewing threads with 50 yards on each mini spool. The different colors make it possible to use clearly contrasting upper and lower threads during sewing tests. The set includes 1,500 total yards of thread and is intended for both machine and hand sewing.
Check On AmazonIf you click this link and buy, we earn a commission at no additional cost to you.
Remove and rethread the upper path from the beginning
Do not correct an underside nest by pulling the existing upper thread into a slightly different position. Remove the upper thread and start again from the spool using the exact threading path for the machine. Singer’s general troubleshooting specifically directs users to rethread completely when loops appear underneath.
Keep the machine in the documented threading state while doing this. On the Singer and Pfaff support examples used here, the presser foot is raised so the thread can seat in the tension mechanism, and the needle or take-up lever is brought to the required upper position. The exact machine manual still controls the sequence for your model.
- Stop sewing and remove the upper thread. Do not keep testing with the same questionable threading path.
- Set the machine to its documented threading state. Verify the required presser-foot and needle or take-up-lever position.
- Rethread from the spool forward. Follow every thread point in the exact model sequence.
- Confirm the take-up lever is actually threaded. Do not assume the thread entered it because the path looks close.
- Verify the upper thread is seated through the intended tension path. Do this before changing the tension setting.
- Then verify the bobbin state. Keep lower-system checks separate from the upper-path reset.
- Retest on stable scrap. Change one variable at a time so the result remains useful.
This rethread-before-tension sequence preserves the evidence. If the nest disappears after a correct rethread, there is no reason to start turning tension controls or adjusting the bobbin system.

AK TRADING CO. Muslin Fabric is natural unbleached fabric made from 100% cotton. This listing provides a one-yard medium-weight cut with a smooth finish for sewing, quilting, draping, and related fabric work. The yardage can be divided into short woven samples for repeated machine setup and stitch tests.
Check On AmazonIf you click this link and buy, we earn a commission at no additional cost to you.
Use the exact documented presser-foot and take-up-lever threading state
The state of the machine during threading affects whether the upper thread reaches the intended tension path. Singer says to raise the presser-foot lifter before threading and to make sure the thread enters the take-up lever. Its troubleshooting material also uses the change in thread resistance between raised-foot and lowered-foot states as a check that the upper thread is engaged with the tension mechanism.
Pfaff’s select 4.2 support follows the same basic logic for its covered model: raise the presser-foot lifter, bring the needle and take-up lever to the required upper position, then rethread so the thread can seat correctly. Do not generalize an exact handwheel direction, tension number, or threading motion from one model to every machine. Use the manual for the exact model in front of you.
Confirm the thread seats in the tension path
Underside loops can appear when the upper thread never enters the tension mechanism correctly. The machine may still move fabric and the needle may still cycle, but the upper thread reaches the underside without the control needed to form a balanced lockstitch. That is why a low or high number on the tension control is not the first piece of evidence.
Check seating using only the method documented for the machine. Do not pry into tension discs, floss abrasive material through the assembly, loosen internal screws, or disassemble the tension unit. If the manual offers a simple owner-level thread-resistance check, follow it exactly and stop there.
Key point: A tension control cannot correct thread that never entered the intended tension path. Prove the path first, then evaluate the setting.
If the thread path is correct and the loops remain, keep that state fixed while you verify the lower system. Avoid changing both upper tension and bobbin setup at the same time.
Verify the bobbin is the correct type and inserted correctly
Starting with the upper path does not mean ignoring the bobbin. Once the upper thread has been fully restored, verify the exact bobbin type, winding state, insertion direction, and lower threading path specified for the machine. A similar-looking bobbin or a bobbin that drops into the holder is not enough to prove compatibility.
Do not turn a bobbin-case tension screw just because the loops are physically underneath the fabric. If the bobbin is the wrong type or visibly damaged, replace it only with the exact compatible bobbin specified for the machine rather than a similar-looking substitute. If the bobbin is correct and seated as documented, leave it alone while you retest the upper-path correction.
Return upper tension to the documented baseline before fine adjustment
If the tension control was changed during troubleshooting, return it to the normal starting value or baseline stated for the exact machine and sewing condition before evaluating the retest. Do not copy a universal tension number from another machine. Mechanical and automatic-tension systems differ, and even within one manufacturer the documented normal range can vary by model and thread/fabric setup.
Only consider a fine tension adjustment after the upper path is correct, the bobbin is verified, the needle and thread are suitable, and the machine is forming stitches without a jam or strike. A tension change should refine a known setup, not hide an unresolved threading error.
Retest on stable scrap
Use a short piece of stable woven scrap and an ordinary stitch the machine normally forms well. Keep the verified needle, thread, bobbin, foot, and threading state fixed. If the needle is bent, blunt, or visibly damaged, replace it with the documented compatible type and size before the retest; if the thread is visibly damaged, do not use it as the baseline. Sew only a short sample and inspect both sides before changing anything else.
A useful retest log records whether the top still looks clean, whether the underside loops remain loose, whether the loop color still matches the upper thread, and whether the machine feeds and cycles normally. If the result improves after the upper rethread, that is evidence that the previous thread path was part of the problem.
| Retest field | Before sewing | After sewing |
|---|---|---|
| Upper path | Completely rethreaded in documented state | Still seated and feeding freely |
| Bobbin | Correct type and insertion verified | No abnormal movement, scraping, or binding |
| Top surface | Stable scrap ready | Normal stitches or visible imbalance recorded |
| Underside | Two-color threads identifiable | Loop color, size, and whether a nest remains |
Do not keep extending the test if a loose nest turns into hard binding or repeated needle contact. At that point the symptom has crossed into a different safety branch.

This SCHMETZ assortment contains 10 Universal household sewing machine needles using the 130/705 H system. The needles have a slightly rounded point and the pack includes sizes 70/10, 80/12, and 90/14. They are intended for domestic sewing machines that accept the 130/705 H needle system, which should be confirmed in the machine manual before use.
Check On AmazonIf you click this link and buy, we earn a commission at no additional cost to you.
Use a different path when lower thread appears on top
If the dominant symptom is bobbin thread being pulled to the top surface, the side-specific evidence has changed. Singer and Pfaff troubleshooting both treat top-side bobbin-thread visibility differently from underside upper-thread loops, including checks for upper tension, thread obstruction, and correct bobbin seating.
Use bobbin thread showing on top for that symptom. Do not keep following an underside-nest diagnosis just because both faults involve visible thread imbalance.
Use a different path when the upper thread snaps instead of looping
An upper thread that repeatedly breaks is not the same failure as an upper thread that reaches the underside in large loose loops. Both can involve threading, spool feed, needle condition, abrasion, or tension state, but the visible failure mode is different and should be diagnosed separately.
If the dominant evidence is breakage rather than nesting, use upper thread breakage troubleshooting. If the thread is visibly fraying before it fails, keep the shredding symptom separate as well.
Treat start-of-seam nesting as a subcase, not a separate diagnosis
If bunching happens only in the first few stitches and then the seam becomes normal, record that pattern. Singer support for a current machine notes that start-of-seam bunching can occur when the upper and bobbin thread tails are not positioned as required under the presser foot before sewing, and it also points to stitch length and presser-foot choice for certain dense stitches.
Use the exact model instructions rather than turning those examples into universal rules. The important distinction is timing within the seam: a nest that appears only at startup may have a different owner-level setup cause from continuous underside looping, even though both belong under the broader thread-bunching symptom.
Route a hard jam to the mechanical-motion troubleshooting path
A loose underside nest belongs here only while the machine still cycles normally. If the handwheel becomes stuck or unusually tight, the needle is trapped, thread is wound into a hard bind, or the machine will not complete a normal cycle, stop treating the problem as simple thread bunching. Do not add power, force the handwheel, or pull the fabric harder to make the machine move.
Use stuck handwheel and mechanical bind troubleshooting for that failure state. The purpose of this boundary is to keep an upper-thread looping problem from turning into unsafe mechanical-jam troubleshooting inside the wrong symptom path.
Stop before internal tension or timing work
If a complete documented rethread, correct bobbin, appropriate needle/thread setup, normal tension baseline, and stable scrap retest do not resolve the symptom, stop before internal repair. Do not alter hook timing, needle-bar height, internal tension assemblies, gears, electrical housings, or undocumented screws.
Seek qualified service for smoke, burning odor, overheating, exposed wiring, repeated hard needle strikes, a hard mechanical lock, visible broken internal parts, or a fault that persists after the documented user checks. The goal is to isolate the symptom without creating a second problem.
Final Thoughts: Read the thread path, not only the side where the nest appears
Thread looping underneath fabric can make the bobbin look guilty simply because the mess is below the seam. Use thread color to identify what is actually looping, then restore the upper path from the spool through the tension mechanism and take-up lever in the exact threading state required by the machine. Verify the bobbin afterward, return tension to the documented baseline, and retest on stable scrap before making any fine adjustment.
If the machine locks, strikes, binds, overheats, or develops another service-level symptom, stop. If the lower thread appears on top instead, or the upper thread breaks rather than loops, move to the matching symptom path. A side-specific diagnosis works only when the evidence still matches the side-specific failure.
Frequently Asked Questions
🧵 Why is thread bunching under fabric?
Loose underside loops commonly point first to the upper thread path, especially incorrect seating in the tension mechanism or a missed take-up lever. Rethread from the beginning in the exact documented machine state before changing bobbin tension.
🎨 How can I tell which thread is making the nest?
Use contrasting upper and bobbin thread colors on a short stable test sample, provided the machine is moving normally. If the loose underside loops match the upper-thread color, begin with the upper threading path.
⬆️ Should the presser foot be raised while rethreading?
Follow the exact machine manual. Singer and Pfaff support examples used here require the presser foot raised so the upper thread can seat correctly in the tension mechanism during threading.
⚙️ Should I adjust the bobbin tension when loops are underneath?
Not as the first response. Restore the upper thread path, verify the bobbin type and insertion, and return the upper tension to the documented baseline before considering fine adjustment. Do not turn an undocumented bobbin-case screw.
🪹 What if the bird nest happens only when I start sewing?
Treat that as a start-of-seam subcase and record that the rest of the seam is normal. Follow the exact model instructions for thread-tail position, stitch setup, and presser foot rather than assuming the same cause as continuous looping.
🛑 When does thread bunching become a service problem?
Stop for a hard mechanical lock, repeated needle strikes, smoke, burning odor, overheating, exposed wiring, visible broken internal parts, or a fault that persists after documented owner-level checks. Do not force the machine or adjust internal timing or tension assemblies.
References and Sources
- Singer troubleshooting tips: Supports treating underside loops as an upper-thread-path symptom and rethreading with the presser foot and needle in the documented threading state.
- Singer machine troubleshooting FAQ: Supports the upper-tension threading check, take-up-lever check, and thread-resistance check used to verify upper-thread seating.
- Singer upper-threading instructions: Supports model-specific threading, raised-presser-foot guidance, take-up-lever placement, and spool-cap checks.
- Pfaff Select 4.2 troubleshooting: Provides a model-scoped example linking underside loops to incorrect upper threading and documenting presser-foot and take-up-lever state during rethreading.
- Singer Heavy Duty 6800C troubleshooting: Provides a model-scoped example for complete upper rethreading and differentiates underside loops from top-side bobbin-thread visibility.