Choosing a sewing machine needle size for fabric starts with the material in front of you, not with a fabric name printed in a generic chart. Blade size changes with fabric weight and resistance, but construction, density, stretch, coating, seam thickness, thread, needle point, and the machine’s permitted range can change the decision. A label such as cotton, denim, or canvas is therefore only a starting clue, not a complete needle specification. The useful goal is to describe the fabric and seam first, then narrow the needle size within the limits documented for the exact machine.
One Fabric Name Can Hide Two Very Different Needle Decisions
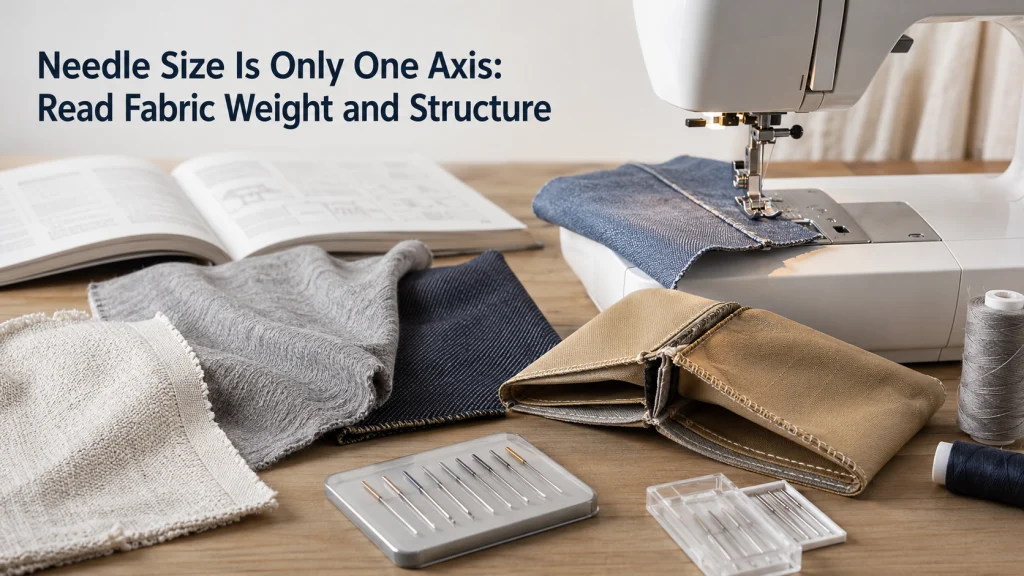
Choosing the right sewing machine needle size for fabric becomes difficult when two materials share one broad name but behave differently at the needle. One may be a relatively supple cotton cloth sewn as a single folded edge, while another may be tightly woven, coated, and stacked into several seam layers. A chart that places both under one canvas row cannot describe those differences. The fabric name tells you something useful, but it does not tell you enough to select one universal size.
The same problem appears with denim, linen, cotton, and knits because each name can cover a range of weights and constructions. Start by asking what the needle must pass through at the actual seam, not what broad material family appears on the bolt or product listing. That means considering thickness, density, stretch, surface treatment, and the number of layers together. Once those properties are clear, a chart becomes a reference point rather than an automatic answer.
Needle Size Describes Blade Diameter, Not a Fabric Category
The numerical size of a household sewing-machine needle refers to the thickness of the needle blade, not to a named fabric class. In the metric NM system, the number corresponds to the blade diameter measured in hundredths of a millimeter, so NM 80 represents a blade diameter of 0.80 mm. A larger metric number therefore means a thicker blade, while a smaller number means a finer blade. That physical change matters because the blade has to make room for the thread while passing through the material without being unnecessarily large for the job.
This is why a larger number should not be treated as a simple upgrade for a difficult fabric. Increasing blade diameter changes the size of the penetration through the material and must still make sense for the fabric, thread, point style, and machine. A lightweight tightly woven fabric may not benefit from a large blade merely because it feels firm in the hand. Think of size as one measurable dimension of the needle, not as a label that automatically says light, medium, or heavy fabric.
Read the Metric and American Numbers as One Needle Size
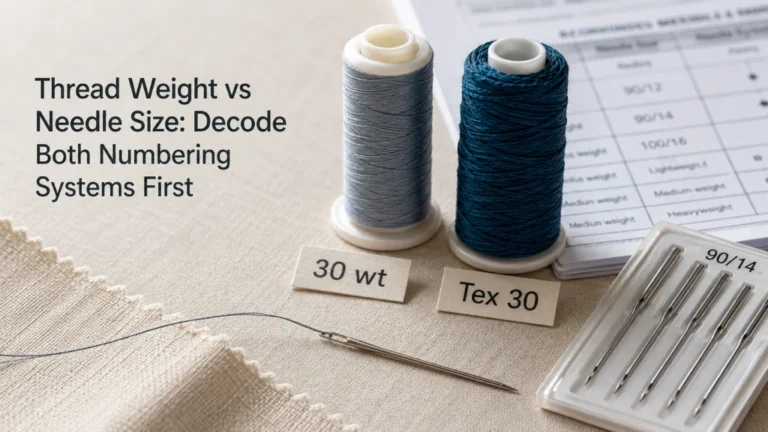
Household needle packaging commonly shows paired numbers such as 70/10, 80/12, 90/14, or 100/16. The first number is the metric designation and the second is the corresponding American size, so 80/12 is one needle size written in two numbering systems. Moving from 80/12 to 90/14 means moving to a thicker blade, not changing to a completely different type of needle. Reading the pair this way prevents the common mistake of treating the two numbers as separate performance ratings.
A sewing machine needle size chart is most useful when it preserves that relationship and then adds context rather than pretending the number stands alone. The chart should help you compare finer and thicker blades while keeping point style, needle system, thread, and fabric conditions visible. It should also be read against the permitted range for the exact machine because a general household chart cannot authorize every size on every model. The number tells you how thick the blade is, while the rest of the sewing system tells you whether that blade belongs in the job.
Separate Needle System, Point Style, and Blade Size
Three needle decisions are easy to blur together: whether the needle system fits the machine, what point geometry suits the material structure, and what blade size suits the fabric and thread conditions. Changing the size does not change a universal needle into a ball-point needle, and choosing a ball-point shape does not prove that its system fits the machine. Those are separate checks that happen to meet in one small component. The broader fabric, thread, and needle relationship is easier to understand when those axes stay separate.
| Needle axis | Question it answers | What it does not prove |
|---|---|---|
| Needle system | Does this needle geometry fit the exact machine? | That its point or blade size suits the material |
| Point style | How is the tip designed to meet the material structure? | That the needle system fits the machine |
| Blade size | How thick is the needle blade? | That the point style is correct or the machine has more capacity |
Source example: Official SCHMETZ documentation illustrates why this separation matters. A universal household needle uses a slightly rounded point, while its jersey or ball-point documentation describes a medium ball point for knit applications. Its Microtex documentation describes a slim acute point for a different penetration profile. None of those descriptions creates a universal fabric rule, but they show why blade diameter alone cannot answer a structure question.
Describe Fabric by Weight, Thickness, Construction, Density, Stretch, and Coating
Fabric weight is a useful starting variable because a very light cloth and a genuinely heavy cloth usually do not place the same demand on needle diameter. Weight alone is still incomplete, since two fabrics with similar mass can differ in thickness, weave or knit structure, yarn density, compressibility, and surface treatment. A dense fine weave can resist penetration in a different way from a bulky but open structure. Coatings, laminations, adhesives, or finishes can add another layer of behavior that a simple fabric name does not capture.
A property-first record makes those differences visible before you reach for a number. It also prevents a familiar shortcut in which cotton is treated as one weight class even though cotton can appear as lawn, poplin, quilting cloth, twill, canvas, and many other constructions. The table below is not a sizing chart; it is a way to describe what the needle will actually encounter. That description gives a generic needle chart enough context to become useful instead of misleading.
| Fabric property | What to record | Why it matters to needle selection |
|---|---|---|
| Weight | Light, medium, heavy, or a known fabric weight | Helps establish whether a finer or thicker blade range is plausible |
| Thickness | Single layer and seam-stack thickness | Shows how much material the needle must pass through at the actual seam |
| Construction | Woven, knit, nonwoven, laminated, or layered | Influences point behavior and how fibers or layers respond to penetration |
| Density | Open, moderate, or tightly packed structure | Changes resistance even when two fabrics have similar weight |
| Stretch | None, mechanical give, or meaningful stretch | Can make point style as important as blade size |
| Surface treatment | Uncoated, coated, fused, adhesive-backed, or otherwise finished | Can change penetration behavior and may call for different needle characteristics |
Use these fields as observations rather than as a scoring system. A fabric does not become a size 90/14 simply because several boxes look heavy, and a coated fabric does not automatically require the largest needle the machine accepts. The record narrows the questions you need to answer with the machine manual and needle documentation. It is a description of the material, not a substitute for the evidence that controls fit and safe use.
Add the Seam Layer Stack Without Turning It Into a Universal Size Rule
The needle does not sew the fabric name; it sews the stack under the presser foot at that moment. A single layer of medium-weight twill may be straightforward, while a hem intersection in the same fabric can combine folds, seam allowances, pockets, or interfacing into a much thicker local stack. That change can affect how appropriate a given blade diameter is even though the material label has not changed. Record the thickest realistic seam area separately from the single-layer fabric.
Layer count still should not be converted into a formula such as one extra size for every added layer. Compression, weave density, coatings, interfacing, thread choice, and the machine’s own limits all affect what the stack means in practice. A bulky soft stack and a compact dense stack can feel different to the needle even when their measured thickness is similar. Use the layer stack to refine the decision, then keep the actual needle choice inside the range and conditions documented for the machine.
Woven, Knit, and Nonwoven Structures Can Need Different Point Behavior
Fabric structure changes what the needle point is being asked to do. Many woven fabrics present crossing yarns that a general or sharper point may penetrate between or through, depending on the specific needle design and material. Many knits are better served by a rounded point that works with looped fibers rather than behaving like a sharp cutting point. Nonwovens and coated materials can introduce still different penetration conditions because their structure is not simply a woven grid or knitted loop system. That is why a size number cannot stand in for point geometry.
For example, two fabrics can both be light enough to suggest a similar blade-size neighborhood yet call for different point behavior because one is a stable woven and the other is a stretchy knit. Conversely, two woven fabrics can share the same broad structure while differing enough in density or coating that their blade-size needs are not identical. Treat structure as a separate description field, then consult needle-type documentation for the point behavior intended for that structure. The result is a three-axis check: system fit, point style, and blade size.
Reconcile a Generic Fabric Chart With the Exact Machine’s Permitted Needle Range
Source example: Brother publishes fabric-thread-needle tables for defined groups of machines, showing broad relationships such as finer needles with lighter fabrics and thicker needles with heavier fabrics. Those tables are not permission to install any size listed on the internet into any domestic machine. Manufacturer support information can also place model-specific limits on usable household needle sizes, embroidery sizes, thread weights, or material thickness. The exact machine manual or model-specific support documentation therefore has the final say on the usable range.
| Evidence | Useful for | Not enough to prove |
|---|---|---|
| Generic fabric chart | Finding a plausible starting range | Exact-model permission |
| Needle maker application page | Understanding point and material intent | Machine compatibility by itself |
| Exact machine manual or support page | Confirming permitted systems, ranges, and restrictions | The final size without considering fabric and thread |
A practical sequence is to use the fabric properties to identify a plausible region on the chart, then compare that region with the machine’s documented range and restrictions. If the chart suggests a size outside what the manual permits, the chart does not override the machine. If the manual gives a broad range, the fabric, thread, and point-style evidence still has to narrow the choice within that range. This keeps a general recommendation in its proper role: helpful orientation, not model-specific authorization.
Use Named Fabrics as Bounded Examples, Not Fixed Needle Categories
Names such as silk, cotton, linen, denim, and canvas can still be useful because they help describe common material families and give charts a readable starting point. The mistake is turning those names into fixed numerical assignments. A light silk fabric and a dense coated silk-based material do not present the same structure, just as a light cotton shirting and a heavy cotton canvas do not present the same weight or layer behavior. The material name should lead to more description, not end the decision.
Consider denim as a bounded example. A chart may place heavyweight denim toward a thicker needle range, but the actual seam can vary from a relatively light single layer to a dense multi-layer intersection with topstitching thread. Canvas has the same problem because the word can describe materially different weights, weaves, coatings, and finished products. Use named fabrics to locate likely questions, then let properties, thread, point style, and the exact machine range determine how far that example really applies.
A Larger Needle Does Not Prove More Motor Power or Material Capacity
A thicker needle blade may be appropriate for a heavier fabric within a machine’s documented limits, but that does not increase the machine’s motor power, feeding ability, presser-foot clearance, frame strength, or allowable material thickness. Needle size describes the needle, not the overall capacity of the sewing system. Treating a 100/16 or another larger size as a way to make any domestic machine handle any heavy stack confuses one component with the entire mechanism. That shortcut can also push the setup beyond what the model documentation allows.
Material capacity has to be judged from the machine’s own specifications, manual, feed behavior, presser-foot arrangement, and any manufacturer limits that apply to the intended work. If the question is really whether a machine can handle a certain class of material, start with how the sewing machine system works rather than using needle size as a proxy for power. A bigger needle can be the right needle inside an appropriate setup, but it cannot convert an unsuitable machine into a different class of machine. Keep capability claims separate from needle-selection logic.
Thread Clearance Is a Separate Reason Needle Size May Need to Change
Fabric is only one side of the needle-size decision because the thread must also pass through the eye and along the needle groove without excessive restriction. A blade that looks appropriate for the fabric can still be too fine for a much heavier thread, while moving to a thicker needle only for the fabric can be unnecessary if the thread remains fine and the material does not require it. This is why official fabric-thread-needle tables present the three variables together. The relationship is mechanical, not a keyword match between a fabric name and a needle number.
When the unresolved question is whether the chosen thread has enough clearance through the eye and groove, move to the more specific discussion of thread weight versus needle size. That decision should not be hidden inside a fabric-only rule because thread numbering systems and construction add their own variables. For this article, the important point is simply that fabric evidence can narrow the blade size without completing the thread check. The final choice has to satisfy both material penetration and thread passage.
Keep Exact Needle Fit and Sewing Settings as Separate Decisions
This fabric-based reasoning does not prove that a particular needle package fits a particular machine. Exact fit depends on the needle system and the model documentation, and visual similarity is not enough evidence. Once the likely blade size and point behavior are understood, verify the system that the machine accepts before installation. That compatibility check belongs to the exact machine and needle specification, not to the broad fabric category.
Stitch length, tension, presser-foot pressure, feed assistance, speed, and material-handling technique are separate setup choices as well. A needle size that makes sense for the fabric does not automatically determine those settings, and changing settings should not be used to conceal an incompatible needle. Keeping these decisions separate makes troubleshooting cleaner because a failed result can be traced to the correct variable instead of everything being changed at once. This article stops at material-to-needle reasoning before installation and sewing settings begin.
Build a Property-First Record for the Fabric You Actually Have
A short material record is more useful than memorizing one needle number for every fabric name. Write down the broad fabric name, then add the properties that change the decision and the actual seam stack you expect to sew. Record the thread separately so a later thread-clearance check is possible. Finally, compare the resulting needle-size range and point requirement with the exact machine documentation before you install anything.
- Broad fabric name and fiber content if known
- Light, medium, or heavy weight, plus a measured fabric weight when available
- Woven, knit, nonwoven, laminated, or another relevant construction
- Open or dense structure, plus meaningful stretch
- Coating, adhesive backing, interfacing, or other surface treatment
- Single-layer thickness and the thickest realistic seam stack
- Thread type and size or weight designation
- Needle system and size range permitted by the exact machine
That record does not have to be elaborate, and it is especially useful when a material behaves differently from what a generic chart led you to expect. It gives you a way to explain why two fabrics sold under the same name may lead to different needle decisions without inventing a universal rule. It also makes later troubleshooting more disciplined because you know which variables were actually present. The final needle number should be the result of that evidence, not the starting assumption.
Final Thoughts: Describe the Fabric Before Choosing the Number
The safest way to answer what size sewing machine needle should I use is to begin with the actual material and seam, not a single word such as cotton, denim, canvas, silk, or knit. Describe weight, thickness, construction, density, stretch, coating, and layer stack, then separate blade size from point style and needle-system fit. Use a chart to narrow the possibilities, not to override the exact machine documentation. That sequence turns a generic fabric label into a decision you can actually verify.
Keep the boundaries just as clear after the number is chosen. Thread clearance can require another size check, machine compatibility controls whether the needle system fits, and sewing settings belong to the actual setup rather than to the fabric name alone. A larger needle does not prove more machine capacity, and a familiar material name does not prove one universal size. The useful habit is simple: describe first, verify second, and choose the number last.
FAQs
🪡 What size sewing machine needle should I use?
Start with the fabric’s weight, construction, density, stretch, coating, and seam layer stack, then check the thread and the exact machine’s permitted needle range. A fabric name alone is not enough to select one universal size.
📏 What do numbers such as 80/12 and 90/14 mean?
They are paired designations for the same needle size in two numbering systems. The metric number tracks blade diameter, so a 90/14 needle has a thicker blade than an 80/12 needle.
🧵 Does heavier fabric always need a larger needle?
Heavier fabric often moves the decision toward a thicker blade, but weight is only one variable. Density, construction, seam layers, thread, point style, and the machine’s documented range can change the appropriate choice.
🧶 Do knit fabrics need a different needle size from woven fabrics?
Not automatically, because size and point style are separate decisions. A knit may call for different point behavior even when its blade-size range overlaps with a woven fabric of similar weight.
⚙️ Can I use a bigger needle to sew thicker material on my machine?
A larger needle does not increase motor power, feed capacity, presser-foot clearance, or the material thickness the machine is designed to handle. Stay within the exact model’s documented needle and material limits.
📋 Is a sewing machine needle size chart enough by itself?
No. Use a chart as a general range reference, then reconcile it with the actual fabric properties, thread, point style, needle system, and the exact machine manual or support documentation.
References and Sources
- Brother fabric, thread, and needle table: Supports the relationship between fabric weight, thread, needle size, point guidance, and model-scoped safety limits.
- SCHMETZ needle size designations: Explains the NM metric system and how blade diameter relates to needle size numbers.
- SCHMETZ jersey and ball-point documentation: Supports the distinction between rounded point geometry and blade size for knit applications.
- SCHMETZ Microtex point documentation: Shows a contrasting slim acute point intended for different material and precision applications.