A self-healing cutting mat should be cleaned according to the instructions for the mat you own, not a generic soaking recipe copied from elsewhere. Start with dry debris removal, use only the cleaner and moisture level the maker approves, and treat fibers in cut lines with methods the maker specifically supports. Keep the mat flat while it dries and in storage, and protect it from ironing surfaces, hot vehicles, direct heat, and other conditions the manufacturer warns against. If the surface is already deeply grooved or warped, cleaning is maintenance, not a promise that the mat can be restored.
Identify the Mat Before You Choose a Cleaning Method
If you are learning how to clean a self-healing cutting mat, the first useful step is to identify the maker and, when possible, the model or product family. Mats that share the same generic description can use different materials, surface constructions, printed grids, and care instructions. A method that is harmless on one mat is not automatically approved for another. Manufacturer instructions therefore outrank a general internet recipe, even when that recipe is repeated across sewing and quilting forums.
Look for the brand name, model name, package insert, care label, or product page before adding water, detergent, vinegar, alcohol, or any other cleaner. If model-specific care instructions are unavailable, choose the least aggressive maintenance step that does not contradict the information you do have, such as lifting loose scraps before wet cleaning. Do not assume that the word “self-healing” means the surface needs to be soaked or “rehydrated.” For a broader look at how mats fit into a cutting setup, the article on choosing fabric cutting tools explains the role of the cutting surface without turning maintenance into a product recommendation.
- Identify the manufacturer and mat family if possible.
- Find the maker’s cleaning, storage, and temperature guidance.
- Separate approved care from forum recipes or cross-brand advice.
- Start with the least aggressive approved method.
- Stop if the surface, grid, or shape begins to change.
This checklist is deliberately conservative because the maintenance question is about preserving an owned tool. The goal is not to make every mat behave like new or to prove that one cleaning routine works across brands. If you are actually deciding whether an old mat should be replaced, the separate article on choosing a self-healing cutting mat handles that buying decision. Here, the useful question is narrower: what does the maker of this mat allow you to do to it?
Remove Loose Debris Before Wet Cleaning
Loose thread ends, fabric crumbs, batting fuzz, paper dust, pins, and other debris should come off the work surface before you add moisture. This keeps a damp cloth from dragging gritty particles across the printed grid or pressing more lint into existing cut lines. It also gives you a clearer view of what is actually dirty and what is simply caught in the surface. A mat that looks gray or fuzzy may need targeted fiber removal more than a full wash.
Use your hands only for debris that can be picked up without contacting a blade, sharp pin, or other cutting hazard. If a rotary cutter is on the table, close or guard it according to its instructions and move it out of the cleaning area before you start. Sweep or lift loose material gently rather than scraping the surface with a metal edge or another sharp object. Once the easy debris is gone, you can judge whether the mat needs a damp cleaning step or only attention to fibers trapped in the cut lines.
Use the Manufacturer’s Approved Cleaner and Moisture Level
The words “mild cleaner” are not a license to improvise with every household chemical. Check what the manufacturer names, how the cleaner should be applied, and whether the instructions call for a damp cloth, a wash, or another method. OLFA, for example, tells owners to use light detergent with a soft damp cloth for its rotary mats and advises applying cleaning product to the cloth rather than spraying the surface directly. That is useful evidence for OLFA mats, but it should not be treated as a universal cleaning rule.
Keep the amount of moisture within the maker’s stated method instead of assuming that more water means deeper cleaning. Unsupported soaking advice is especially risky because the article’s maintenance goal is to preserve flatness, surface condition, and printed references, not to test how much water a mat can tolerate. If the maker provides no soaking instruction, an internet recipe involving a tub, vinegar solution, or long soak does not become verified care simply through repetition. When the instructions are unclear, stop at the gentlest documented method rather than escalating to a stronger cleaner.
Key point: Treat the maker’s cleaning method as a model-specific limit. A cleaning recipe proven only for another mat is not evidence that your mat should be soaked, scrubbed, sprayed, or treated with the same chemical.
That distinction keeps cutting mat maintenance practical instead of experimental. It also prevents a cosmetic problem, such as lint or surface grime, from becoming a shape or surface problem created by cleaning. If your work area forces you to bend or move a large mat just to reach a sink, it may be worth reviewing how to choose cutting mat size when replacement is eventually necessary. For the mat already on the table, however, work within its published care limits.
Remove Embedded Fibers with Approved Tape, Roller, or Eraser Methods
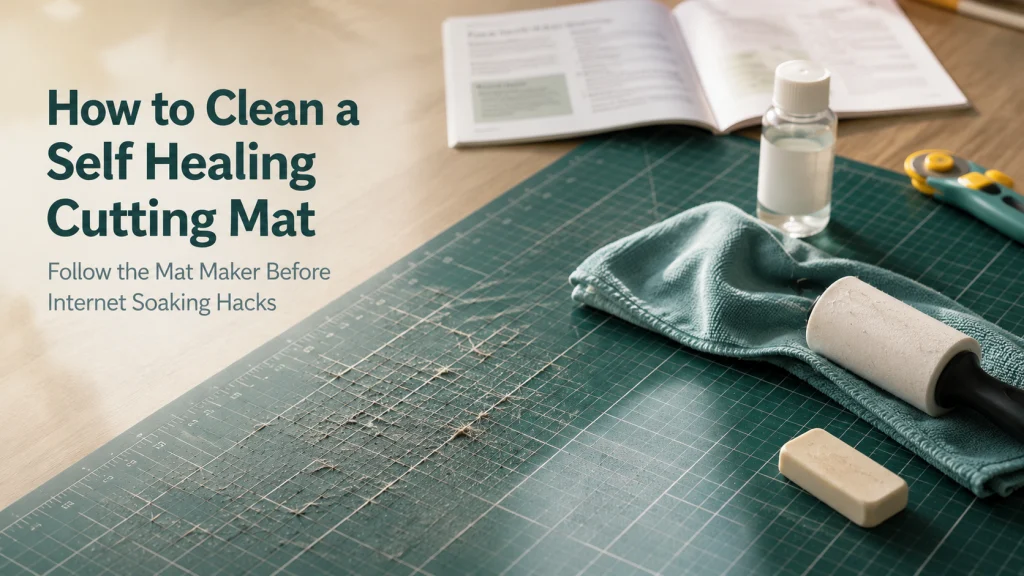
Fibers trapped in cut lines need a different approach from ordinary surface dust. OLFA’s maintenance guidance lists a lint roller or heavy tape for embedded fibers, and its FAQ also describes a damp cloth or art gum eraser as options for its mats. These methods work by lifting or dislodging fibers rather than carving the cut line wider. If you own a different mat, confirm that the same method is allowed before pressing adhesive or an eraser across the surface.
Work on a small area and use light contact instead of digging into the line with a pin, knife point, seam ripper, or exposed rotary blade. The goal is to remove the fiber, not reopen every cut in the mat. If the residue does not release with the approved method, repeated aggressive scraping can create more damage than the original lint. A stubborn cut line is a maintenance limit, not an invitation to use a sharper object.
A fiber-removal pass is also a good time to look at where the lint is accumulating. Repeated fibers in the same track may show that you are cutting in one location again and again, which can contribute to groove formation on some mats. Changing the cut location across the usable surface is a maintenance habit, not a substitute for cleaning. If you use a rotating surface because you frequently reposition small work, deciding whether a rotating cutting mat helps is a separate tool-choice question from cleaning the mat you already own.
Dry and Store the Mat Flat as Directed
After any approved damp cleaning, keep the mat supported on a flat surface while it dries. Do not create a new bend by hanging a large flexible mat over a chair, narrow rail, or table edge unless the maker says that storage method is suitable for that model. OLFA’s care guidance tells owners to store its mats flat and not attempt to roll them. The larger point is to follow the storage geometry stated for the mat you actually have.
Choose a storage location that supports the whole mat and keeps it away from conditions the manufacturer warns about. A tabletop, a broad shelf, or another flat protected space may work when the mat fits without overhang, pressure points, or heat exposure. If space is tight, do not solve the problem by forcing a mat into a curve that conflicts with its care instructions. A smaller future mat may fit the workspace better, but that is a sizing decision rather than a cleaning technique.
Avoid Ironing, Hot Cars, and Direct Heat
Heat is one of the clearest maintenance boundaries in OLFA’s published mat care. The company tells owners not to iron on its rotary mats, not to leave them in vehicles where they can be exposed to extreme temperatures, and to keep them out of direct sunlight. Those warnings matter because a cleaning routine should not end with a heat-based drying shortcut. A mat is a cutting surface, not a pressing surface or heat-resistant drying board unless its own documentation explicitly says otherwise.
Do not use an iron, hair dryer, heater, heat gun, heated press, or hot vehicle to speed drying or try to reshape the surface. Even if an online anecdote claims that heat flattened one mat, that does not establish a safe method for yours. Keep pressing work on equipment designed for pressing, and let the cutting mat remain within its documented temperature and storage limits. This is a simple stop rule that prevents a maintenance task from becoming permanent deformation.
Warning: Do not apply direct heat in an attempt to dry, flatten, or “heal” a self-healing cutting mat unless the manufacturer explicitly instructs that method. Heat exposure can permanently distort mats whose care instructions require flat storage and protection from extreme temperatures.
The same separation helps keep the rest of a sewing workspace organized around what each tool is meant to do. If you are reviewing the broader setup rather than only the cutting surface, building a practical sewing tool setup covers the role of other reusable tools without changing this mat-care rule. Maintenance is safer when each surface has one clear job. The cutting mat should not become the convenient place for pressing just because it is already on the table.
Do Not Promise That a Warped Mat Can Be Restored
A warped mat is no longer just a cleaning problem. OLFA states in its FAQ that once one of its mats is warped, there is no way to flatten it, and its maintenance guidance repeats that a warped mat cannot be made flat again. That directly conflicts with common advice to use hot water, sunlight, ironing, or another heat cycle to force the sheet back into shape. For an OLFA mat, the manufacturer’s answer should control the decision.
For other mats, check the maker’s instructions before deciding whether any recovery method is supported. Do not promise restoration simply because someone reports that weights, warm water, or heat worked once on a different mat. A mat used for measurement and rotary cutting needs a stable, flat reference surface, so a remaining wave or ridge can matter even if the mat looks better after an improvised treatment. When the manufacturer says warping is permanent, replacement or repurposing is a more honest boundary than a risky repair experiment.
Inspect Grooves That Can Affect Future Cuts
Cleaning can remove debris without reversing physical wear. After the surface is clean and dry, look across it at a low angle and run a ruler over the areas you use most to check for ridges, deep tracks, or localized damage. OLFA warns that repeatedly cutting in the same place can inhibit the self-healing behavior of its mats and create grooves that affect cutting accuracy. A clean groove is still a groove, so appearance alone is not enough to judge the working surface.
Also separate a mat problem from a blade problem before replacing either tool. If cuts begin skipping, dragging, or requiring more pressure, inspect the blade according to its maker’s instructions and check whether the mat has a repeated track under the same cutting path. Do not press harder just to force a rotary blade through a damaged area, because greater force adds a safety problem without identifying the cause. The useful maintenance decision is to determine whether the surface remains flat and smooth enough for the cutting task you expect it to support.
| What you see | What to check next |
|---|---|
| Loose lint on the surface | Remove debris before deciding whether wet cleaning is needed. |
| Fibers held in cut lines | Use the maker’s approved lifting or erasing method. |
| Repeated deep track | Check whether cutting in the same location has created permanent wear. |
| Wave or raised area | Check the manufacturer’s warping guidance rather than applying heat. |
| Skipped or difficult cuts | Inspect both the mat surface and the rotary blade condition. |
This inspection keeps maintenance from turning into guesswork. A mat that only needed lint removal should return to service without unnecessary chemicals, while a deeply damaged surface may have reached a point that cleaning cannot change. If the problem is mainly that the existing mat no longer fits the projects or table, revisit selecting the right cutting mat size rather than trying to solve a size mismatch with maintenance. The next step should match the actual condition you found, not the most dramatic cleaning trick available online.
Final Thoughts: Maintain the Mat You Own, Not an Internet Myth
The safest cleaning routine begins with the label on the mat and the care information from its maker. Remove loose debris first, then use only the cleaner, moisture level, and fiber-removal methods that are actually supported for that mat. Dry and store it in the shape the manufacturer specifies, usually with particular attention to flat support and temperature limits. That sequence is less exciting than a soaking hack, but it keeps a simple maintenance problem from becoming permanent damage.
Once the mat is clean, inspect what cleaning could not fix. Deep grooves, a distorted surface, or a permanent warp are condition issues, not dirt, and they need to be judged against the manufacturer’s own replacement or reuse guidance. Keep rotary blades guarded and out of the cleaning area, and do not use heat or sharp tools to force a cosmetic improvement. A well-maintained cutting mat is the one whose care routine respects its actual construction and published limits.
FAQs
🧼 What should I use to clean a self-healing cutting mat?
Use only the cleaner and application method approved by the mat manufacturer. For example, OLFA specifies light detergent with a soft damp cloth for its rotary mats, while other makers may publish different care instructions.
🧵 How do I remove fabric fibers from cutting mat grooves?
Check the maker’s fiber-removal instructions before using adhesive or an eraser. OLFA lists lint rollers, heavy tape, a damp cloth, and an art gum eraser for its mats, while sharp metal tools should not be improvised as groove cleaners.
💧 Should I soak a self-healing cutting mat in water?
Do not assume soaking is required simply because the mat is described as self-healing. Soak only if the maker instructs you to do so, and otherwise stay within its documented moisture level and cleaning method.
🔥 Can I iron a warped cutting mat flat?
Do not use an iron unless the manufacturer explicitly supports that method. OLFA specifically warns against ironing its rotary mats and states that a warped OLFA mat cannot be flattened again.
📏 Why does my clean cutting mat still affect my cuts?
Cleaning removes debris, but it does not erase every deep groove, ridge, or warped area. Inspect the mat and the rotary blade separately, because either condition can change how a cut behaves.
References and Sources
- OLFA rotary mat maintenance: Supports the cleaning, fiber-removal, flat-storage, heat-avoidance, and repeated-cut guidance used in this article.
- OLFA rotary mat FAQ: Supports the manufacturer-specific care, fiber-removal, warping, and storage boundaries discussed above.