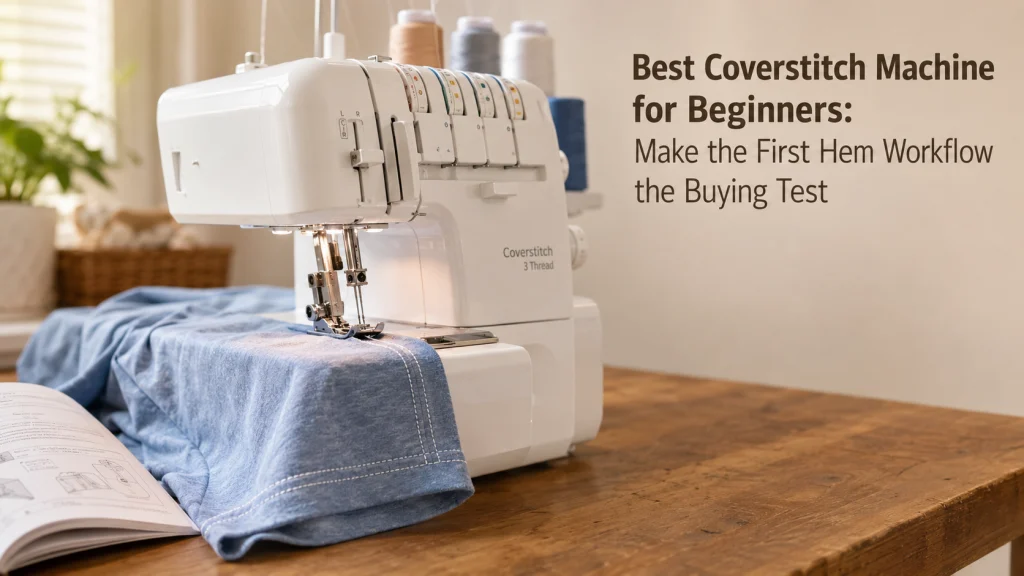
The best coverstitch machine for beginners is not automatically the least expensive or the one with the fewest controls. A better first purchase is the machine whose threading, stitch selection, fabric release, documentation, workspace, and service path fit the garment jobs you expect to repeat. Before comparing candidates, decide whether you actually need dedicated coverstitch capability, whether a combination machine makes sense in your space, and which stitch configurations your projects require. That turns a vague beginner label into a buying test you can apply to any machine.
Beginner to coverstitch does not mean beginner to sewing
Two people can be equally new to coverstitching and still need different machines. One may already own a sewing machine and a serger, leave the serger threaded, and want a dedicated station for knit hems. Another may have solid garment-sewing skills but only enough room for one specialist machine, making conversion time and storage more important than the simplicity of a dedicated setup.
That is why the useful starting question is not, “Which machine is easiest?” It is, “Which workflow will I repeat, and what will interrupt it?” If the distinction between coverstitch, overlock, and ordinary machine functions is still unclear, review the main types of sewing machines before treating a specialist system as the next purchase.
Confirm that coverstitch is actually the next purchase
A coverstitch machine earns its place when the work you want to do repeatedly matches what the system is designed to handle, especially stretch hems, selected neckline or binding workflows, and chainstitch applications. It is not simply a more advanced sewing machine, and it does not replace every function of a serger or a conventional machine. Buying one before identifying the missing operation often creates a third machine that solves a problem you did not have.
Start with garments you already sew or genuinely plan to sew. If the recurring frustration is finishing knit hems while preserving stretch, a coverstitch system may address a real workflow gap. If you are still deciding whether you need this operation at all, compare the coverstitch and twin needle workflows before paying for another machine and giving it permanent table space.
Write down the jobs the machine must handle
A first-year job sheet is more useful than a feature wish list. Write the actual operations you expect to repeat, such as T-shirt hems, sleeve hems, knit necklines, binding, or chainstitch construction where appropriate. Then note the fabric types and the physical shape of the work, because a wide flat hem and a small tubular cuff do not place the same demands on workspace and access.
Do not add capabilities merely because they sound like room to grow. A feature has value only when it connects to an operation you can name. For a first-time owner, this simple list prevents decorative or premium functions from outranking the basic sequence of threading the machine, selecting the required stitch, sewing the garment area, and removing the work cleanly.
- List three to five garment operations you expect to repeat.
- Note whether each job is flat, tubular, narrow, or bulky.
- Record whether you need a coverstitch, chainstitch, or both.
- Mark any job that might be completed acceptably on equipment you already own.
- Keep unplanned specialty features in a separate “optional” column.
Once that sheet exists, every candidate has to answer the same practical questions. That makes comparison much less vulnerable to a long feature list or a broad “beginner-friendly” label.
Choose dedicated or combination architecture first
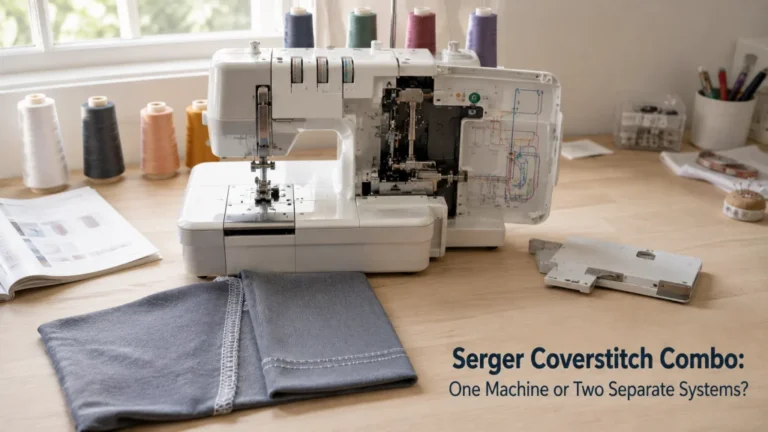
A dedicated coverstitch machine stays assigned to coverstitch work, while a combination machine puts overlock and coverstitch functions into one chassis. One body can save physical space, but it can also add conversion steps when a garment moves back and forth between overlocking and hemming. The useful comparison is the time and attention required by your sequence of work, not the number of machines in the room.
Frequent switching favors a different routine from batch sewing. Someone who already keeps a serger threaded may value leaving a dedicated coverstitch ready for hems, while someone with limited storage may accept conversion in exchange for one specialist chassis. If both functions are confirmed requirements, use the serger and coverstitch combination comparison to examine that tradeoff in more detail.
| Your sewing pattern | Architecture to investigate first | What still needs verification |
|---|---|---|
| You alternate between overlocking and hemming within the same garment | Dedicated coverstitch alongside an existing serger | Space, total ownership cost, and whether two machines can stay ready |
| You have room for only one specialist chassis | Combination system | Complete mode-conversion sequence and how often you will tolerate it |
| You sew in batches and rarely switch functions mid-project | Either architecture may fit | Storage, conversion steps, stitch needs, and service access |
This is an architecture decision, not a beginner ranking. Settle it before comparing smaller convenience features so you do not spend time evaluating machines that conflict with your space or sewing sequence.
Decide the minimum stitch configurations
Coverstitch machines can differ in the number of needles they accept and in the coverstitch or chainstitch configurations they support. More configurations are not automatically better for a first owner. The practical question is whether the machine produces the stitches required by the job sheet without forcing you to pay for functions you cannot connect to a likely project.
For example, a sewist focused on straightforward knit hems may prioritize a dependable two-needle coverstitch workflow and usable differential feed. Someone planning visible decorative work or specific construction techniques may place greater value on additional configurations. Treat every extra stitch as a capability to justify, not a score that makes one machine objectively superior.

The Brother 2340CV is a dedicated coverstitch machine with narrow and wide two-needle cover stitches, a tri-cover stitch, and chainstitch capability. Its listing specifies color-coded threading guides, a fast looper threading system, and differential feed. The machine can sew at speeds up to 1,100 stitches per minute and includes snap-on presser feet.
Check On AmazonIf you click this link and buy, we earn a commission at no additional cost to you.
Audit a fully unthreaded start
A machine can look simple when it arrives pre-threaded or when a demonstration begins halfway through setup. That tells you little about the next thread break, color change, cleaning session, or accidental pullout. For a first coverstitch purchase, inspect the route from completely unthreaded to ready to sew rather than judging the control panel alone.
Trace the documented threading order for the machine you are considering. Check whether the diagrams are readable from the operator position, whether the guides and access points are easy to identify, and whether stitch-specific changes are clearly separated from the basic threading path. If the full sequence cannot be verified from manufacturer documentation or a hands-on demonstration, record the setup as unknown instead of accepting a retailer’s ease claim.
Audit needle and looper threading separately
“Easy threading” is too broad to score as one item. Needle threading and looper threading are separate jobs, and the number of active paths changes with the stitch configuration you choose. Record the guides you must reach, the required threading order, and any aids or release mechanisms documented for each path.
This matters most when you change thread colors or needle positions often. A convenient looper path may save effort, while needle changes or another part of setup can still slow the operation you actually repeat. Scoring those jobs separately gives you a clearer picture than a single beginner-friendly label.

The bernette 42 FUNLOCK is a dedicated coverstitch machine with three coverstitch configurations and a chainstitch. It uses color-coded threading paths and provides a separate needle threader for setup. The machine also includes differential feed, adjustable presser-foot pressure, LED lighting, and sewing speeds up to 1,300 stitches per minute.
Check On AmazonIf you click this link and buy, we earn a commission at no additional cost to you.
Check stitch changes and end-of-seam release
The sewing pass is only part of the workflow. You also need to move between the stitch configurations on your job sheet and remove the fabric at the end without turning every hem into a puzzle. Fabric-release and tension-release systems vary by machine, so a technique learned on one coverstitch system should not be treated as universal.
Identify the documented sequence for stopping, raising the presser foot, releasing tension where applicable, handling thread tails, and removing the work. Do not pull against resistance or copy a release trick from another machine simply because the machines look similar. If a demonstration is available, perform the release yourself because it is a task you will repeat at the end of every seam.
Warning: Follow the instructions for the specific machine when changing needles, opening covers, removing fabric, cleaning, or converting modes. Stop using the machine and seek qualified service for electrical damage, overheating, smoke, a burning odor, sparks, uncontrolled motion, a hard mechanical lock, or repeated hard needle strikes.
Keep setup, stitch change, and fabric release as separate scores. That prevents one pleasant step from masking a different step that repeatedly interrupts the way you sew.
Verify differential feed, workspace, and free-arm access
Differential feed is a functional control, not a beginner badge. On systems that provide it, the adjustment changes how the feed mechanisms move fabric relative to one another, which can help manage materials that stretch or gather during stitching. The available range and useful starting settings vary by machine and fabric, so compare documented controls and then test on matching scraps when possible.
Workspace and free-arm access solve different problems. Flat bed space supports larger garment sections, while a free arm can make some tubular areas easier to position, but neither feature guarantees that every cuff or sleeve will fit comfortably. Match the physical shape of your first-year jobs to the actual bed and access around the needle before treating either feature as essential.
Verify manuals, support, and service before buying
Documentation is part of the machine, especially for a first-time owner. Before buying, confirm that the manufacturer publishes instructions for threading, supported stitches, needle requirements, differential feed, fabric removal, routine cleaning, and any owner-level maintenance or mode conversion that applies. For a machine sold in more than one market, make sure the documentation matches the version available to you in the United States.
Support matters after setup as well. Check whether warranty information is easy to locate, whether authorized service is realistically accessible, and whether normal needles, consumables, and any required accessories can be sourced without turning a small maintenance issue into a long interruption.
- Can you find the complete operating manual before purchase?
- Does it show the full threading path rather than only a quick-start sequence?
- Are stitch configurations and needle positions explained clearly?
- Is the fabric-release procedure documented?
- Are cleaning and owner-maintenance boundaries explicit?
- Can you identify warranty, support, and authorized service routes?
- Are the normal consumables and required accessories identifiable for this machine?
Record each item as verified, unresolved, or not applicable. A lower purchase price is less useful when the ownership path remains unclear before the machine even reaches your sewing table.
Define what makes the best beginner coverstitch machine
A beginner-friendly coverstitch machine should reduce uncertainty across the first-use cycle, not merely have a short feature list. The strongest candidate is the one whose architecture fits your room, required stitches are supported, setup can be followed from documentation, end-of-seam release is understandable, and help exists when the printed instructions are not enough.
Price still matters, but cheapest and easiest are different claims. Fewer features can lower complexity, yet a stripped-down machine can also omit a function tied directly to your job sheet. Fix the criteria before shopping so the machine earns its place through the work you expect to do.
| Workflow check | What to verify | Do not assume |
|---|---|---|
| Architecture | Dedicated or combination, plus required conversion steps | One chassis automatically saves time |
| Stitches | Exact coverstitch and chainstitch configurations you need | More stitches mean a better first machine |
| Threading | Complete needle and looper paths from an unthreaded start | Color coding proves the entire setup is easy |
| Fabric release | Documented end-of-seam procedure | Every coverstitch releases fabric the same way |
| Fabric handling | Differential feed, pressure controls, and test conditions | A marketing label proves knit performance |
| Workspace | Bed area, free-arm access, and the shape of your garments | A larger machine is automatically easier |
| Ownership | Documentation, support, service, consumables, and relevant accessories | Purchase price is the total cost |
Use the same scorecard for every candidate. A machine that wins on feature count but loses on the operations you perform most often is not the stronger first purchase for your workflow.
Build a current shortlist around the first-coverstitch workflow
Once the architecture and required stitches are fixed, narrow the market to machines that are genuinely available to you and can perform those jobs. The shortlist should be small enough that you can inspect documentation and unresolved tasks for each candidate instead of relying on a broad ranking that mixes different buyer situations.
The worked cards below show how three common shortlist profiles can be recorded without pretending that an untested ease claim is established fact. They are not product recommendations. Their purpose is to make the evidence standard visible before you compare actual machines.
| Shortlist profile | Already verified | Keep as unknown until checked | Buying implication |
|---|---|---|---|
| Dedicated machine for recurring knit hems | Required coverstitch configuration, differential feed, available documentation | Full unthreaded setup, small-opening access with your garments, end-of-seam feel | Strong fit only if the unresolved ownership steps also suit you |
| Combination system for a one-machine specialist setup | Both overlock and coverstitch functions are supported | Complete conversion routine, rethreading burden, fabric release after conversion | Space savings matter only if the mode-change routine is acceptable |
| Dedicated machine with additional stitch capability | Core hem requirements plus extra supported configurations | Whether the added functions improve any job on your sheet | Do not pay for growth features until you can name the work they enable |
For each real candidate, add the exact model name to your private shopping notes and replace every unknown with documentation or a hands-on observation. If you want to see how the buyer criteria change outside the first-owner context, use the broader coverstitch machine comparison after this shortlist is defined.
Mark untested ease claims as unknown
“Easy to thread,” “great for beginners,” and “handles knits well” are incomplete claims unless the conditions are disclosed. A manufacturer can verify that a threading aid, free arm, differential-feed control, or tension-release mechanism exists, but that is different from proving how a new owner experiences the entire machine.
Use three labels in your notes: verified feature, observed result with stated conditions, and unknown. If the evidence only establishes that a free arm is present, record exactly that. Whether it is comfortable for a particular cuff or sleeve opening remains an unresolved use question until the garment and machine are actually tried together.
Resolve twin-needle uncertainty before committing
Some buyers reach coverstitch shopping because they dislike the appearance or behavior of a twin-needle hem on their current sewing machine. That can be a valid reason to investigate a specialist system, but it should not skip the diagnostic question of whether the existing setup is being used within its capabilities. Fabric, needle type, thread, tension behavior, stabilizing method, and machine limitations can all change the result.
If a twin-needle workflow already produces acceptable hems for the garments you make, buying another machine may add cost and setup without solving a meaningful problem. If you need the specific structure and repeatability of coverstitch work often enough to justify a separate system, the purchase has a clearer purpose. Make that decision before comparing convenience features.
Treat combination machines as a workflow decision
Space pressure is a common reason to investigate a combination system, but fewer machine bodies do not automatically mean less work. The real tradeoff is the conversion routine between overlock and coverstitch modes, especially when both operations appear in the same garment. Count the changes required and compare them with how you actually sequence construction.
If you switch functions frequently, write out the conversion sequence before buying and decide whether you would realistically perform it every time. If you sew in batches and can leave one mode set for longer periods, the same routine may be a minor inconvenience. The architecture becomes suitable when its conversion burden fits the way you work, not because it carries a space-saving label.

The SINGER Professional 14T968DC supports 2-, 3-, 4-, and 5-thread stitch configurations, including cover stitches. Its listing specifies a self-adjusting tension system, differential feed, and sewing speeds up to 1,300 stitches per minute. The machine includes multiple presser feet and an attachable clean pocket for collecting trimmed fabric.
Check On AmazonIf you click this link and buy, we earn a commission at no additional cost to you.
Know what to test in person before you buy
Documentation can verify features and procedures, but a few ownership questions are easier to answer with your own hands. If a dealer, class, sewing event, or other legitimate demonstration is available, use the time to test the tasks that remain unknown on your shortlist rather than repeating operations already proven by the specification sheet.
- Start from a fully unthreaded state if the demonstration permits it, then follow the published threading sequence.
- Set up the stitch configuration you expect to use most often.
- Sew a representative knit scrap that is reasonably close to your usual garment fabric.
- Change to another stitch configuration you genuinely expect to use.
- Finish the seam and remove the fabric using the machine’s documented procedure.
- Position a cuff, sleeve, or other small tubular piece if small-opening access matters to your projects.
- If the system combines functions, perform the relevant mode change instead of watching only a completed conversion.
Record only what you actually observe under those conditions. A smooth demonstration on one fabric does not establish universal performance, but it can turn the most important unknowns on your own buying card into useful evidence before you spend money.
Final Thoughts: Buy the workflow you will actually repeat
The right first coverstitch machine is the one that makes your recurring garment operations understandable and repeatable. Begin with the jobs, choose dedicated or combination architecture, define the stitch configurations you need, then audit threading, stitch changes, fabric release, differential feed, workspace, documentation, support, and ownership cost in that order.
Do not pay extra for a capability you cannot connect to a real project, and do not reject a suitable machine because another candidate has a longer feature list. When a claim about ease, knit handling, conversion, or fabric release cannot be verified for the exact model, keep it marked as unknown until a manual, disclosed test, or hands-on check answers it.
FAQs
🧵 Is a coverstitch machine easy for a beginner to learn?
It can be, but the answer depends on setup, stitch changes, fabric release, documentation, and the garment jobs you plan to repeat. A short control panel alone does not tell you how the ownership routine will feel.
👕 Do I need a coverstitch machine to hem knit garments?
No. Some knit hems can be made with a conventional sewing machine and an appropriate twin-needle or stretch-capable setup. A coverstitch becomes more compelling when you repeatedly want the specific hem structure and workflow it provides.
⚙️ Is a dedicated coverstitch easier than a serger-coverstitch combination?
Not universally. A dedicated machine avoids mode conversion, while a combination system can reduce the number of machines you store. Compare the exact conversion steps with how often you switch between overlock and coverstitch operations.
🪡 How many coverstitch needles does a beginner need?
Choose by stitch requirement, not by skill level. Identify the hems or chainstitch operations on your job sheet, then confirm which needle configurations and needle system the machine requires.
🧶 Does easy looper threading mean the machine is beginner-friendly?
Not by itself. Treat looper threading as one scored task alongside needle setup, stitch changes, fabric release, documentation, and support. A useful aid can improve one step without deciding whether the whole machine fits your routine.
🧷 Why does differential feed matter on a coverstitch machine?
It changes how the feed system manages fabric movement and can help with materials that tend to stretch or gather during stitching. The available adjustment and useful starting point vary by machine and fabric, so confirm the controls and test on a matching scrap.
📖 What should I check in the manual before buying?
Look for complete threading diagrams, supported stitch configurations, needle requirements, differential-feed instructions, fabric-release steps, cleaning guidance, and any conversion procedure. Anything unclear before purchase belongs in the unresolved column of your shortlist.
💵 Should a beginner buy the cheapest coverstitch machine?
Not automatically. Compare purchase price with the required workflow, included essentials, normal consumables, documentation, service access, and any accessories you genuinely need. The lowest initial price is useful only when the machine still fits the work.
References and Sources
- Brother coverstitch specifications: Supports the article’s point that stitch options, free-arm access, threading aids, and fabric-release features must be checked by machine.
- Janome coverstitch specifications: Supports the comparison of documented stitch configurations, differential feed, workspace, free-arm access, threading features, and tension release.