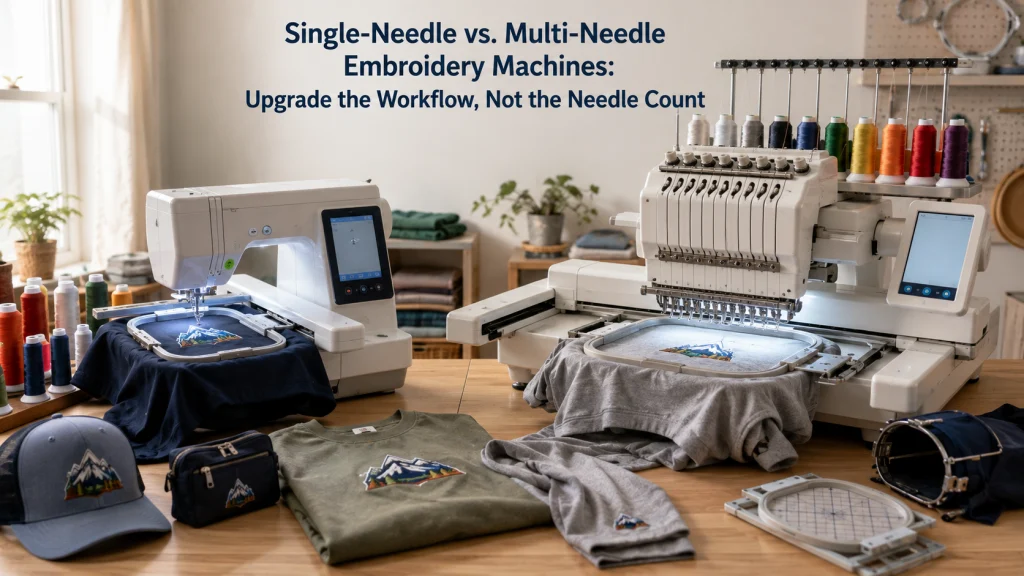
A single-needle versus multi-needle decision is really a workflow decision, not a simple count of needle bars. Color changes, item access, embroidery field, workspace, service requirements, and how often the same jobs repeat can matter more than the headline needle number. A free-arm single-needle system can solve some access problems without requiring a multi-needle machine, while a multi-needle system can reduce repeated manual thread changes when its architecture matches the work. The useful outcome is to identify the bottleneck first, then decide whether to stay with a single needle, test a free-arm single-needle setup, move to multi-needle, or postpone the upgrade.
Needle Count Matters Only When It Changes the Workflow
Choosing between a single-needle and multi-needle embroidery machine starts with what happens during the job, not with the number printed on the machine. Picture the same multicolor logo on a flat shirt front and on a structured cap: the stitch file may be identical, but the operator’s access, framing, and color-change burden can be very different. A machine with more needles may reduce rethreading when several colors are already loaded, yet that advantage does not automatically solve difficult item geometry or an unsuitable embroidery field. The first useful comparison is therefore the sequence of interruptions and handling steps that the recurring work actually creates.
This is also why a simple beginner-versus-business split is too crude. A home embroiderer who repeats six-color designs may care greatly about color changes, while someone taking occasional paid work with one- or two-color designs may care more about access to sleeves, bags, or caps. Before comparing individual machines, it helps to choose the right embroidery machine type and understand how that decision fits among different sewing machine systems. Once the architecture is right, model-level features become easier to judge without mistaking a higher needle count for a universal upgrade.
Define Single-Needle, Free-Arm Single-Needle, and Multi-Needle Separately
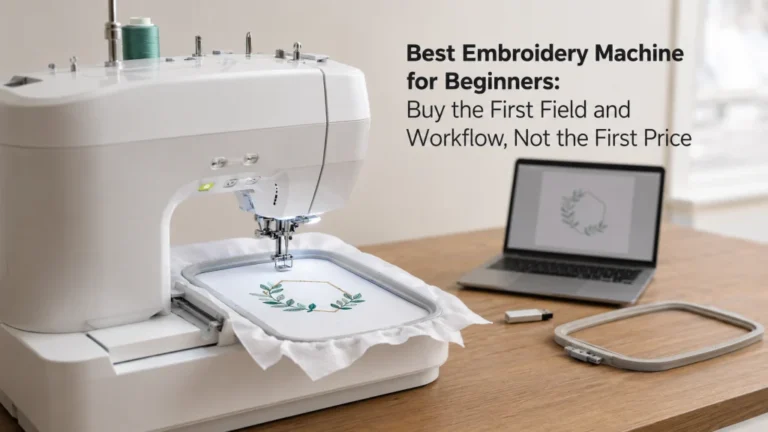
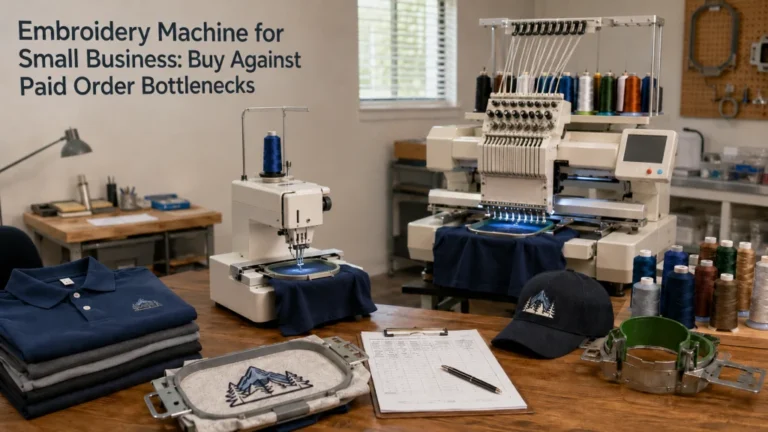
Single-needle embroidery covers more than one physical layout. A conventional home embroidery machine often works around a flatbed-style embroidery unit, while some single-needle embroidery-only machines use a free-arm or tubular-style arrangement that lets the item hang around a narrower arm. Multi-needle machines add several needle bars so multiple thread colors can remain loaded at once, but the exact number of needles, frame system, field size, and access geometry still vary by model. Treating these three architectures as separate choices prevents the false assumption that moving away from flatbed embroidery always requires moving to multiple needles.
| Architecture | Color handling | Access question | Main decision test |
|---|---|---|---|
| Flatbed single-needle | One active needle thread at a time | Can the item be hooped and moved without trapping or crushing part of it? | Is flat work the normal workload? |
| Free-arm single-needle | One active needle thread at a time | Does the narrower arm solve the recurring sleeve, bag, or cap access problem? | Is geometry the bottleneck more than color changing? |
| Multi-needle | Several colors can remain threaded and assigned, depending on the model | Does the exact arm, frame, or cap system fit the recurring items? | Do repeated color changes and item access justify the larger system? |
Manufacturer documentation provides a useful evidence anchor for that distinction. Brother identifies its PR1X as a single-needle machine with free-arm embroidery for areas such as caps, sleeves, and bags, while the PR680W uses six needles and lists cap-frame capability. Janome identifies the MB-7 as a seven-needle embroidery machine, and Baby Lock separately lists free-arm single-needle and multi-needle systems in its embroidery line. These examples are not recommendations or rankings. They show that needle count, arm geometry, frame support, and embroidery area are separate specifications that must be checked independently.
Count Color Changes in the Designs You Actually Repeat
Color changes become meaningful when they are counted across recurring designs rather than admired as an abstract multi-needle advantage. On a single-needle machine, the design normally pauses at a programmed color change so the operator can replace the active thread before continuing. On a multi-needle system, several colors may already be assigned to separate needle bars, which can reduce those manual rethreading interruptions when the design fits within the loaded set. The benefit grows from the pattern of the work, not simply from owning more needles.
| Recurring job | Color segments | Repeated colors | Copies per run | What to observe |
|---|---|---|---|---|
| Illustrative left-chest logo | 6 segments | 2 colors return later | 12 shirts in this example | How often repeated colors cause manual rethreading |
| Illustrative decorative design | 14 segments | 5 colors recur | 1 item in this example | Whether the palette exceeds the useful preloaded set |
| Illustrative one-color name set | 1 segment per item | No intra-design repeats | 8 items in this example | Whether color-change automation would matter at all |
The rows above are illustrative workload examples, not performance benchmarks. Build your own one-page sheet using designs you genuinely sew more than once, recording the color segments, repeated colors, normal batch size, and whether the thread palette stays consistent from job to job. A six-color logo repeated across several shirts can create a different interruption pattern from a many-color art design stitched once, even when the second design has the higher color count. This is a common first-time buyer misunderstanding: more design colors do not automatically mean that the machine with more needles removes more work.
Record Item Geometry and Access Restrictions
Embroidery access is a physical problem before it is a needle-count problem. A flat shirt front can usually spread away from the stitch area, while a sleeve, small bag opening, pocket area, or structured cap may force fabric around the machine arm and frame in ways that are much harder to manage. The key question is whether the item can sit in the required orientation without another layer being trapped under the stitching area or interfering with frame movement. That question should be answered for the exact item, not for a generic category such as “hats” or “bags.”
| Item type | Access question | What can interfere | What must be verified |
|---|---|---|---|
| Flat shirt front | Can the garment lie clear of the embroidery path? | Extra garment layers under the hoop | Field size and frame fit |
| Sleeve or narrow opening | Can the opening pass around the machine arm? | Closed tube geometry and seam bulk | Free-arm clearance and compatible frame |
| Bag or pocket area | Can the target panel reach the needle without trapping the rest of the item? | Handles, lining, zippers, and stiff seams | Arm clearance and frame support |
| Structured cap | Can the cap be mounted in the intended orientation? | Crown shape, bill, seams, and backing structure | Exact cap frame or driver compatibility |
Create an access map from the items that recur in your work and note what prevents clean positioning on the current machine. Separate frame limitation from machine-body limitation, because changing a hoop does not necessarily create the missing clearance around an arm. Also separate a flat cap frame from a true cap-driving arrangement, since the existence of a product called a cap frame does not prove that every cap construction can be mounted the same way. If access is the dominant problem, a free-arm single-needle architecture may deserve testing before a buyer assumes multiple needles are required.
Separate Embroidery Field From Tubular or Free-Arm Access
Embroidery field describes how large a design can be stitched within the supported frame area, while free-arm or tubular access describes how the item can physically surround the stitch area. They affect different problems and should never be collapsed into one idea of “bigger” or “more capable.” A large flat field may be ideal for jacket backs, quilt blocks, or broad flat panels but still be awkward for a narrow sleeve opening. A smaller field on a free-arm system may reach the item more easily even though it cannot stitch the same large design in one hooping.
Key point: Ask two independent questions: “Will the design fit the supported embroidery field?” and “Will the physical item fit around the machine and frame system?” A yes to one does not answer the other.
Manufacturer specifications make the separation easy to see. Brother currently lists an 8 x 12 inch maximum embroidery area for both a free-arm single-needle model and a six-needle model. A buyer therefore cannot infer field size from needle count, and the same field dimension does not mean two machines have the same access geometry. Verify the exact frame list, optional frame or driver support, and usable item clearance for the machine under consideration.
Record Machine Footprint, Stand, and Service Needs
The machine itself is only part of the space requirement. Embroidery frames move during stitching, thread stands add height, cap systems can extend around the arm, and the operator still needs room to load items, change thread, and reach routine user-serviceable areas. Multi-needle and free-arm machines may also be heavier or shaped differently from a familiar flatbed home machine, so a table that feels generous now may become cramped once the full motion envelope is considered. Measure the real workspace before a machine architecture is treated as practical.
- Measure machine width, depth, and height, then add clearance for frame movement and thread handling.
- Check whether the table or stand can support the machine securely during normal operation.
- Confirm that doors, shelves, walls, and nearby machines do not block the frame sweep.
- Identify how the machine would be moved for service and whether local support is available.
- Read the exact maintenance section before assuming the machine has the same owner-service routine as the current one.
Service access belongs in the same decision because a more specialized machine can change how maintenance, transport, and dealer support fit into ownership. Follow the exact manual for cleaning, lubrication, needle changes, and any other owner-level maintenance, and do not assume procedures transfer from one embroidery architecture to another. Work that the manual reserves for service personnel should stay out of the owner-maintenance plan, especially around internal timing, electrical components, or hard mechanical faults. A machine that fits the embroidery task but cannot be reasonably serviced in your location may still be the wrong ownership choice.
Compare Operator Attention During Color Changes
Multi-needle systems are often described as if they remove operator attention, but the more precise advantage is that several thread colors can remain prepared on separate needle bars. When the design calls for colors that are already assigned, the machine can change among those needles according to its programmed sequence, subject to the exact model’s controls and setup. A single-needle machine generally pauses for the operator to change the active thread when the design reaches another color segment. That difference can be substantial in repetitive work, but it does not make the rest of the embroidery process unattended.
Note: Automatic color selection, thread trimming, alerts, and other workflow features vary by model. Verify the exact manual and feature list instead of treating “multi-needle” as a promise that every interruption disappears.
The operator may still need to prepare the item, confirm placement, manage backing, watch for thread or bobbin problems, respond to alerts, inspect the stitch-out, and rehoop the next piece. Designs that use more colors than the machine can keep loaded may also reintroduce thread changes, while jobs that reuse a stable thread palette can make preloaded needles more valuable. Compare the amount of attention removed from your actual workflow rather than assuming a multi-needle machine runs without intervention. The useful measure is how often the operator has to interrupt another task to keep the embroidery moving.
Keep Maximum Speed Separate From Real Throughput
Maximum stitches per minute is a machine specification, not a complete production result. Actual elapsed workflow includes hooping, placement, thread preparation, color changes, bobbin work, design loading, operator checks, and the time between one finished item and the next. Some materials, designs, frames, or operating conditions may also call for speeds below the published maximum. Comparing only the largest speed number can therefore hide the exact interruption that motivated the upgrade in the first place.
| Workflow element | What to record | Why it matters |
|---|---|---|
| Stitching | Machine speed actually used for the design and material | Shows whether maximum SPM is even relevant |
| Color changes | Manual interventions per item | Shows the value of preloaded needles |
| Item loading | Hooping, placement, and mounting steps | Captures geometry and frame burden |
| Between-item reset | Removal, inspection, rehooping, and next-item setup | Captures work outside the stitch cycle |
A useful current example is that Brother publishes a maximum of 1,000 stitches per minute for its PRS100 single-needle free-arm system and also up to 1,000 stitches per minute for its PR680W six-needle system. That does not mean the two machines have identical throughput, and it does not prove that either architecture is faster for your work. It proves something narrower and more useful: needle count and headline maximum speed are not the same specification. Real throughput must be measured around the entire job, with the exact design, item, color sequence, framing process, and operator steps identified.
Build an Upgrade-Trigger Ledger Before Shopping
An upgrade-trigger ledger turns vague frustration into a set of conditions that can be tested. Start with the current machine and write down every recurring problem that changes what you can embroider or how often you must intervene. Then label each problem as color-change burden, item-access geometry, field limitation, workspace limitation, service issue, or something unrelated to architecture. The goal is to discover whether one machine change solves several high-frequency problems or merely adds features while the real bottleneck remains.
| Trigger | Evidence from your work | Architecture it points toward | What could still block the change |
|---|---|---|---|
| Frequent manual color changes on repeated designs | Logged interruptions across normal batches | Multi-needle may reduce rethreading | Space, service, cost, or colors exceeding loaded needles |
| Closed or awkward items cannot reach the stitch area | Specific sleeves, bags, or caps fail to mount cleanly | Free-arm single-needle or multi-needle may help | Exact frame or driver compatibility |
| Flat designs exceed the current field | Recurring design dimensions exceed supported frames | A machine with a larger verified field | Item geometry may remain unchanged |
| No recurring architecture problem | Current work fits and interruptions are minor | Stay with the current system | Future workload may change |
Give the strongest weight to problems that occur repeatedly on work you intend to keep doing. A once-a-year oversized design should not automatically outweigh weekly sleeve access problems, and a desire to avoid occasional rethreading should not automatically outweigh a workspace that cannot safely accommodate the larger system. Also include reasons not to upgrade, such as a current machine that handles the normal item mix reliably or access to outsourcing for rare specialist jobs. A ledger is useful precisely because “buy nothing yet” is allowed to win.
Decide: Stay Single, Move Multi, Test Free Arm, or Postpone
The decision becomes clearer once the ledger shows which problem repeats most often. Staying with a conventional single-needle system can be entirely rational when flat items dominate, color changes are manageable, the existing field fits the work, and the machine remains supported. Moving to multi-needle makes more sense when repeated manual color changes are a real workload burden and the exact multi-needle architecture also fits the recurring items, workspace, and service situation. A higher needle count is useful when it removes a verified bottleneck, not because it occupies a higher rung in an imagined machine hierarchy.
- Stay single: keep the current architecture when its access, field, and interruption pattern still fit the normal work.
- Move multi: consider multi-needle only when preloaded colors and the exact access system address recurring workload limits.
- Test free arm: compare free-arm single-needle architecture when geometry is the main constraint but needle count is not.
- Postpone: keep collecting workflow evidence when the dominant bottleneck is still unclear.
Testing a free-arm single-needle system is the overlooked fourth path between flatbed single-needle and multi-needle. It can be especially relevant when the main complaint is access to sleeves, bags, caps, or other tubular items while manual color changes remain tolerable. Postponing is also a valid result when the workload is too mixed, the service path is uncertain, or the current machine still handles almost everything without expensive workarounds. Choosing later with better records is preferable to upgrading now around a problem that has not been defined.
Stop the Comparison Before It Turns Into Model Ranking
This comparison is complete once the architecture decision is defensible. It is not meant to identify the best individual machine, calculate detailed business payback, or rank hat-specific systems. Those questions require a different evidence set, including exact frame compatibility, current model specifications, warranty and service terms, software or file support, included accessories, and the buyer’s budget. Mixing those decisions too early makes it harder to see whether the architecture itself is right.
If multi-needle wins the ledger, the next useful step is to compare multi-needle machine options using exact model evidence rather than returning to broad needle-count claims. If paid orders are the real reason the workload changed, separately evaluate an embroidery machine for paid work because order mix, support, downtime, and outsourcing can change the purchase decision. A buyer focused mainly on caps should likewise verify cap geometry and the exact frame or driver system rather than assuming any free-arm machine handles every cap construction. Keeping the boundaries clean produces a more useful purchase decision and fewer features bought for problems that never existed.
Final Thoughts: Upgrade the Bottleneck, Not the Needle Count
A single-needle versus multi-needle choice is strongest when it begins with a record of what interrupts the work. Count recurring color changes, note which items cannot be mounted cleanly, separate field size from access geometry, measure the real workspace, and identify how the machine would be serviced. Those checks reveal whether the problem is truly needle count or something adjacent to it. They also make room for a free-arm single-needle system when access matters more than keeping several colors threaded.
There is no penalty for staying with a machine that already fits the normal workload. Multi-needle can be a meaningful change when repeated color switching and compatible tubular access remove real constraints, but it is not automatically faster, more accurate, or more appropriate for every embroiderer. Verify the exact machine’s field, frame system, maintenance instructions, service path, and supported accessories before treating any architecture as settled. The best upgrade is the one that removes the bottleneck you can actually document.
FAQs
These questions separate needle count from field size, access geometry, color handling, and real workflow. They stay at buyer and owner level instead of drifting into internal service. Use them to check the upgrade-trigger ledger before comparing individual machines. Exact compatibility and maintenance details still belong to the manual for the machine being considered.
Give the most weight to the question that matches a recurring problem in your work. Return to the related measurement or compatibility check before shopping. A repeated limitation matters more than an impressive feature that does not change the job. If the evidence is mixed, postponing the purchase is a valid result.
🧵 Is a multi-needle embroidery machine always faster than a single-needle machine?
No. Maximum stitch speed, manual color changes, hooping, item loading, and between-item handling all affect elapsed workflow. Compare the exact machines and record the full job rather than using needle count as a speed proxy.
🎨 Can a single-needle embroidery machine stitch multicolor designs?
Yes. The machine can follow a multicolor design and pause when the active thread color must be changed. The main difference is how much operator intervention is needed at those color changes.
🧢 Do I need a multi-needle machine to embroider caps?
Not automatically. Some single-needle systems use free-arm architecture and support cap-related accessories, while cap construction and mounting systems vary. Verify the exact machine, frame or driver, and the type of cap you intend to embroider.
📐 Does a multi-needle machine have a larger embroidery field?
Not by definition. Field size is a separate specification and can overlap between single-needle and multi-needle systems. Compare the published maximum field and supported frames for each exact model.
🪡 What is the point of a free-arm single-needle embroidery machine?
It changes how the item can sit around the stitch area while keeping a single active needle thread. That can help when access geometry is the problem but repeated manual color changes are still acceptable.
References and Sources
These manufacturer pages verify two points: free-arm access can exist on a single-needle machine, and needle count does not determine field size. They support the architecture examples above. They are not recommendations or rankings. Recheck specifications and supported accessories before buying.
- Brother PR1X specifications: confirms a single-needle embroidery system with free-arm access and an 8 x 12 inch embroidery area.
- Brother PR680W specifications: confirms a six-needle system, 8 x 12 inch maximum embroidery area, and cap-frame capability.
- Janome MB-7 specifications: confirms a seven-needle architecture and its published embroidery field.
- Baby Lock Array specifications: confirms a six-needle architecture and published embroidery field.
Community discussions helped identify confusion around color changes, caps, access, and workload, but do not serve as technical proof. Manufacturer pages anchor the architecture claims. No source here proves better stitch quality or throughput. Those outcomes depend on the exact machine, design, material, setup, and workflow.